Better than Canadian Bacon: Breakfast Nanaimo Bars Recipe

Let's play a game. I'm going to list a few ingredients, and you guess what meal I'm making.

Here goes: 

  • Oatmeal
  • Granola
  • Maple syrup
  • Butter
  • Coconut

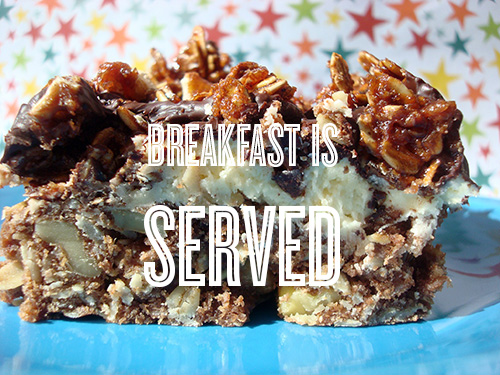
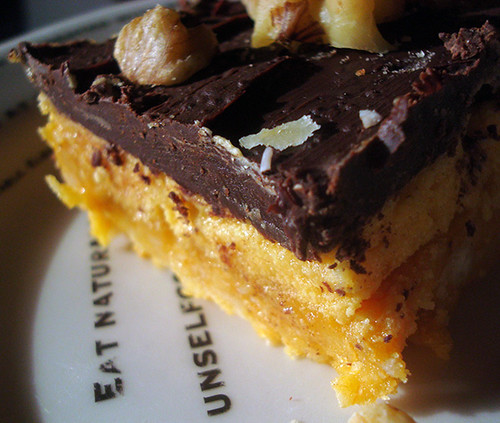
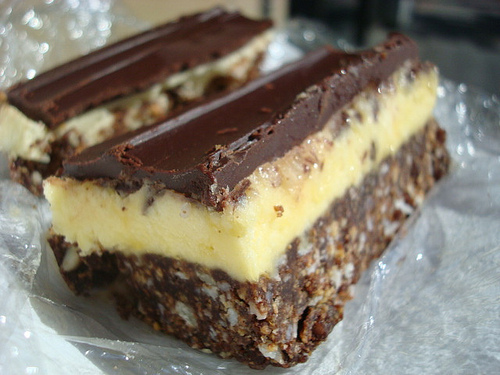
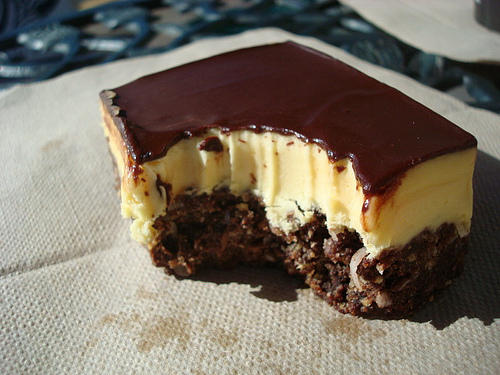
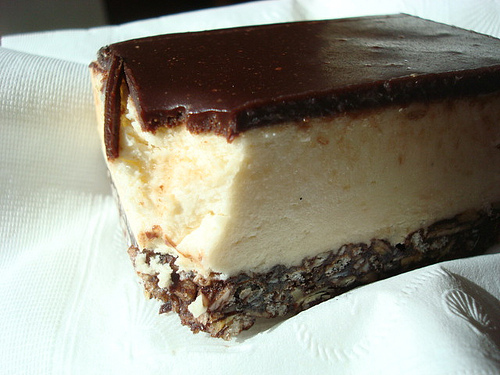
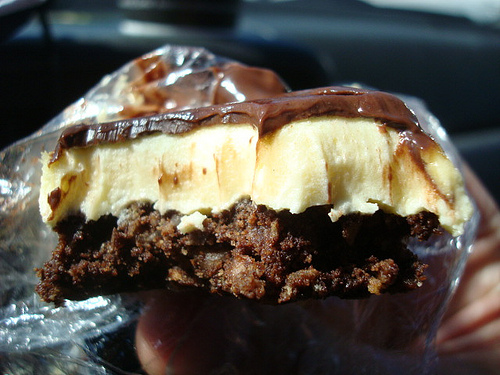
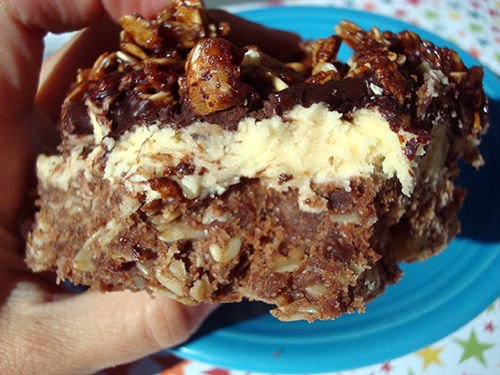
Do you think I'm talking about breakfast? Good, because that means I have sufficiently breakfast-ified these Nanaimo bars, and therefore, they are officially OK for A.M. eating. Why would I want to do such a thing? 

I have a lot of trouble understanding why doughnuts, scones, and danish are OK for breakfast, yet cookies and cake are not.

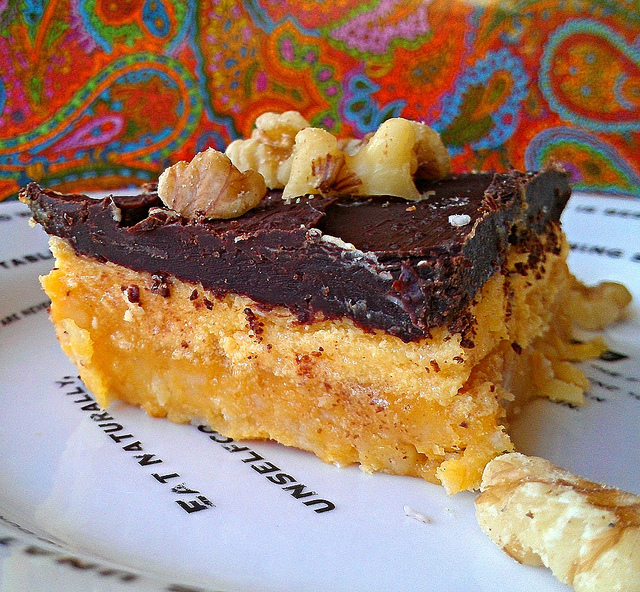
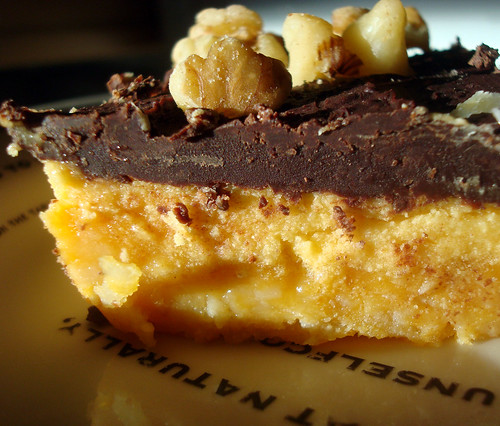
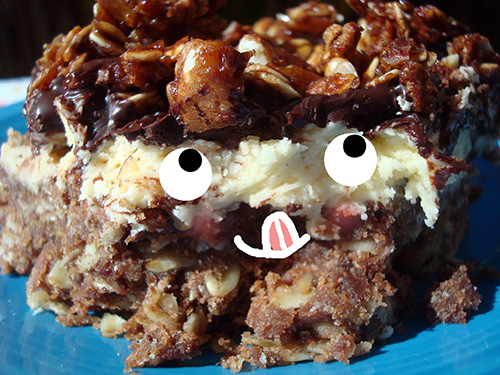
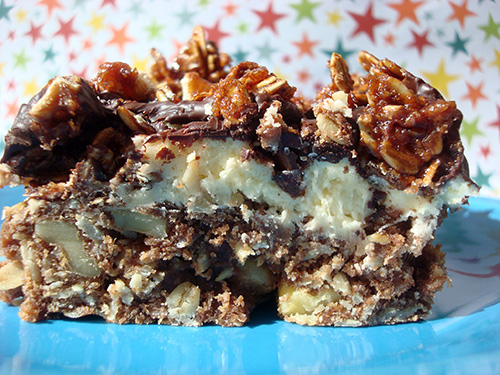
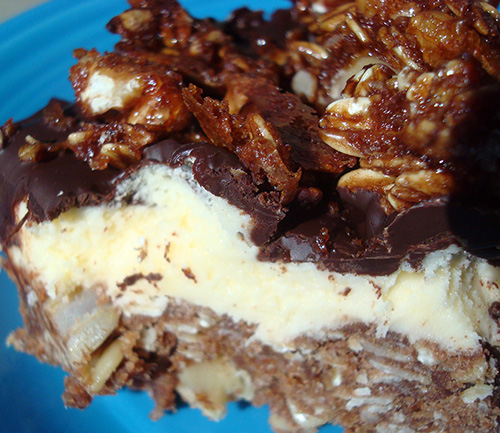
My logic is this: if you are what you eat, why not start out the day by eating (and being) amazing? These breakfast-friendly Nanaimo bars are the perfect way to start your day right, and an ideal indulgent holiday breakfast treat. They've got enough of the classic makings to be recognizable as the famed Canadian treat, but enough breakfast stylings, such as oats in the crust (which is baked, not simply mixed and no-baked; it is loosely based on the crust used in King Arthur Flour's "President's Day Cherry Squares" recipe) and a tasty crunchy granola on top, that they become an exciting and new thing.

Nanaimo bars for breakfast? Believe it.

I'm especially excited to share these as a recipe featuring King Arthur Flour (whole wheat no less--another point for these being health food!). Ever since my awesome Bake For Good experience with the esteemed flour-maker, I've maintained a good relationship with them, and when they recently asked if I'd come up with a breakfast recipe using their flour, I was more than happy to do so!

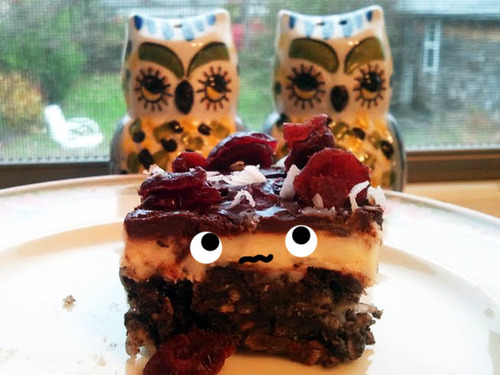
Oh, and I should tell you, these bars freeze beautifully. You can freeze up to 2 months; let them come to room temperature before serving. 

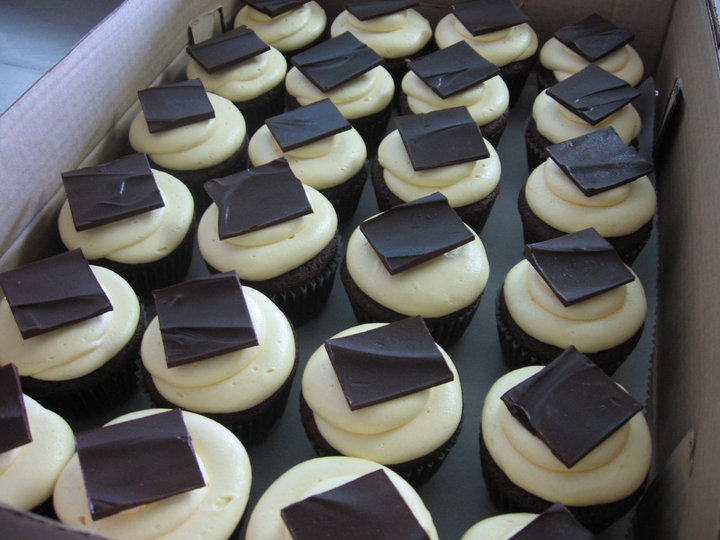
Breakfast Nanaimo bars

Makes up to 36 tiny bars, or 9 massive breakfast bars

For the crust

  • 1 1/4 cup rolled oats
  • 1 cup King Arthur Whole Wheat Flour
  • 1 cup coconut
  • 1/2 cup coarsely chopped nuts
  • 1 teaspoon salt
  • 1 1/2 sticks butter
  • 2 tablespoons unsweetened cocoa
  • 1 cup packed dark brown sugar

For the middle layer

  • 1 stick unsalted butter
  • 1 teaspoon vanilla extract
  • 2 tablespoons Bird's Custard powder
  • 2 cups confectioners' sugar, sifted

For the top layer

  • 4 ounces chocolate, coarsely chopped 
  • 2 tablespoons unsalted butter

For the granola garnish

  • 1 cup rolled oats
  • 1/2 cup nuts
  • 1/2 cup brown sugar, packed
  • 1 tablespoon unsweetened cocoa
  • 1/2 teaspoon salt
  • 1/2 teaspoon vanilla
  • 1/4 cup maple syrup

Procedure

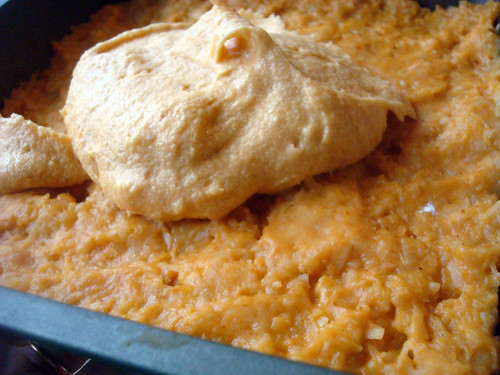
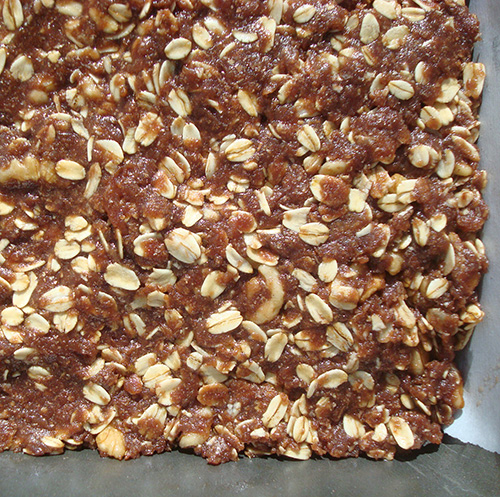
  1. Start by making the crust. Grease a 9x9-inch square baking pan; add a strip of parchment with the ends poking up two sides of the pan so you have "handles" to make removal easy later. Preheat the oven to 350 degrees F. In a large bowl, mix together the oats, flour, coconut, nuts, and salt. 
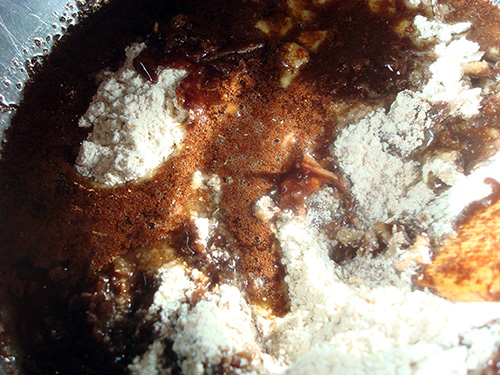
  2. In a saucepan, melt the butter with the cocoa and brown sugar. Once melted, stir into the dry mixture. Mix everything until combined, and press into your prepared pan.
  3. Bake in the preheated oven for 13-15 minutes, or until it has a dull finish on top. Remove from oven and let cool completely. You can hasten the process by putting the slightly cooled pan in the refrigerator for 30 minutes.
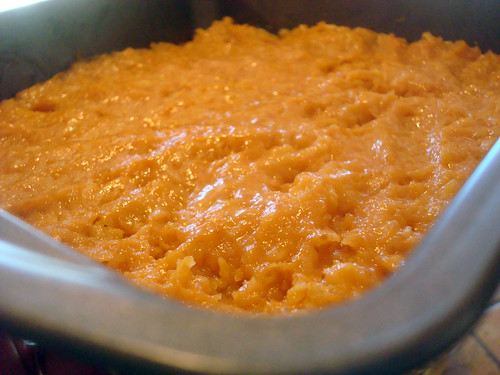
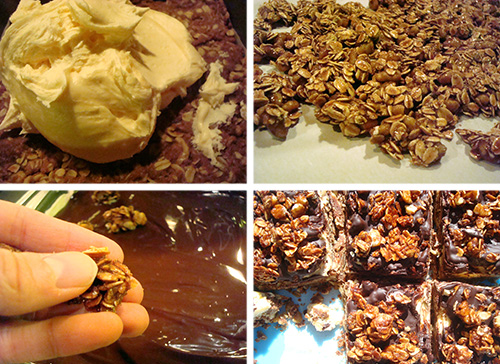
  4. Make the filling. In the bowl of a stand mixer fitted with the paddle attachment, mix all of the filling ingredients on low speed until fluffy--3 to 5 minutes. While not in the ingredient list for this recipe, if you are having trouble incorporating the sugar and butter, add a small amount of milk or cream until it reaches your desired spreading consistency. Gently spread on top of the bottom layer. Take pains to smooth this layer as much as possible (I like to use the end of a metal spatula to smooth it) as the topping will only lay as smooth as this layer. 
  5. Place the pan in the refrigerator and let cool for 30 minutes or up to 2 hours. This will make the filling firm enough for the next layer to be put on top without ripping or damaging it in any way.
  6. Meantime, make the granola garnish. Preheat the oven to 325 degrees F. Mix all of the ingredients together in a bowl, and scatter on a parchment-lined baking sheet. Bake for 15 minutes; remove from the oven and stir right on the sheet. Return to the oven and bake for 15 more minutes, or until toasty and firm. Let cool completely, and break up by hand into small pieces.
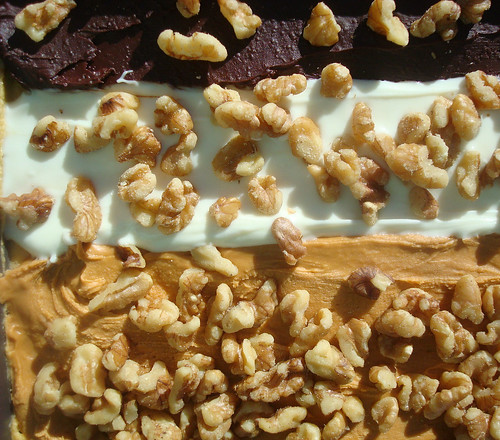
  7. Ready to put it all together? OK. Now, we'll make the topping. In a double boiler, melt the chocolate and butter until, well, melted. Spread on top of the middle layer, working quickly because it will set rapidly as it is applied to the cool surface, and too much working of the hot mixture can tear up the delicate middle layer. 
  8. Scatter the broken-up granola on top while the chocolate layer is still slightly wet on top to ensure it adheres. Score the bars (this is imporant!) before the chocolate has fully set as it will make life so much easier when you want to serve these sweet treats. Place in the fridge and let them set for 20 minutes.
  9. Although typically I would suggest continued storage of these in the fridge, I find that they're actually quite nicer when left at room temperature. It's up to you, but I found that the topping got kind of hard when left in the fridge. If you do prefer to store in the fridge, let them come to room temperature before serving. Likewise, these bars can be made ahead and frozen for up to 2 months. Once again, let 'em come to room temp before serving.

What's your favorite sweet to eat in the morning?

Fall, Canadian-Style: Pumpkin Nanaimo Bars

Although Nanaimo bars are perfect just as they are, sometimes it's nice to get celebratory about the season.

Just as people enjoy putting on sweaters and drinking pumpkin spice lattes, Nanaimo bars like to get their Fall on. These ones are a lovely fall treat, with pumpkin and pumpkin pie spice mixed into both the bottom and middle layers. Now, the pumpkin in the bottom layer does make them moist to the point that you want to keep them in the refrigerator, but I think the slightly annoying texture will be forgiven when you take your first creamy, custard-y, kissed with earthy pumpkin-flavored bite. 

Pumpkin Nanaimo Bars

Many of the key components of a Nanaimo bar remain constant: nuts and coconut in the crust, the Bird's custard in the middle section, and of course the chocolate topping. I tested out white and butterscotch chips on the topping, and while they looked pretty, chocolate definitely won the taste test.

Feel like getting your fall on with a tasty Canadian treat? Let's go. 

For the bottom layer

  • 1/2 cup (1 stick) butter
  • 1 tablespoon pumpkin puree
  • 1 teaspoon pumpkin pie spice
  • 1/4 teaspoon salt
  • 1 large egg, beaten
  • 1 cup shredded sweetened coconut
  • 2 1/4 cups finely crushed sugar cookies
  • 1/2 cup finely chopped nuts (almonds are traditional; pecans or walnuts work well, too)

For the middle layer

  • 1/2 cup (1 stick) butter
  • 2 tablespoons heavy cream
  • 1/4 cup pumpkin puree
  • 2 tablespoons Bird’s Custard Powder, or substitute vanilla pudding powder (instant)
  • 2 cups confectioners’ sugar, sifted
  • 2 teaspoons pumpkin pie spice

For the top layer

  • 4 ounces chocolate (or white chocolate or butterscotch morsels), coarsely chopped
  • 1 1/2 tablespoons butter

Step 1: Prepare the bottom layer.

Pumpkin Nanaimo Bars

Melt the butter, pumpkin, salt, and spice in a medium saucepan over low heat until fully incorporated, but do not let the mixture come to a boil. Add the beaten egg and stir constantly until the mixture begins to thicken, less than 5 minutes. Remove from heat and stir in the cookie crumbs, coconut and nuts. Press down firmly into a greased 8″ by 8″ pan; try to make the mixture as flat as possible in the pan. Let this cool for about 20 minutes in the freezer (you want it to be as firm as possible, and the pumpkin variation never becomes quite as firm as the bottom of a traditional Nanaimo bar).

Step 2: Prepare the middle layer.

Pumpkin Nanaimo Bars

In a stand mixer fitted with the paddle attachment, cream the butter, cream, pumpkin, spice, custard powder and confectioners’ sugar together until very light and fluffy, 3 to 5 minutes. Spread over the bottom layer, taking care to spread it as flat and evenly as possible. Consider flattening with an offset spatula.

Basically, the flatter this level, the flatter the chocolate will lie on the top. Return the pan to the refrigerator while you prepare the topping.

Step 3: Prepare the top layer.

Pumpkin Nanaimo Bars

Can't decide whether you want chocolate, white chocolate, or butterscotch? Do as I did and make three separate batches! Or, stick to one fave.

In a medium saucepan or double boiler, melt the chocolate and butter over medium heat, stirring often to ensure that the mixture doesn’t scorch. Remove from heat. Let sit until the mixture is still liquid but very thick, then pour it over the second (middle) layer and gently spread it with a spatula to ensure even coverage

Note: Work carefully, because the still-warm chocolate will get messy if you press too hard while spreading it and tear up the buttery layer below.

Be sure to score the tops of the bars before the chocolate totally sets on top. This will make slicing them much easier later.

Typically, Nanaimo bars are sliced in fingers rather than squares. You can slice them any way you like, of course, but for an authentic look, split into eight rows in one direction and six rows the other way, so that they are slightly elongated when sliced.

Pumpkin Nanaimo Bars

Let the chocolate set on the bars, then place in the refrigerator for at least 20 minutes before serving. Run a knife under hot water and then dry off before slicing; this will help the knife go through the bars easily. Clean the knife frequently between cuts.

Have you ever tried a Nanaimo bar? If not, check out these other tasty variations:

Classic Nanaimo bars Triple chocolate Nanaimo bars

Shortbread Nanaimo bars

Conversation Heart Nanaimo bars

You Say Nanaimo: Chocolate Cranberry Nanaimo Bars Recipe for Serious Eats

It's a fact: Nanaimo Bars are delicious. They're a decadent no-bake treat named for the Canadian city in which they were invented, comprised of a chocolate-graham-coconut crust, a custard-buttercream middle, and a chocolate topping.

But they also dress up nicely for Thanksgiving, as proven in this chocolate-cranberry variation.

The Canadian classic takes a tart-but-sweet Thanksgiving turn by adding dried cranberries to each of the three layers. The resulting seasonal variation is bound to delight family and friends at Thanksgiving festivities and start the holiday cookie season off sweetly.

For the full entry and recipe, visit Serious Eats!

Cakewalk: The Nanaimo Bar Trail

CakeSpy Note: This week, I visited the city of Nanaimo, which true lovers of sweets will probably know best as the birthplace of the mighty Nanaimo Bar. This bar is beloved by many--the city has even created a "Nanaimo Bar Trail" with a guide to some of the best Nanaimo Bar experiences. My friends at Serious Eats even made a delicious slide show! On my visit, I checked out several of the spots on the trail and then some--here's a chronicle of what I saw, learned, and best of all, tasted. 

Exhibit A: The Nanaimo Museum. In the City of Nanaimo, there is a place called the Nanaimo Museum. It has other exhibits, but the only one I went to see was the one focusing on the Nanaimo Bar. Hey, just being honest.

The display is not huge, but it is a loving tribute to this sweet triple-layer confection. And they have Nanaimo Bar benches. And you know what that means...PHOTO SHOOT!

They also sell tea towels featuring the official Nanaimo Bar recipe, but (sob) they were out when I visited.

Exhibit B: The Classic. Personally, my main objective was to sample the authentic Nanaimo Bar in its place of birth. Directly adjacent to the Nanaimo Museum, Serious Coffee makes the bars using the official city recipe, and I found theirs to be highly satisfying, with a deliciously crumbly base and a good-quality chocolate top acting as bookends to the real reason why I eat the bars, which is the custard-cream filling. 

Also offering the classic style are Perkins Coffee:

...and Bocca Cafe, and McLean's Specialty Foods (which, btw, is also the home of "Haggis Extravaganza"). But truly, these bars are ubiquitous--you'll find them at Tim Hortons, grocery stores, on the ferry, and...well, everywhere! (BTW--my friend Allyson says some of her favorites are made by The Cakerie).

Exhibit C: Ice Cream Variations. The city boasts several ice cream variations, including Nanaimo Bar ice cream, a Nanaimo Bar Ice Cream Sundae at Jakeob's Ice Cream Parlour, Nanaimo Bar Ice cream sandwiches (pictured above) at 2 Chefs Affair (if you're stateside, you may also be able to get these in NYC!), and crumbled bars are a common topping or mix-in with ice cream.

CakeSpy note: I also found a recipe for a Nanaimo Bar Ice Cream cake here.

Photo: Grand Hotel NanaimoExhibit D: Quaffable Nanaimo Bars. The city boasts a Nanaimo Bar Martini, which is always available at the Modern Cafe. I did not sample it. But it exists. Just wanted you to know. It is also occasionally offered as a special at the Grand Hotel Nanaimo (pictured above).

Exhibit E: Fancy Nanaimo Bars. I consider these a very blue-collar treat, but some establishments have raised it to pinkies-out status. One such place was Mon Petit Choux, where the cream filling was much more copious in terms of height and quantity, and yet it tasted lighter and fancier...delicious, but perhaps not as "authentic" as other versions. Also according to the City of Nanaimo site, a fair-trade, all organic/amazing version is made by Pastry Chef Sarah Wallbank and can be found at the various Farmers’ Markets in Nanaimo. The rest of the year she will make special orders.

Nanaimo Bar Cupcakes Photo: A Wee CupcakeryExhibit F: Awesome Overload. Also available, if you're seeking sweet excess? Nanaimo Bar Fudge from Rocky Mountain Chocolate (they didn't have it when I visited, though they DID have Chocolate covered frozen Nanaimo Bars), Deep-Fried Nanaimo Bars from Pirate Chips, Nanaimo Bar Cupcakes at A Wee Cupcakery (friday and saturday only), and Nanaimo Bar Cheesecake at Minnoz (side note: Minnoz is attached to a hotel which would like to be your home during your Nanaimo Bar crawl--they will even start you out with a Nanaimo Bar waiting in your room!)

CakeSpy Note: If you are not in Nanaimo, here's a recipe for Nanaimo Bar cupcakes!

Exhibit G: Other Variations. There are also peanut butter Nanaimo Bars, as well as variations in mint, coffee, and Irish Cream flavors; also, there are several confections which seem to have the same construction if not flavors. There was the "Kleinberg Bar" at aforementioned Perkins Coffee, which visually resembled a Nanaimo Bar and shared the same custard-cream middle layer, but had a peanut butter crispy base and peanut butter topping. It somewhat reminded me of the peanut butter krispy-based version at Savary Island in Vancouver.

Exhibit H: Transit. Don't forget that there are Nanaimo Bars to be found both on the ferry to and from Nanaimo, and at the ferry terminals on both sides! 

...the end, for now. Create your own Nanaimo Bar adventure; visit the Nanaimo website here. Read about Miss 604's adventure here. Learn more about the history of the Nanaimo Bar and find more of my recipes for them here.

Make it in a Shake: Nanaimo Bar Milkshake Recipe

File under "Unholy, but Wholly Delicious": The Nanaimo Bar Shake.

That's right.

When I recently found myself with an excess of Nanaimo Bars--to the point where they were just on the verge of getting stale--I thought to myself, "how can I revive these sweet treats for an extra-awesome treat?". The answer was swift and obvious: make it in a shake!

The result when you give the richest, most decadently addictive bar cookie on earth gets a butterfat upgrade? You have yourself a frosty froth of fantastic, that's what you've got. 

Here's how to make this magic happen at home. 

You're welcome.


Nanaimo Bar Shake

  • 1 Nanaimo Bar
  • 2 scoops ice cream, vanilla or chocolate, or one of each
  • milk or cream, to thin (up to 1/4 cup)

 Procedure

But in a blender. Blend. Add more milk/cream if you want it more sippable. Enjoy.