 It's a fact: Nanaimo bars are a practically perfect foodstuff.
Gifted to the world from a blue collar city not too far from Vancouver, these bars are the stuff of dreams. If you've never heard of them, a brief intro to the classic version:
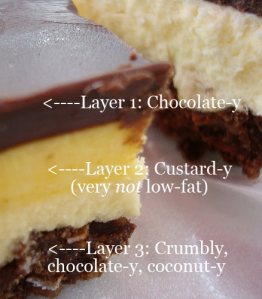
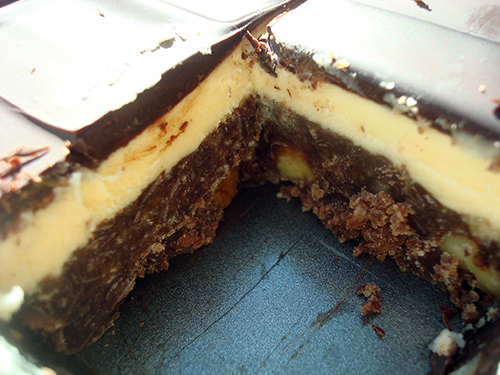
- The top layer is a solid chocolatey layer, which is firm but not hard.
- The middle layer is a buttery, frosting-y, creamy, custard-y stuff that is so much the opposite of low-fat that it makes you want to weep with pleasure.
- The bottom layer is a sturdy, tightly packed layer of chocolate, graham cracker and coconut, bound together with melted butter.
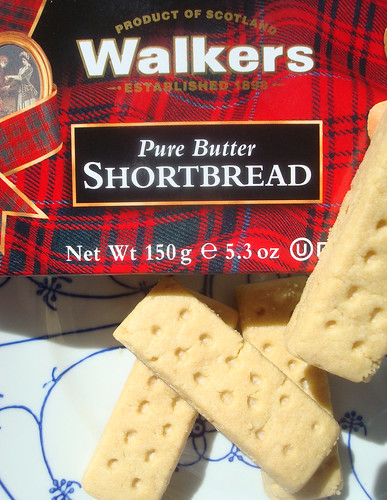
As much of a classic as they are, though, I think I have finally figured out the way to make them better: I ditched the traditional graham crackers in the crust and swapped in shortbread instead. I had the idea for these bars when I was contacted by Walkers Shortbread to make a recipe for their site. They offered to pay me for a recipe and send me samples of the shortbread to bake with, so I figured it had to be a good one. Time to call in the Nanaimo bar aces!
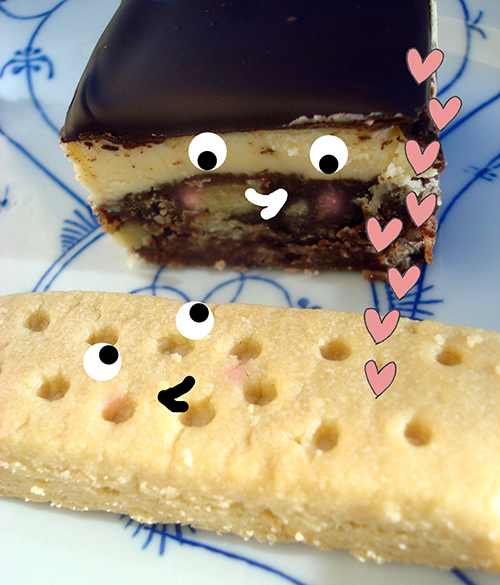
Shortbread and Nanaimo bars: both practically perfect.
So what happens when you combine two practically perfect foodstuffs in one recipe? Oh, my word. Amazing things. The crust has a distinct shortbread crunch and touch of saltiness which elevates the bars from great to "omigod how quickly can I eat my weight in these?". Promise me that you will make them, and the sooner the better. You'll thank me, and so will every single person you share them with.
Here's how to make this magic happen in your own home.
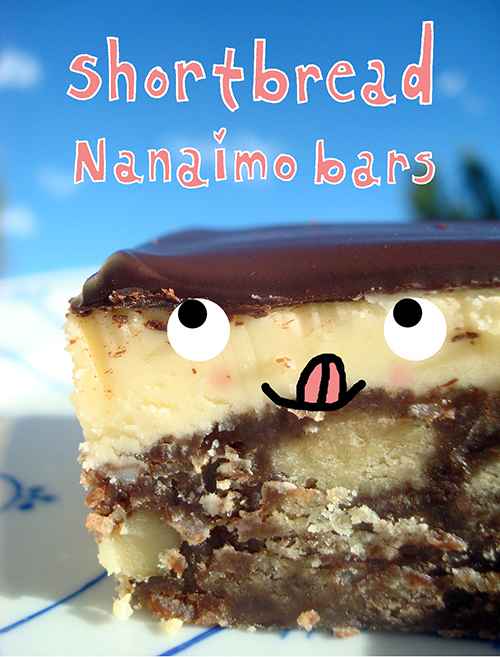
Shortbread Nanaimo Bars
Makes 16-24 bars, depending on how you slice 'em
Ingredients:
For the bottom layer
-
1/2 cup (1 stick) butter
-
4 tablespoons cocoa
-
1 large egg, beaten
-
1 cup shredded sweetened coconut
-
14-16 fingers finely crumbled Walkers shortbread (each package has 8; I used 14 and snacked on the remaining two, but you can have willpower and use both packages for the crust if you prefer)
-
1/2 cup finely chopped nuts (I used walnuts this time)
For the middle layer
-
1/2 cup (1 stick) butter
-
2 tablespoons heavy cream
-
2 tablespoons Bird’s Custard Powder, or substitute vanilla pudding powder (instant)
-
2 cups confectioners’ sugar, sifted
For the top layer
-
4 ounces chocolate, coarsely chopped
Directions:
Step 1: Prepare the bottom layer.
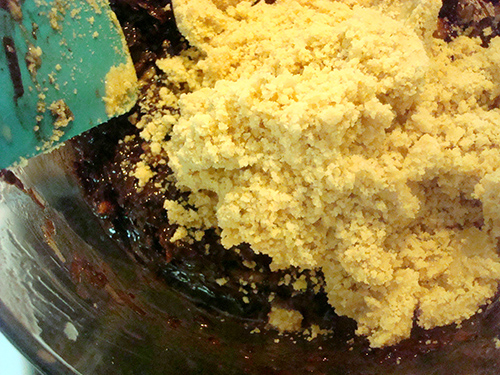
Melt the butter and cocoa in a double boiler until fully incorporated, but do not let the mixture come to a boil. Add the beaten egg and stir constantly until the mixture begins to thicken, less than 5 minutes. Remove from heat and stir in the cookie crumbs, coconut and nuts.
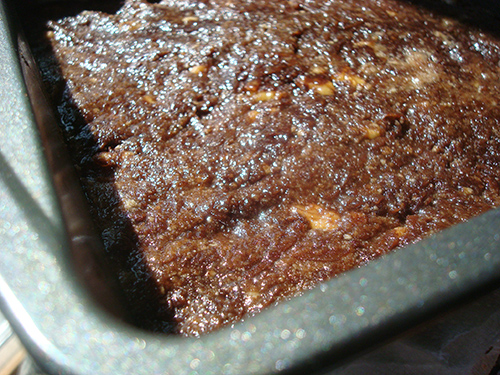
Press down firmly into a greased 8″ by 8″ pan; try to make the mixture as flat as possible in the pan. Let this cool for about 20 minutes in the refrigerator.
Step 2: Prepare the middle layer.
In a stand mixer fitted with the paddle attachment, cream the butter, cream, custard powder and confectioners’ sugar together until very light and fluffy, 3 to 5 minutes.
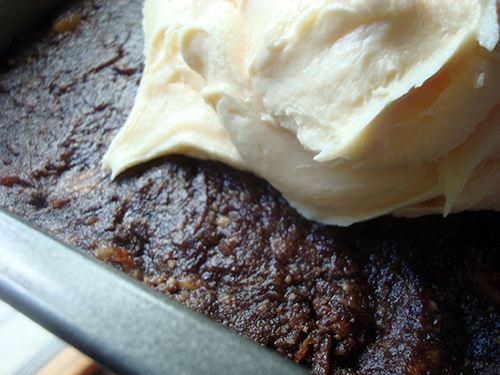
Spread over the bottom layer, taking care to spread it as flat and evenly as possible. I like using a pastry scraper to do this.
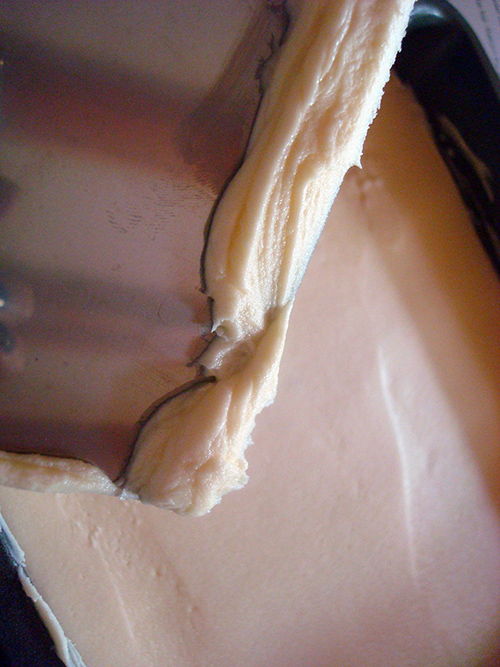
Basically, the flatter this level, the flatter the chocolate will lie on the top. Return the pan to the refrigerator while you prepare the topping.
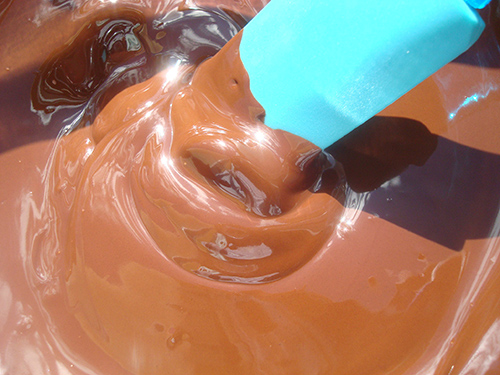
Step 3: Prepare the top layer.
In a medium saucepan or double boiler, melt the chocolate over medium heat, stirring often to ensure that the mixture doesn’t scorch. Remove from heat. Let sit until the mixture is still liquid but very thick, then pour it over the second (middle) layer and gently spread it with a spatula to ensure even coverage.
Note: Work carefully, because the still-warm chocolate will get messy if you press too hard while spreading it and tear up the buttery layer below.
Be sure to score the tops of the bars before the chocolate totally sets on top. This will make slicing them much easier later.
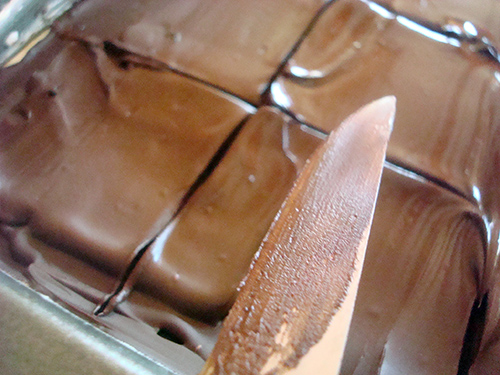
Typically, Nanaimo bars are sliced in fingers rather than squares. You can slice them any way you like, of course (and to prove that point I did them in squares this time because I wanted bigger bars and fewer servings), but for an authentic look, split into eight rows in one direction and six rows the other way, so that they are slightly elongated when sliced.
Let the chocolate set on the bars, then place in the refrigerator for at least 20 minutes before serving. Run a knife under hot water and then dry off before slicing; this will help the knife go through the bars easily. Clean the knife frequently between cuts.