Baked, Not Stirred: Fresa Breeze Margarita Cupcakes Recipe from Robicelli's

Who knew? February 22 is National Margarita Day. But how to celebrate? Well, naturally, you should indulge in a margarita or seven. But you'll need something to soak up all of that blissful booze, so may I suggest a Margarita Cupcake? Here's a recipe sent on care of Partida Tequila, developed specially for them by Robicelli's (who you know I have a cake crush on!).

Margarita Cupcakes

Cake
3/4 stick butter, melted & cooled
3 eggs
1/4 heavy cream
1/4 cup Partida Blanco tequila
1 cup flour
3/4 cup sugar
1 teaspoon baking powder
1/2 tsp salt
Zests of 2 limes

Cream cheese frosting
1 tsp Partida Blanco Tequila
1/2 stick butter, softened
1 package cream cheese, softened
3 cups powdered sugar

Strawberry salsa
1 large container strawberries, stems removed and chopped 
1/4 cup seedless cucumber, peeled, seeded and diced
1/3 cup sugar
2 Tbsp Partida Tequila
One Lime, juiced
1/2 teaspoon Sea Salt

Strawberry Salsa:
1.  Combine all ingredients in a bowl and cover with plastic wrap.  Refrigerate for at least 30 minutes.

For Cake:
1. Preheat oven to 350.
2. Beat eggs until well mixed, then add butter, cream, tequila & salt.  Mix until combined.
3. Sift together flour, sugar and baking powder.  Add to wet mixture and stir until smooth.
4. Divide amongst 12 cupcake tins and bake for 16-18 minutes, or until the tops just spring back when touched.

Cream Cheese Frosting:
1.  Beat together tequila, softened butter and cream cheese on high speed until light and fluffy.
2.  Add powdered sugar 1/2 a cup at a time, beating well after each addition.
3.  Once all sugar is added, beat for an additional 3 minutes to incorporate air.

To assemble:
1.  Strain salsa, reserving liquid.  Using a pastry brush, brush the top of each cupcake with the liquid.
2.  Frost cupcakes with the cream cheese & tequila icing.  Using a teaspoon, scoop out an indentation in the middle of each cupcake.
3. Place a heaping spoonful of the strawberry salsa in each indentation.
4.  Garnish with a sliver or lime.

Cake Byte: Robicelli's Pretty Much Rules

Image: Blondie & BrownieThis is not breaking cake news to most of you who are in the know.

But.

Robicelli's pretty much rules. 

The name was not new to me, but when CS buddy Meaghan, who not long ago relocated from Seattle to Brooklyn, clued us in on Robicelli's Chicken & Waffles Cupcakes (" Vanilla “waffle” cake, vanilla buttercream, buttermilk soaked fried chicken dunked in pure Vermont maple syrup" ), it led to a little clicky-click over to their website, where we discovered even greater treasures.

First, how about the El Guapo (not to be confused with the sandwich by the same name at Seattle's HoneyHole Sandwiches) made up of "Sweet corn cake, cilantro lime buttercream, Iowa yellow kernel popcorn"...

...or the Creme Brulee--"vanilla cake, pastry cream buttercream, caramelized sugar"...

...but if that doesn't strike you as quite extreme enough, for your consideration, the Hot Josh Cupcake.Described thusly:

I really have no words to describe the Hot Josh. It’s a culinary acid trip; something that engages you, messes with your head and at the end of it all is completely unforgettable.  I actually feel a little abused by this cupcake, to tell you the truth.  It’s like that time I saw that movie where at the beginning I totally thought I knew what was going on, then I thought that there was going to be a twist and I had figured it out, then by the end I was just COMPLETELY wrong and was so confused and disoriented by the whole experience that I was rattled to the bone for days.  I still cannot see anything about “Maid In Manhattan” without shuddering just a little.

Why does this rule so much? Not necessarily because of the savory flavors. They might not be your thing with cupcakes. Truthfully, as a sweets enthusiast, I personally might not reach for a chicken and waffles cupcake (I'd prob'ly go for the Creme Brulee first!), but I respect and thoroughly enjoy that sense of adventure and experimentation in baking. Keep on doing what you're doing, Robicelli's!

Want more? If you're in NYC, follow their day-to-day goings-on via their twitter and Tumblr feed. If not, go ahead and track them the same ways, and put them way up on your to-do list next time you visit the Big Apple.

Let it Snow, Man: Snowman Cupcakes from Bredenbeck's Bakery, Chestnut Hill, PA

Winter got you down? Well, here's a way to add some sugar to the cold, dark days: Snowman Cupcakes!

Snowman-ify the cupcakes of your choice with this super-easy tutorial from Philadelphia's Bredenbeck's Bakery--not only is it easy, but it's fun and delicious when you're snowed in.

Here's how you do it.

You’ll need:
  • A dozen of your favorite cupcakes
  • 16 oz. vanilla icing
  • 22 oz. (two packages) white chocolate chips
  • Red shoestring licorice, black gel icing, candies for decorating
  1. Start with your favorite cupcake recipe and bake according to instructions
  2. Flip your cooled cupcakes upside down, and spoon a dollop of icing on top to add height
  3. Place the iced cupcakes in the freezer until icing is firm
  4. Melt white chocolate in a double boiler
  5. Place frozen iced cupcakes on a wire rack
  6. Spoon melted white chocolate over top of iced cupcakes, allowing excess to drizzle through wire rack
  7. Wrap a few pieces of shoestring licorice around for a scarf, create a face, nose and buttons using the black gel icing and candies.

Of course, if you make them, share your pictures with them on the Bredenbeck's Facebook Page for sweet snow day fun!


Cake Byte: Velvet Elvis Cupcakes for January from Cupcake Royale

Elvis is Dead.

But--you know--not in our hearts. Or bellies, what with the likes of the Velvet Elvis, the Flavor of the Month at Seattle's Cupcake Royale.

That's right: in honor of what would have been (or...was! shun the nonbelievers!) Elvis's 75th birthday, the Cupcake Royale Crew is serving up banana cupcakes topped with a rich peanut butter chocolate fudge frosting--need I say this is a cake fit for a king? 

Or, you know, you. At least for the rest of the month of January!

Keep updated via Cupcake Royale's twitter account and their website! 

Live and Let Pie: But Please Don't Let the Cupcake Die

Poor cupcakes. They've been the subject of so much foodie scorn lately: from NPR's battle cry of "Cupcakes are Dead, Long Live the Pie" to the New York Times' headline "Pie To Cupcake: Time's Up" to the derision on the Serious Eats forum about best and worst food trends of 2010. The message is clear: if you're a cupcake, you've gone the way of Von Dutch Caps, Ugg boots, and gaucho pants. You're out. The truly fashion-forward would never indulge (at least publicly).

And I can see the point. It does seem like new cupcake shops are cropping up at a rate not unlike re-animated brooms in The Sorcerer's Apprentice. And with cupcakes being offered at mass-market eateries such as Red Robin, Cinnabon, and Au Bon Pain, it's hard not to look at the cupcake without having "jumped the shark" type thoughts. 

And undoubtedly, the ubiquity of cupcakes will falter. Like the cookie shop fad that started with Mrs. Fields in the 1970s but began to fizzle with the recession of the 80's, this cupcake shop phenomenon is bound to have an arc. The weak will not survive, but maybe we don't want them to (because there's no bigger bummer than a bad cupcake).

But here's the thing. Cupcakes are cake, and that will never go out of style.

Let me tell you a brief story to illustrate my point.

One ill-fated year, before cupcakes or pie were trends, before Magnolia Bakery was an institution, I unwittingly made what turned out to be a major life decision: I decided to have banana cream pie instead of cake or cupcakes for my birthday party. What can I say? I was going through a phase.

The reaction from the party-goers was swift, and fierce.

"What the hell is this?" said one wide-eyed child (really).

"Where's the cake?" asked a confused parent.

"Is this to go with the cake?" said another child, hopeful, but with a slight tinge of panic in his voice.

Unfortunately, no, there was not a cake to go with that pie. And although the pie was perfectly serviceable--even better than good, as I recall--somehow, the experience left a bad taste in my mouth. And it wasn't forgotten by my so-called friends, who were quick to inquire the next year: "will there be cake this time?". Every now and again it would come up in conversation, too: "remember that year you had pie instead of cake for your birthday? What was up with that?". It was the biggest birthday shame I ever suffered. 

Now, don't get me wrong. I love pie. I love it enough to have had it for my birthday one year, and enough that I was even hired as pie recipe consultant for a newly opened Seattle bakery. I love it on a plate, in a cake, in a shake, on a stick. I, like, totally embrace pie.

But I'm not convinced it takes the cake.

Here's an idea: why don't we just let pie and cake get along? Pie on some days, cake on others? Or embrace diversity by combining them, as in the case of the Pumpple Cake or the Pake?

Or maybe we should just skip right to the good part and combine all of the "next big thing" desserts, mixing up a slurry of macaron-cupcake-artisan-ice-cream-whoopie-pie-salted-caramel-bacon-chocolate...and baking it up in a pie shell?

Come to think of it, that doesn't sound like such a bad idea.

But before I busy myself in the kitchen on that task, let me conclude: Cupcakes=good. Pie=also good. But all the same, please don't call me PieSpy.

Violet and White: A Snowstorm, Plus SpyMom's Vanilla Cupcakes With Lavender Buttercream Recipe

The snowflake is totally not photoshopped! I actually (accidentally) captured it on film!Guess what? It is snowing in New Jersey. Like, a lot. In fact, to the point that we've been nostalgically recalling the Blizzard of '96. A real post-Christmas miracle!

But wait, there's more to this miraculous day. You do not need to worry about the SpyCrew starving in the snow, because SpyMom made cupcakes. Delicious ones, based on Magnolia Bakery's recipe (now, I personally am not a Magnolia naysayer, but SpyDad is, and even he said that this homemade version had a leg up on the original), but with an added element of pinkies-out-ness from lavender coloring powder to the frosting, and candied violets (edible!) used as garnish. 

Want a piece of this holiday magic in your own home? Here goes:

SpyMom's Christmas Miracle Cupcakes

  • 1 1/2 cups self-rising flour
  • 1 1/4 cups all-purpose flour
  • 1 cup (2 sticks) unsalted butter, softened
  • 2 cups sugar
  • 4 large eggs, at room temperature
  • 1 cup milk
  • 1 teaspoon vanilla extract

For the frosting 

  • 1 cup (2 sticks) unsalted butter, softened
  • 6 to 8 cups confectioners' sugar
  • 1/2 cup milk
  • 2 teaspoons vanilla extract
  • Violet food coloring, such as this one from Wilton
  • Edible candied violets

Procedure

  1. Preheat oven to 350 degrees F.
  2. Line 2 (1/2 cup-12 capacity) muffin tins with cupcake papers.
  3. In a small bowl, combine the flours. Set aside.
  4. In a large bowl, on the medium speed of an electric mixer, cream the butter until smooth. Add the sugar gradually and beat until fluffy, about 3 minutes. Add the eggs, 1 at a time, beating well after each addition. Add the dry ingredients in 3 parts, alternating with the milk and vanilla. With each addition, beat until the ingredients are incorporated but do not over beat. Using a rubber spatula, scrape down the batter in the bowl to make sure the ingredients are well blended. Carefully spoon the batter into the cupcake liners, filling them about 3/4 full. Bake for 20 to 25 minutes, or until a cake tester inserted into the center of the cupcake comes out clean.
  5. Cool the cupcakes in tins for 15 minutes. Remove from the tins and cool completely on a wire rack before frosting.
  6. While they cool, prepare your frosting. Place the butter in a large mixing bowl. Add 4 cups of the sugar and then the milk and vanilla. On the medium speed of an electric mixer, beat until smooth and creamy, about 3 to 5 minutes. Gradually add the remaining sugar, 1 cup at a time, beating well after each addition (about 2 minutes), until the icing is thick enough to be of good spreading consistency. You may not need to add all of the sugar. If desired, add a few drops of food coloring and mix thoroughly. (Use and store the icing at room temperature because icing will set if chilled.) Icing can be stored in an airtight container for up to 3 days.


Cookies, Cakes, Oh My: Sweetness from JustJenn Recipes and Designs

Photo: JustJenn DesignsSo, two things.

First, this recipe comes from the same person who designed the pins to the left. They say "I Like Big Bundts". Now that is hilarious!

But wait, there's more!

When Jenn sent me a parcel of said pins, she also sent a four-pack of some of the most amazing things I've put in my mouth recently: Cookie Cupcakes.

What are they, exactly? Cookie? Cupcake? The answer is YES. And deliciously so, on both counts. Served in cupcake liners, these are cakey, decadent cookies that are so full of butter and chocolate chips that you'll totally be ok with the lack of frosting. For reals.

Want a recipe? OK. You can also find it on JustJenn Recipes (that and so many more!).

Cookie Cupcakes

Ingredients

  • 1 1/2 cups all-purpose flour
  • 3/4 teaspoon baking powder
  • 1/4 teaspoon kosher salt
  • 1 cup (2 sticks) butter
  • 3/4 cup granulated sugar
  • 3/4 cup packed brown sugar
  • 3 large eggs
  • 1-1/2 teaspoons vanilla
  • 1/3 cup whole milk
  • 1 cup semi sweet chocolate chips
  • 1/2 cup cinnamon chips

Procedure

  1. Preheat your oven to 350 degrees. Prep a cupcake pan with liners.
  2. In a medium bowl whisk the flour, baking powder and salt. Set aside.
  3. In the bowl of an electric mixer beat the butter, sugar, and brown sugar. Once combined, add the eggs one at a time, then the vanilla.
  4. Alternate the flour mixture with the milk until combined. This will look like cookie batter!
  5. JustJenn Note: Cinnamon Chips are hard to find, but so worth the hunt. They are made by Hershey’s and as far as I can tell in the Los Angeles area they are only sold at Alberton’s. So weird! If you can find them – get them, you won’t be disappointed.
  6. Now fold in the chocolate chips and cinnamon chips.
  7. Fill your liners about 3/4 of the way full.
  8. Bake for 18-20 minutes until toothpick test says they’re done! Let cool on a wire rack.

Tour de Sweet: A Chicago Cupcake Run With Ryan's Baking Blog

CakeSpy Note: This is a guest post chronicling a very sweet visit to Chicago from Cake Gumshoe Ryan, whose sweet adventures can be followed via his great site, Ryan's Baking Blog! All of the text, photos, and opinions reflected below are his--read on, and enjoy! 

I'm in Chicago until Friday (then I leave for San Francisco) and was super excited to grab some delicious cupcakes. I've had a few bakeries recommended to me and I tried out a bunch so far. Chicago

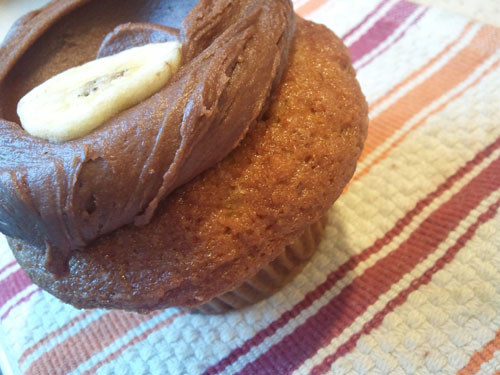
Molly's Cupcakes 2536 North Clark Street, Chicago, IL 60614

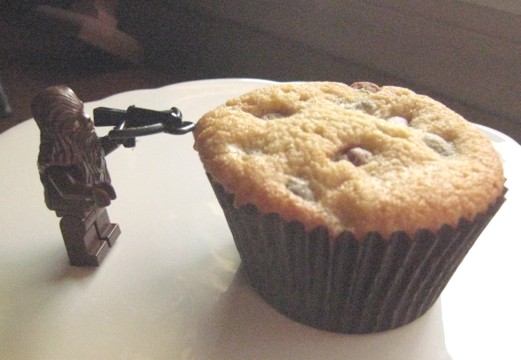
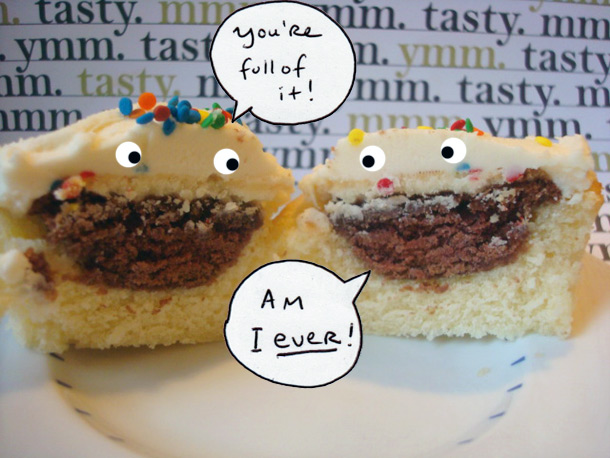
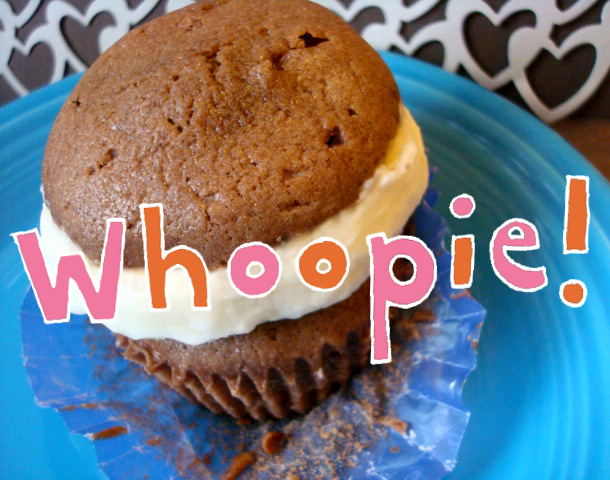
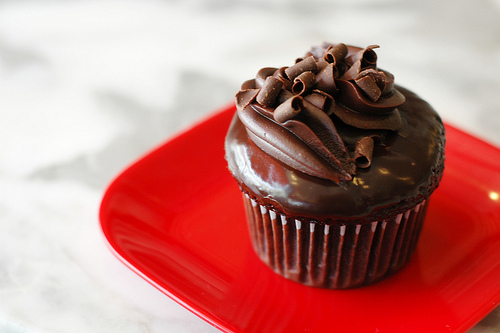
I only have one picture for this section (photo pictured top), I wasn't sure if they wanted me sitting there photographing the whole store and everything so I just focused on the cupcake. I also didn't ask if I could photograph so I was trying to be sneaky (well, as sneaky as you can be with a big DSLR camera). This is a Chocolate Decadence cupcake. They have a ton of flavors ranging from this to peanut butter nutella, minty mash-up, peach cobbler, and so much more. This cupcake was amazing. Probably the best chocolate cupcake I've had. Honestly though, I think this one was meant to share. It is a chocolate cake with chocolate mousse filling, chocolate ganache on top PLUS chocolate frosting with chocolate shavings. It is a lot of chocolate and every element is so good. The cake was super moist, the mousse was smooth and chocolatey, the frosting and ganache were perfect. The shop itself is great. It is pretty large and cafe style. They have a bar you can sit at that has SWINGS. Yes, like playground swings for you to sit on to enjoy your cupcake. They also have a bunch of tables and seats to sit at, some people were working on things and a few people were having conversations. It was a really comfortable atmosphere and the staff was really nice. If all that wasn't enough to convince you to go, they have a "sprinkle station". It was a counter with shakers filled with different kinds of sprinkles, like little stars and moons or dinosaurs, that you could top your cupcake with. I thought this was a great idea. I really can't recommend this shop enough, if I lived in Chicago I'd be here every day. They are also open super early and super late. Sunday-Thursday they are open til 10pm and on Friday and Saturday til midnight.

Bleeding Heart Bakery 1955 West Belmont Avenue, Chicago, IL 60657

I came here twice actually, unfortunately the first time I forgot my camera.

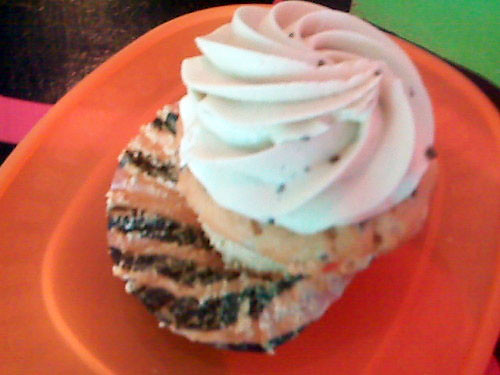
This is a terrible picture and does not do this cupcake any justice. Like I said, I forgot my camera and had to use my blackberry. I had the Veruca Salt cupcake (above), a salted caramel cupcake with caramel filling and FOUR kinds of salt. It was amazing. The cake was dense in all the right ways, the caramel filling was delicious, the frosting was so smooth, and the salt added a ton of great flavor. My friend had a "Take A Hike" Scone, which was pretty much a trail mix scone, and he loved it. They also have a variety of vegan cupcakes in a lot of flavors. The staff was super nice and helpful, my friend had a ton of questions about the different items and the girl working knew everything.

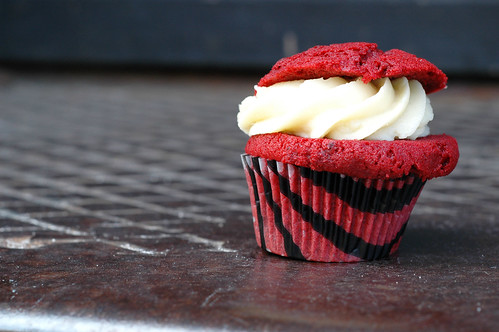
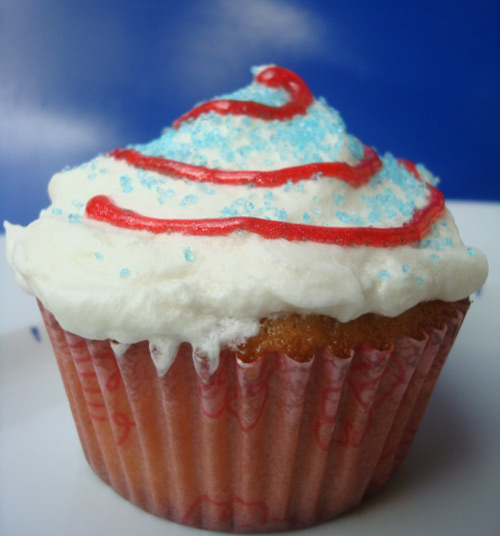
I came back a second time to try a red velvet and I remembered my camera. I love how it was decorated and it was super delicious, a traditional red velvet. The frosting was super smooth and creamy, I don't have any complaints. The bakery has a very punk rock feel which I thought was great. They were playing punk music, had a ton of local flyers up and do a lot of community building and clearly care about the people that live in Chicago. The tables were cut out like cupcakes, there was a couch and coffee table by the front window, and they had pretty awesome shirts for sale (if I had more money to spend I definitely would have gotten one or five). They definitely make you feel comfortable. That is a big thing that I liked about both this bakery and Molly's Cupcakes. I felt like I should sit down and enjoy my cupcake there, it was a relaxing environment and very welcoming.

Sweet Mandy B's 1208 West Webster Avenue Chicago, IL 60614

Sweet Mandy B's is a bakery in Lincoln Park with a lot of pastel colors. Their frostings were all tinted light pink or light blue or another pastel and the shop had a cozy feel to it. It's has another section for an ice cream shop and that is where the seating is. It was hectic in there so I got my cupcake to go.

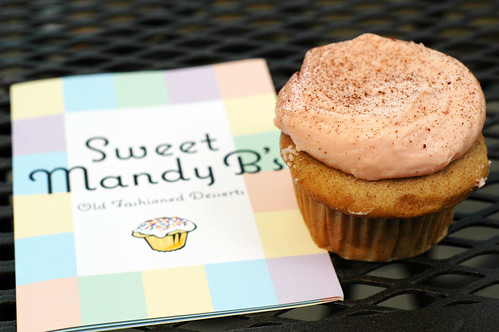
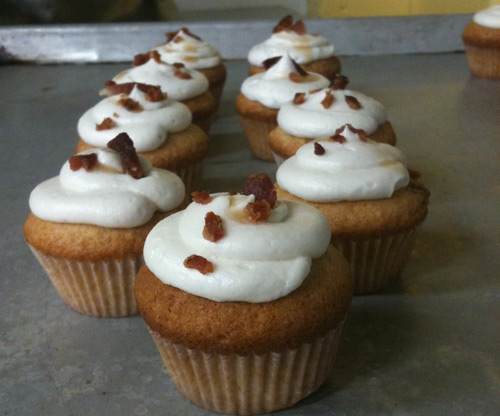
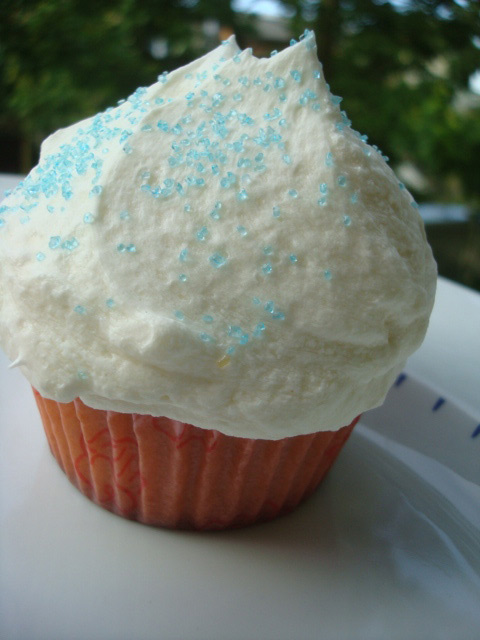
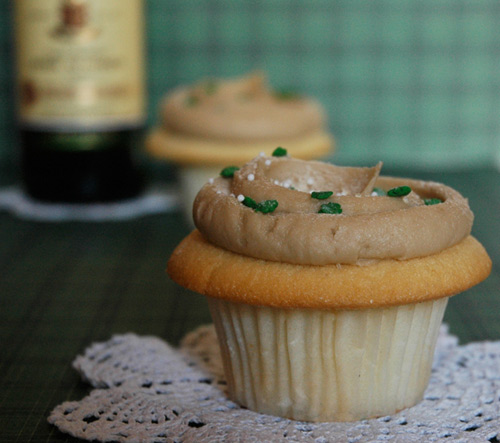
They had the normal flavors as well as orange and lemon and this french toast cupcake. It's cinnamon cake with maple frosting. This cake was made well, super soft and a strong (but not overwhelming) cinnamon taste. The frosting was a perfect consistency and it was just the right amount. It tasted exactly like french toast. They also offer a ton of cookies as well as cakes, puddings, and ice cream. It was easy to see why they had so many customers.

Sprinkles 50 E Walton St, Chicago, IL 60611

Everyone knows about Sprinkles. The first cupcake-exclusive bakery to hit the world. They opened in 2004 and have enjoyed a ton of success. Many of their cupcakes sport the signature dot that many people have come to recognize as Sprinkles. This was the cupcake shop I was most excited about for the obvious reason: it was the first cupcake shop and EVERYONE talks about Sprinkles. I planned on going twice during my trip to sample various flavors because of how much I've heard but I don't think I'll be going back, not even to try the famous red velvet everyone talks about.

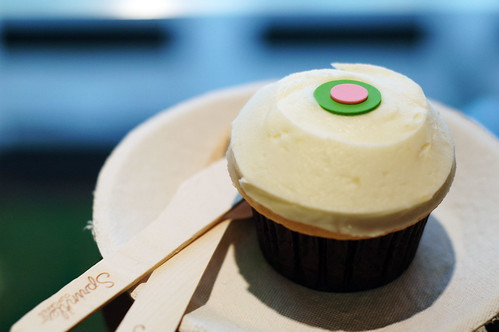
This is the key lime cupcake, a summer exclusive flavor. The frosting has a STRONG key lime flavor and the cake has a more subtle but noticeable flavor to it. Both were delicious. The cake was extremely soft and fluffy, perfectly moist, and overall delicious. I was satisfied. This is the milk chocolate cupcake: chocolate cake with milk chocolate cream cheese frosting. I think the frosting really killed this cupcake for me. Maybe I'm just not a huge fan of cream cheese frosting but it wasn't that chocolatey. I wanted that candy-bar-milk-chocolate taste and I just didn't find it. This cupcake wasn't that pretty compared to the key lime I had. The cake itself was pretty good but it felt kind of doughy in my mouth. It makes me believe the Sprinkles cupcake craze is about decent cupcakes and a lot of branding. They aren't bad cupcakes by any means, but not the best I've had. The store itself has a very modern look to it. I really like modern design, especially in homes, but I like cozy cupcake shops. Mismatched furniture, comfy seats, someplace you can sit down and feel comfortable. Sprinkles only had four or five stools and a lot more customers than that, it didn't seem like they encouraged you to sit and stay.

More Cupcakes 1 East Delaware Place, Chicago, IL 60611

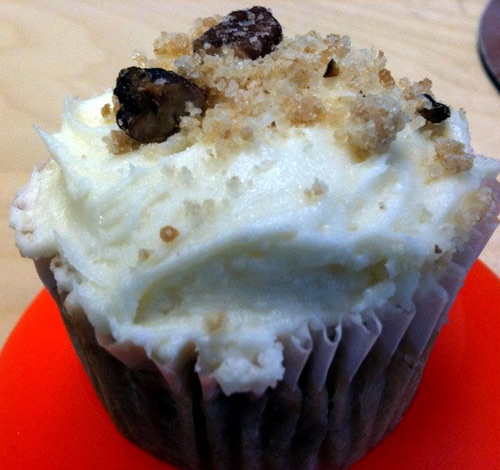
More cupcakes is a small cupcake shop in downtown Chicago. Literally small. It's a tiny shop without any chairs and a small table to stand and eat at. The cupcakes are displayed in a big glass box thing. It was a little confusing and the labels were tiny, I also couldn't tell what flavors they had that day..maybe they had all of them? I had a black and white cupcake, a vanilla and chocolate cake with chocolate frosting and covered in chocolate shavings. I originally wanted a white velvet but wasn't sure if they had it (I only saw the display one). The cupcakes are taller than normal cupcakes and this one had a lot of frosting. It took three or four bites to get to the actual cake part and it was awkward to eat because of it's height. The cake was a little dry too.

They also had mini cupcake samples, I grabbed the chocolate passionfruit, chocolate cake with passionfruit frosting. I've never had passionfruit before and it turns out I don't actually like it. The man in front of me did sneak an extra sample so they must have been good. Not all the cupcakes had a ton of frosting so maybe some of the others are better. I started feeling a little sick by the end of mine though. As much as I hate to say it, I wouldn't go back there.

(CakeSpy Note: I should say that I too have visited More Cupcakes, and had a much better experience than Ryan; like so many things, it could have just been his visit, or different tastes. Any reader thoughts?)

In Closing

If you are in Chicago, go to Bleeding Heart Bakery and Molly's Cupcakes. If you're in the Lincoln Park area, go to Sweet Mandy B's. Try Sprinkles, maybe you'll like it more than I did, it ended up being more of a "cupcake history" kind of thing for me. And finally, if you're a frosting fiend, go to More. Or get one of their cupcakes without a ton of frosting.

Don't forget to keep up with Ryan's sweet adventures at Ryan's Baking Blog!

Cake Byte: Mini Bacon Maple Cupcakes by Mini Empire Bakery Now Available!

This revolution may be mini, but when it comes to flavor, these cupcakes are maxed out (now, just to clarify, when I wrote that I really intended for it to be said in a booming, "Sunday, Sunday, SUNDAY!" sort of voice).

That's right: Mini Bacon Maple Cupcakes by Mini Empire Bakery. Starting with a biscuity-cake base, these are topped with a rich daub of maple buttercream and topped off with bacon for a perfect sweet and salty union that tastes like a sort of breakfast-meets-dessert party in your mouth.

And they're available for purchase at Seattle Coffee Works downtown, and at Mioposto in Mount Baker! Or I'll bet if you asked really nice, they'd do a custom order for you too.

Find out more about Mini Empire Bakery on their website.

Better Together: Beer Cupcakes With Chocolate Covered Potato Chips Recipe from Bredenbeck's Bakery, Philadelphia

Sweet or salty? Why decide, when you can have both--and beer, too--in one deliciously decadent cupcake parcel? Yup, that's right: Beer Cupcakes. Topped with Chocolate Covered Potato Chips. It's a recipe kindly donated by Bredenbeck's of Philadelphia. Awful or awesome? Maybe a little of both, in the best way possible. Make it happen at home thusly:

Beer Cupcakes Topped With Chocolate Covered Potato Chips

Ingredients for cupcakes:

  • 1 cup of Guinness® Draught
  • 1 stick plus 1 tablespoon unsalted butter, cut into pieces
  • 3/4 cup unsweetened cocoa powder
  • 2 cups dark brown sugar
  • 3/4 cup sour cream
  • 2 eggs
  • 1 tablespoon vanilla extract
  • 2 cups all-purpose flour
  • 2 1/2 teaspoon baking soda Pinch of cinnamon

Glaze:

  • 8 ounces cream cheese
  • 1 1/4 cup confectioner’s sugar
  • 1/3 cup Guinness® Draught

Chips:

  • 1⁄2 pound high quality milk chocolate, chopped
  • 4 cups ridged potato chips

Procedure

  1. Make the cupcakes. Preheat oven to 350 degrees. In a large sauce pan over low heat, combine Guinness® and butter, stirring until butter melts. Remove pan from heat and whisk in cocoa powder and brown sugar. In a medium bowl, whisk together sour cream, eggs and vanilla. Combine with beer mixture. Sift together flour and baking soda, then fold into batter. Pour into greased muffin tin, filling each cup about 2/3. Bake for 20-25 minutes. Cool in tin for 10 minutes, then remove from tin and place on a wire rack to finish cooling.
  2. Make the glaze. With a mixer, whip cream cheese until smooth. Sift confectioner’s sugar into cream cheese, and beat. Add Guinness®, and beat until smooth. Apply to cupcakes using a flat spatula.
  3. Prepare your garnish. Place 3/4 of the chocolate into a heat safe bowl, and place over the top of a pan of simmering water. Heat, stirring occasionally until the chocolate has melted, then continue to heat the chocolate to 110F degrees, stirring occasionally. As soon as the chocolate reaches this temperature, remove from heat. Stir in remaining chocolate until melted. Using tongs, dip potato chips one at a time into the chocolate. Place on waxed paper to cool. Once cooled, place atop cupcakes. Enjoy!

Of course, if you have no time—or desire—to bake your own Beer Cupcakes, you can stop into Bredenbeck’s Bakery and try their version! They're also busy baking all your favorite fall confections: pumpkin bread, caramel apple cheesecake, pumpkin cheesecake with cinnamon whipped cream, carrot cake, s’mores pie and much, much more.

Hummingbird Chronicles: Lemon Cupcakes Recipe from Hummingbird Bakery

English cupcakes come stateside!CakeSpy Note: This is an ongoing series of entries about (and recipes from!) London's Hummingbird Bakery by Cake Gumshoe Alexandra Levert, who is an assistant director for a French television network in Toronto, Ontario, Canada. She loves cooking and baking because she finds it comforting and yet challenging at the same time. She tries to combine her love of food and her love of travel as much as life will let her.

 One Sunday afternoon, my boyfriend, who has never been into cupcakes, decided to finally take a look at my Hummingbird Bakery Cookbook. He started flipping the pages and landed on the lemon cupcakes page. He suddenly got all excited and said he wanted to make them. And right now. I was surprised, yet I wasn’t: he can never say no to a dessert with lemon. Suddenly, I was the one who wasn’t too excited about the idea of making them. Don’t get me wrong, I love lemon, but I always prefer chocolate to fruit in a dessert. This time though, I let him convince me and we went to the grocery store. 

Hummingbird Bakery Lemon Cupcakes

Recipe by Tarek Malouf, from Hummingbird Bakery Cookbook 

For the base:


  • 120g of plain flour
  • 150g of caster sugar
  • 1½  teaspoons of baking powder
  • 2 tablespoons of grated lemon zest, plus extra to decorate
  • 40g of unsalted butter (at room temperature)
  • 120 ml of whole milk
  • 1 egg 


For the lemon frosting:


  • 250g of icing sugar (sifted) 
  • 80g of unsalted butter (at room temperature)
  • 2 tablespoons of grated lemon zest
  • A few drops of yellow food colouring (optional but pretty!)
  • 25 ml of whole milk 


For the cooking process:


  • A 12-hole cupcake tray lined with paper cases 


So here is what I did:


  1. First, I preheated the oven to 325°F or 170°C. 
  2. Second, I sifted the flour and put it in a large bowl with the sugar, baking powder, lemon zest and butter. Then I used a handheld electric whisk, although you can also use a freestanding electric mixer with a paddle attachment, to beat the first batch of ingredients together. I beat them on slow speed until I was certain all the components were combined. I gradually poured the milk in and continued beating so that everything was mixed in well. I added the egg to the first mixture and beat it in with the rest for a few minutes until it formed a nice, smooth blend. Now the next part tested my cupcake skills for the first time: spooning the mixture into the paper cases. To do so, I took two spoons: one to pick up a bit of the blend and the other to push it out of the first spoon and into the mold. I repeated that same action until all 12 paper cases were about 2/3 full. The tricky part was to try and keep the tray as clean as possible, by not letting any of the mixture fall anywhere but in the cases. It was harder than it looked, but I did it. One cupcake point for me! 
  3. I put the tray in the oven for 22 minutes, since the recipe said to leave it in for 20 to 25 minutes. What I did was I set my timer for 20 minutes, and then when it rang, I took a fork and inserted it gently into one of the cakes. When I took the fork out, there was a slight trace of cake on it, so I knew I had to leave them in for a few more minutes. So I waited a little bit, checked again and they were fine. I took them out of the oven and let them cool down completely. 
  4. After about 30 minutes, it was time for me to make the icing. First I beat the icing sugar, butter, lemon zest and food colouring with the same handheld electric whisk, but this time on medium-slow speed until the ingredients were well combined. Then I turned the whisk down to a slower speed while I poured the milk. After that, I turned it to high speed and beat the mix for about 5 minutes, until the frosting became fluffy enough. As Tarek Malouf said in his book: “The longer the frosting is beaten, the fluffier and lighter it becomes.” 
  5. Then my now-favourite, yet the riskiest part of the whole process finally arrived: it was time to put the frosting on the cakes. The thing about cupcakes is that they are supposed to look pretty and appetizing, and this was my first time trying to do so. The best advice I can give you is just dig in but do it gently. Take a good amount of the frosting with a spoon, a knife or a small spatula and spread it evenly while rotating the cupcake. This will give you more control over what the end result will be like. And voilà! Your first cupcakes. MY first cupcakes! 


So what do they taste like, you ask? Well, the thing about Hummingbird cupcakes is that they are never too sugary, which is good for people who don’t have a sweet tooth. I found the lemon ones very flavorsome, yet quite subtle in taste. Lemon is not something you need a lot of in order to get the full taste experience. And it was the case with these cupcakes. 

Final words: In order to make the recipes with as much precision as possible, I would recommend using a weighing scale in order to measure some of the ingredients. I didn’t have one when I made this recipe, and I found it really affected the texture and consistency of the frosting. It was a bit too liquid, not overly but just enough for it not to stick to the base properly. Remember: You need good tools to make great cupcakes!

Stuff It: Cupcake-Stuffed Cupcakes for Serious Eats

I hold this truth to be self-evident: Cupcakes are better when filled. This, of course, is a lesson learned from Bake It In A Cake, which proves that there's no lack of material with which to fill them, ranging from cookie dough to dollhouse-sized pies to baklava.

But the ultimate cupcake-stuffer? Cupcakes themselves. By embedding miniature cupcakes—frosting and all—inside batter-filled standard-sized cups, you get a surprisingly delightful treat: The baby-cakes, sealed by the moisture of the cake batter, don't dry out, whereas the baked bit of frosting lightly spreads, browns, and adds a rich crunch, making for an overall taste and visual contrast which can't be beat.

Note: If you don't cover the mini cupcakes batter, the frosting will spread a bit and you might want to keep a cookie sheet under the muffin tin in case of drippage. Alternately, save a little batter and cover them completely before baking.

For the full entry and recipe, visit Serious Eats!

Everyone's Irish, Even in August: Whisky Maple Cupcakes Recipe

Thing I'm saddest about at this minute: I do not have a Whisky Maple cupcake from Cupcake Royale in my mouth. This is a fact that became all the more evident when I read the Seattle Weekly writeup on the delicious seasonal morsel, which is sadly available only during March. 

Happily, I uncovered the recipe in an issue of Edible Seattle, and you know what that means: you can be Irish any time you want now. And oh, how sweet to be Irish with a rich sour cream vanilla cupcakes with whisky maple buttercream. They're just as good made at home (although your frosting swirls might not be as perfect as the one shown above, which was made by Cupcake Royale!).

Here's the recipe.

Sour Cream Vanilla Cupcakes with Whisky Maple Buttercream

Adapted from Cupcake Royale

Cupcake ingredients 

  • 3/4 cup whole milk (I used half and half! heavy, but tasty)
  • 1/2 cup full fat sour cream
  • 2 teaspoons vanilla
  • 2 3/4 cups flour
  • 1 teaspoon baking powder
  • 1/2 teaspoon salt
  • 1 cup (2 sticks) unsalted butter, room temperature
  • 2 cups granulated sugar
  • 3 large eggs, room temperature 

Frosting ingredients

  • 1 cup unsalted butter, at room temperature
  • 1/4 cup whisky (CCR uses Jameson, I used some cheap brand, I'll be honest about it)
  • 5 tablespoons maple syrup
  • 1/2 teaspoon salt
  • 4 cups confectioners' sugar

Procedure

  1. Preheat oven to 350 F.
  2. Line a standard muffin tin with cupcake liners (this recipe yields 18-24 cupcakes, depending on size). 
  3. In a small mixing bowl, mix together the milk, sour cream, and vanilla. In a separate small bowl, whisk together the flour, baking powder, and salt. 
  4. In the bowl of an electric mixer, combine the butter and sugar. Beat together on medium spead until the mixture is light and fluffy, about one minute. Add the eggs one at a time, beating at medium speed for a full 30 seconds after each addition. Scrape down the sides of the bowl with a rubber spatula. Add half the dry mixture, and beat until incorporated. Repeat the process again, mixing until the liquid and dry ingredients are combined, the batter thick and smooth.
  5. For traditional cupcakes, fill each lined cup 2/3 of the way full with batter. For fat crowns on your cakes, fill each cupcake liner close to the top (this will make fewer cupcakes, but bigger and awesomer ones).
  6. Bake for 22-27 minutes, or until a cake tester comes out clean.
  7. Make the frosting. Using an electric mixer, beat butter, whiskey, syrup, salt, and one cup of the confectioners' sugar together until smooth. Add the rest of the sugar bit by bit until it has reached your desired consistency (you might not use all of it). Spread generously on cooled cupcakes.


So Bad, But So Good: Chocolate Chip Cookie Dough Filled Funfetti Cupcakes

Nobody's going to challenge the idea that cupcakes are delicious. It's like, fact.

But you know what? They're even better when stuffed with cookie dough.

I learned this, of course, when I found myself with a boatload of extra Funfetti cake mix and cookie dough from making a Cookie Cake Pie, and decided to make a batch of cupcakes with a dollop of dough dropped in each cup of batter before baking.

Now, if you've never done it yourself, here's what you can expect.

First: A heads up: the cookie dough will sink--the cake will bake around and over the dough. But this is OK, because each one has an unexpected, gooey little sugar bomb inside.

Note: It will be gooey, by the way, so if you are worried about things like, oh, salmonella, use an egg-free cookie dough.

Second, and perhaps more importantly: It will delight you and your friends to eat them.

Now, I'm going to confess: my favorite delivery method is with either Funfetti or Rainbow Chip cake (a mix. Yup, I said it). But please, please, please: Make your own frosting. It's so easy, and it adds an extra dimension of delicious to this ever-so-slightly trashy (but delightfully so) treat.

Here's the recipe I used.

Chocolate Chip Cookie Dough-filled Cupcakes

 Components

  • 1 box Funfetti or Rainbow chip cupcake mix
  • 1/2 batch of chocolate chip cookie dough (um, bake the rest as cookies)
  • 1 batch fudge buttercream (recipe below, as found on AllRecipes)

Procedure

  1. Prepare cupcake batter per box instructions--but before baking, fill the cups about 2/3 full, then give each one an added dose of awesome by adding a generous spoonful of cookie dough.
  2. Bake as directed on box instructions.
  3. Remove from oven and let cool. 
  4. Meanwhile, make the frosting (recipe below). When the cupcakes are room temperature, frost liberally, and enjoy.

Chocolate Fudge Buttercream

  • 1/2 cup butter
  • 1/4 cup shortening
  • 1/3 cup unsweetened cocoa powder
  • 2 cups confectioners' sugar
  • 2 tablespoons milk
  • 1 cup hot fudge topping
  • 1 teaspoon vanilla extract

Procedure

  1. Cream together the butter or margarine with the shortening.
  2. Sift the cocoa with the confectioners' sugar and add to the creamed mixture. Mix together adding 1 tablespoon at a time of milk to keep mixture smooth. Don't add more than 1/4 cup of milk.
  3. Add the hot fudge topping and the vanilla extract. Blend until smooth and creamy.

P.S. In case you were wondering how the Cookie Cake Pie came out? Delicious.

America the Sweet: United Cakes of America, and Hartford Election Cupcakes

Let's talk for a minute about the new book United Cakes of America: Recipes Celebrating Every State by Warren Brown, owner of the CakeLove empire in the DC area.

I love the idea of this book: a sweet show of patriotism, dedicated to celebrating the cakes unique to each region of the USA, including recipes and stories.

And for the most part, I love the result: it's beautifully designed, well written, and so far, the recipes are tasting most excellent. 

My only reservation about the book isn't so much a complaint about the content as a wish that even more had been done to delve into the history--including the hows and whys--of each region's cake. Several of the entries--Hartford Election Day Cake, Hummingbird Cake, and Red Velvet Cake, for instance--come with insightful histories and thoughts on why the cakes might have come into their own in a certain region, and I found these to be the most fascinating parts of the book. However, other entries are more loosely tied to a region, simply inspired by other flavors popular in the area rather than truly zeroing in on the region's cake specialty. For instance, the Washington entries are for Apple Cake and Coffee Buttercream, respectively. While both apples and coffee definitely have a strong presence in Washington, and I have no doubt that the recipes are delicious, I wouldn't consider these cakes that really represent the area.

But you know what? If the only reservation about this book is that I wanted more, that's really not such a bad thing. 

Here's one of my favorite entries so far, the Connecticut cake: an updated version of Hartford Election Day Cake, which was probably an American adaptation of English fruitcakes, which has since evolved into the below delicious spice cake. Spicy and flavorful, these cupcakes are quite light, but don't worry--a healthy dollop of the old-fashioned milk buttercream (which, by the way, smells and tastes so good that you might just want to lick the bowl) anchors them down quite deliciously. And it's a perfect recipe to dress up in red, white, and blue for the 4th of July!

Hartford Election Day Cupcakes

Makes about 11 cupcakes

Dry ingredients:

  • 8 ounces (1 cup) superfine granulated sugar
  • 5 ounces (1 cup) all-purpose flour
  • 1 tablespoon potato starch
  • 1⁄8 teaspoon kosher salt
  • ½ teaspoon  nutmeg, freshly grated
  • Pinch of allspice
  • Pinch of salt
  • 1⁄8 teaspoon baking soda

 Wet ingredients:

  • 3 ounces (6 tablespoons) butter, melted
  • ¼ cup half-and-half
  • 1 tablespoon rum
  • ½ teaspoon vanilla extract
  • 2 whole eggs
  • 1 egg yolk

Procedure 

  1.  Preheat the oven to 325°F and place the rack in the middle position. Lightly coat a cupcake tray with nonstick oil-and-starch spray and line 10 of the cups with paper liners.
  2. Measure and combine all the dry ingredients in a deep bowl. Whisk lightly for about 15 seconds to blend.
  3. Combine all the wet ingredients in a container with a tight-fitting lid and shake well for 15 seconds.
  4. Lightly whisk the wet ingredients into the dry ingredients. This should take about 15 seconds.
  5. Scoop or pour 2 ounces of batter into the paper-lined cups. (Using a food scooper or ladle works best.)
  6. Bake for 20 to 25 minutes, or until the tops of the cupcakes are golden brown and a wooden skewer inserted in the center of one comes out clean or with just a few crumbs.
  7. Cool the cupcakes for five minutes before removing them from the tray. When they are room temperature, frost or decorate them with Old-Fashioned Milk Buttercream (recipe below).

 Old-Fashioned Milk Buttercream

Yield: Enough for one 9-inch layer cake or 24 cupcakes (note: it is more than you'll need for the cupcakes, but it tastes good enough to eat by the spoonful)

  • 1 cup milk
  • 2 ounces (¼ cup) all-purpose flour
  • 8 ounces (2 sticks) unsalted butter
  • 8 ounces (1 cup) superfine granulated sugar
  • Pinch of salt
  • 2 teaspoons vanilla extract

 Optional garnish: sprinkles, decorating gel, etc.

 Procedure

  1. Quickly whisk together 4 tablespoons of the milk with the flour. This slurry will be somewhat thick, so whisk thoroughly to make it smooth. Press out any lumps with a flexible spatula, if necessary.
  2. Whisk in the rest of the milk and transfer the mixture to a 2-quart heavy-bottom saucepan. Bring to a simmer for about 30 seconds over medium heat, whisking the whole time.
  3. Remove the pan from the stove and place plastic wrap directly against the milk’s surface. (This is the best method to prevent a skin from forming.) Cool to room temperature.
  4. Combine the butter, sugar, salt, and vanilla in the bowl of a standing mixer fitted with the paddle attachment and mix at medium to high speed for 5 minutes.
  5. Pour the cooled milk-and-flour mixture into the bowl and beat for another 5 minutes, or longer, as needed to achieve a spreadable consistency.

Pucker Up: Delicious Lemon Meringue Cupcake Recipe from Cake Gumshoe Megan Seling

On the occasion of her recent birthday, Megan Seling provided a dessert spread of epic proportions at her party.

And while usually I would object that the birthday girl shouldn't have to lift a finger on her special day, opting to simply eat cakes that others have made, I have to admit that as a guest, I was kind of glad that she did. Because it was a most delicious spread.

And the highlight of the table? In my humble spy's opinion, the Lemon Meringue Cupcakes. Made of a light cake filled with lightly tart and very flavorful lemon curd, these cakes were capped with a punk rocker hairstyle of a meringue topping which tasted just as good as it looked.

And happily, she was willing to share the recipe, which she got here, which I am now passing on to you. You're welcome. It can also be found in the book Cake Art.

Lemon Chiffon Cupcakes

Makes 24 cupcakes

  • 3 cups cake flour
  • 2 teaspoons baking powder
  • 1 cup sugar, divided
  • 4 large egg yolks
  • 1 cup vegetable oil
  • 1 cup water
  • 1/2 teaspoon vanilla extract
  • Zest of 1 lemon
  • 4 large egg whites

Lemon Curd

  • 1 cup butter, cubed
  • 1 cup sugar
  • 1 cup lemon juice
  • Zest of 3 lemons
  • 10 large egg yolks

Swiss Meringue Buttercream

  • 4 large egg whites
  • 1 cup sugar

Procedure

Prepare the Lemon Chiffon Cupcakes. Preheat the oven to 375°F. Prepare pans with cupcake liners. Sift the flour, baking powder, and half the sugar together into a large mixing bowl or stand mixer and reserve. In another large mixing bowl or stand mixer bowl, combine the egg yolks, oil, water, vanilla, and zest. Mix with a handheld mixer or whip attachment until thoroughly combined, about 1 minute. Add the egg yolk mixture gradually to the dry ingredients, mixing with a handheld mixer or whip attachment on medium speed until a paste forms. When a paste has formed, scrape down the sides of the bowl, and continue adding the remainder of the yolk mixture until it is all incorporated. Beat for an additional 2 minutes on medium speed. In a separate mixing bowl or stand mixer bowl, whip the egg whites with a clean whip attachment on medium speed until soft peaks form. Gradually add the remaining sugar while beating the egg whites and continue to beat until medium peaks form. Gently blend one-third of the beaten egg whites into the egg yolk mixture to lighten it. Gently fold in the remaining egg whites. Divide the batter evenly among the prepared pans. Bake at 375°F until the top of the cupcakes spring back to the touch, about 20 minutes. Let the cupcakes cool in the pans for a few minutes before turning out onto a wire rack to finish cooling before decorating.

Prepare Lemon Curd. Combine half of the butter, half of the sugar, the lemon juice, and zest and bring to a boil over medium heat, stirring gently to dissolve the sugar. Meanwhile, blend the egg yolks with the remaining sugar. Temper the mixture by gradually adding about one-third of the lemon juice mixture, stirring constantly with a whip. Return the tempered egg mixture to the saucepan. Continue cooking, stirring constantly, until the whisk leaves a trail in the curd. Remove from the heat. Stir in the remaining butter. Strain the curd into a shallow container or bowl. Cover with plastic wrap placed directly on the surface of the curd. Cool over an ice bath. Store the curd, covered, in the refrigerator for up to 3 days.

Prepare Swiss Meringue Buttercream. Put the egg whites and sugar in the clean, grease-free bowl of a stand mixer fitted with the whisk attachment and stir together until the sugar is blended into the egg whites. Place the bowl over a saucepan of simmering water and stir frequently until the sugar dissolves and the mixture reaches 140°F. Transfer the bowl to the mixer and beat on high speed until the meringue is thick and glossy and has a stiff peak.

Finish the cupcakes. Fill a piping bag fitted with a large plain tip two-thirds full with lemon curd. Insert the tip as far as it will go inside the center of the cupcake and apply gentle pressure. Try not to squeeze too hard or lemon curd will squirt out the top of the cupcake. Stop filling once you see any lemon curd around the base of the tip. Repeat with the remaining cupcakes. Clean the piping bag and tip and fill it two-thirds full with Swiss meringue. Pipe a large pearl of meringue on top of each cupcake. Use the back of a spoon to lift up areas of the meringue, creating spikes. Lightly toast the meringue with a kitchen torch or under the broiler until the tips of the meringue are golden brown.

Being Green: Vegan Green Granny Smith Cupcakes Recipe

Just take a look at this Vegan Green Granny Smith Cupcake. Doesn't it look just heavenly?

Unfortunately, an evil cupcake-poacher ate this before I could sample it, but I was assured it was an intensely delicious experience, and happily, the recipe was shared.

If you'd like to taste the magic for yourself, here's the recipe:

Vegan Green Granny Smith Cupcakes

Adapted from Sinfully Sweet Confections

Makes about 30 cupcakes

Ingredients for cakes

  • 2 cups cake flour
  • 2 cups coarsely chopped Granny Smith apples
  • 1/2 cup chopped pecans
  • 1/2 cup rolled oats
  • 1 cup apple juice
  • 2/3 cup canola oil
  • 2 cups sugar
  • 1/2 teaspoon baking powder
  • 1/2 teaspoon salt
  • 1/2 teaspoon cinnamon
  • 1/2 teaspoon ground ginger
  • 6 ounces plain soy yogurt
  • 1 tablespoon vanilla extract
  • 1 1/2 teaspoon baking soda

Ingredients for Vegan Cream Cheese Frosting

  • 8 ounces vegan cream cheese, softened
  • 1 cup nonhydrogenated margarine, softened
  • 2 pounds powdered sugar
  • 2 tablespoons vanilla extract
  • 1/2 cup chopped pecans

Ingredients for Brown Sugar Streusel Topping

  • 1/2 cup flour
  • 1/2 cup organic evaporated cane juice (sugar)
  • 1/4 cup pecan pieces
  • 1/4 cup non-hydrogenated margarine, softened

Procedure


  1. Preheat oven to 325ºF.
  2. Peel and chop apples coarsely.
  3. In a electric mixer bowl fitted with a paddle attachment mix together the canola oil, baking powder, baking soda, salt, cinnamon, soy yogurt, vanilla extract, baking soda.
  4. Add flour and sugar; and mix on slow.
  5. In a slow steady stream add apple juice and continue to mix on slow.
  6. Fold in apples, oats, and pecan pieces. Pour into cupcake cups and bake for approximately 15 minutes or until a skewer comes out clean.
  7. Make the frosting. In an electric mixing bowl fitted with a paddle cream together cream cheese and margarine until smooth and creamy. Slowly add the confectioners' sugar 2 cups at a time, mixing and scraping down the sides. Add vanilla, and mix on medium speed for about 2 minutes. Gently fold in chopped pecans.
  8. Make the streusel topping. Preheat oven to 450ºF. In a medium size bowl add flour, sugar, and margarine. Mix together with a fork to create crumbs. Add pecans and toss. Spread out evenly onto cookie sheet covered with aluminum foil. Bake until golden brown. Once cooled toss and break up crumbs, use as topping for cream cheese frosting.


Sweet Combination: Whoopie Pie Cupcakes, Inspired by Audrey

Whoopie pies are not the next cupcake...or are they?

At the recent CupcakeCamp Seattle event, one cupcake submission (by talented amateur baker Audrey M. of Seattle's Babeland) made my eyes go wider than any other: the whoopie pie cupcake. Here it was: cold, hard proof that both are improved when combined. Yes!

Needless to say it was love at first bite, and I rushed home to try and recreate the magic in my own kitchen. I whipped up a batch of whoopie pie batter (using butter instead of the traditional shortening) and baked about two-thirds of it in cupcake cups, and the rest as regular whoopie pie cookies, and then sandwiched it all together with a generous dab of fluffy frosting.

The conclusion? Whoopie pies and cupcakes are definitely better together.

For the full entry and recipe, visit Serious Eats!

Seeing Green: Irish Whiskey Maple Cupcakes all March Long at Cupcake Royale

March is in like a Lion at Cupcake Royale, where their flavor of the month is bound to make the masses roar with good cheer: Irish Whiskey Maple Cupcakes!

Here's the 411, direct from Cupcake Royale: 

It’s March 1...and you know what that means: Jameson Irish Whiskey Maple cupcakes are back at Cupcake Royale! In keeping with our mission to make Seattle’s most local cupcake, the March cupcake of the month is made from local ingredients like milk, eggs, and butter from Medowsweet Dairy and specially milled Shepherd’s Grain cake flour from Shepard’s Grain farmers in Eastern Washington.

But don't hesitate--in this spy's experience, the flavor of the month is usually first to disappear from the bakery case on most days! To ensure availability, call ahead.

Available all March long at the four Cupcake Royale locations; for directions and contact info, visit www.cupcakeroyale.com. Of course, you can keep up to date with their goings-on at legalizefrostitution.blogspot.com and via Twitter.

Sweet Cakes: Naomi Henderson's Vanilla Cupcake Recipe

Hello Naomi's Vanilla Cupcake Recipe 

Perfect for use with this tutorial for Valentine's Day Sweetheart Cupcakes!

Makes 12

Ingredients

  • 1/2 cup unsalted butter
  • 1 cup castor sugar
  • 2 vanilla beans or 1/2 teaspoon vanilla extract
  • 2 free range eggs
  • 1/2 cup milk
  • 3/4 cup self-rising flour
  • 3/4 cup all-purpose flour

Procedure

  1. Preheat the oven to 170°C (350°F ) . Line a 12 hole cupcake trays with standard size papers.
  2. Sift the flours together and set aside.
  3. Soften butter in the microwave.
  4. Warm the milk in the microwave to luke warm.
  5. Place the softened butter in a mixing bowl and beat with an electric mixer (med-low speed) for 1 min until smooth.
  6. Beat on med and add the sugar 1/3 at a time beating for a minute between additions. (The fluffier the butter and sugar is, the fluffier and higher your cupcakes will rise)
  7. Add the vanilla seeds or extract and beat though
  8. Add the eggs one at a time mixing on med-low and for a minute in between additions.
  9. Once the eggs are mixed remove mixing bowl from stand and using a wooden spoon mix in 1/3 of the flour. Mix until there are no lumps.
  10. Add 1/2 of the milk and mix until well combined.
  11. Add another 1/3 of the flour, mix until no lumps. Mix through the rest of the milk until well combined and then mix through the rest of the flour until there are no lumps.
  12. Spoon mixture into cupcake papers about 2/3 full using an ice cream scoop. Bake on the middle rack for 18-20 minutes until golden (rotate tray after about 15 min).
  13. Remove from trays and cool on a wire rack for at least 45 minutes before decorating.
  14. Frost as desired, or according to this awesome tutorial!

Store in an airtight container for up to 4 days.