What is Cream of Tartar and What Does it Do?

Cream of Tartar

You've probably seen Cream of Tartar in recipes, or at least have seen it in the spice aisle in the grocery store. Perhaps you've even used it in a recipe--it's a common ingredient for meringues or meringue toppings. But what exactly is the stuff? For those of you who have ever wondered...let's take a moment to consider the life, times, and purpose of this unique white powder.

What it is: a fine, white, odorless powder. Were I to see it on the counter and not have the benefit of seeing its packaging, I might confuse it with baking powder. 

Why the name? The chemical name for this substance is potassium bitartrate, or potassium hydrogen tartrate. As you might surmise, the "tartrate" part can explain where the "tartar" came from. 

I wasn't able to find a good explanation of where the "cream of" came into play, but I should clear up any confusion regarding Tartar Sauce. That name is derived from tartare, which is a dish for which this sauce a condiment of choice. Though tartar sauce is creamy, it has nothing to do with cream of tartar. Got it? Good.
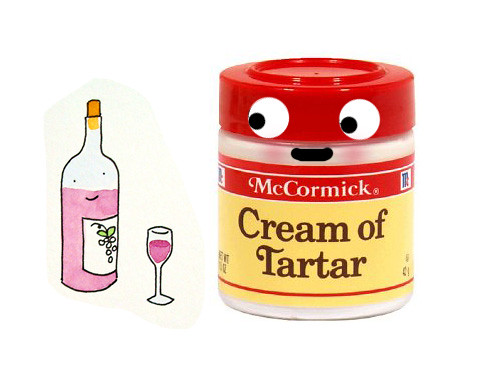
Cream of tartar is from wine!

Where it comes from: Believe it or not...it is a by-product of wine production! I'm totally not kidding. It is formed from the sediment left over in barrels after the winemaking process; once formed, it is scraped off of the sides of the barrels and then cleaned and ground to form cream of tartar. Interesting factoid: it's said that cream of tartar residue has been found in pottery dating back 7,000 years! 

Food uses: Arguably the most famous use for cream of tartar (or at least the one I've seen and used it for most frequently) is to stabilize egg whites when making meringues or meringue toppings. The cream of tartar not only stabilizes the egg whites and allows them to maintain their texture when whipped into stiff peaks, but it also increases their tolerance to heat, which is very helpful, say, when you put a meringue topped pie or a baked alaska into a hot oven. This allows them to brown nicely, hold their shape, and to not melt away and expose the delicious interior of these desserts! 

However, there are other food uses for cream of tartar, including stabilizing whipped cream, preventing discoloration of vegetables which have been boiled, and preventing sugar syrups from crystallizing (I have never used it for this purpose but am intrigued!). 

It can also be used as an ingredient which will help activate baking soda (hence you may see it in some cake recipes), and it also sometimes is listed as an ingredient in salt substitutes. 

Other uses: Cream of tartar can also be used, if you're a hippie, as a homemade cleaner. Mix it with something acidic like lemon juice or white vinegar to form a paste; this can be used to clean metals and porcelain. 

It can also be combined with hydrogen peroxide to clean rust from metal tools, but I will be completely honest and tell you that I find this boring.
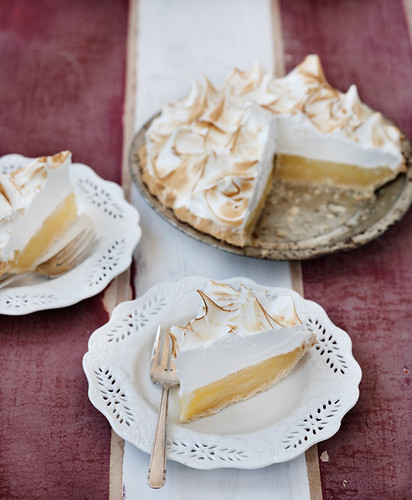
Lemon meringue pie

So I'll go back to the egg white thing, because that I found interesting. I learned a little bit more about that via Kitchen Savvy:

When you beat egg whites, proteins in the whites unfold from their natural shape and become tangled with each other.  At the same time, you are beating air into the whites, forming small bubbles.  The protein molecules become attached to each other through chemical and electrical bonds that reinforce the skin of the air bubbles.  Over time, these bonds can pull the proteins closer together, forcing out the water trapped in the surface of the bubbles.  Eventually, the proteins pull themselves together so strongly that compact, grainy protein lumps form and the liquid pools in the bottom of the bowl.

This is where the cream of tartar comes in.  It helps prevent the formation of chemical bonds between protein molecules.

Interestingly, though, if you use a copper bowl for whipping your egg whites, you won't need cream of tartar. As I learned here,

When you whisk egg whites in a copper bowl, some copper ions migrate from the bowl into the egg whites. The copper ions form a yellow complex with one of the proteins in eggs, conalbumin. The conalbumin-copper complex is more stable than the conalbumin alone, so egg whites whipped in a copper bowl are less likely to denature (unfold).

Who know Cream of Tartar was so OLD, interesting, and useful? Not me. Cue the "the more you know" music, fade out with a rainbow, and enjoy your newfound knowledge, sweeties! 

The Mystical and Magical Mazurka: The Story of a Seattle Baked Good Icon

Note: Here's a post from many years ago, near the start of CakeSpy, that I really thought was worth revisiting. Enjoy!

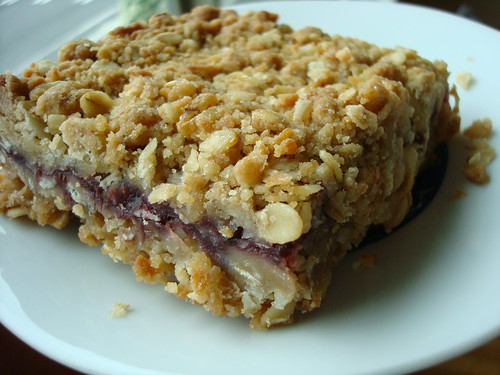
Mazurka Bar

(Mazurka pictured made by ace pastry chef Chris Jarchow)

Have you ever stopped to wonder why certain baked goods are popular in your area? 

For me, the discovery of a popular Seattle area treat, the fruit-and-oat bar, which is at times known by various names, started with this book:

The Baker's Apprentice

This is a book by Judith Ryan Hendricks, which I picked up at random at the library last year. Turns out, the novel, which is about a thirty-something woman who is finding herself as a breadmaker after a nasty divorce (which is actually the sequel to the writer's previous novel, Bread Alone) is set in Seattle, and fictional as it may be, the "Queen Street Bakery" featured in the book is inspired by an actual bakery (the McGraw Street Bakery--now Macrina Bakery). But even more than this fact, what caught our attention was one pastry in particular in the book, which turns out to be real as well: the Mazurka Bar.

In the book, the baked good is described as:

"locally world famous--a killer combination of thin, flaky crust, then your choice of lemon, chocolat-espresso, apple-raisin, or raspberry filling, and on the top the crumble layer with its habit-forming, sandy crunch".
Ladro Coffee, and a Mazurka bar from Great Harvest Bread

Reading this, we got a shiver of excitement. We had noticed the proliferation of this fruit-and-oat cookie bar format in the Seattle area--though known by several different names, nearly every coffee shop or bakery in the area has some variation (several are pictured throughout this writeup). Could this mysterious Mazurka hold the key to this particular bar cookie's popularity in Seattle? 

An obsession was born.

I started out by emailing the writer Judith herself, who pointed us in the right direction in our Mazurka hunt, which eventually led us to the Mazurka Maven herself--Jessica Reisman, former owner of the McGraw Street Bakery and the woman who introduced the Mazurka to Seattle. Though Jessica now lives in Beacon, NY (where she owns a different cafe, the charming-looking Homespun Foods), she was more than happy to share the story of the mysterious bar with us:

Macadamia caramel chocolate crumb bar, Seattle

The path to Mazurka monopoly began in 1983, when Jessica Reisman moved to back to Seattle (she had previously lived in the city in the 70's, but had moved around a bit in between) and helped start up Rainbow Foods, a business which has evolved but still exists on Capitol Hill. At the same time, she began making the bars, which were based on Maida Heatter's recipe for Polish Wedding Cakes (in Heatter's description in her cookbook, she notes that they are also sometimes known as Mazurkas). At first the operation was skirting the line of legality--she was making them in her own apartment, and selling them from the back of her car at various festivals and street fairs. Popularity caught on though, and soon enough she was baking from a commercial space in Ballard, where she made enormous batches of Mazurkas which were then sold to wholesale accounts. In retrospect, this was a pivotal time for the Mazurka, and it can be argued as a case of being in the right place at the right time: as a hearty, dense, oaty treat, it appealed to Seattle's outdoor sensibilities--it was the perfect accompaniment for long hikes or mountain climbs, and homey enough for the most gloomy and drizzly days. Timewise, it couldn't have come along at a better time: the Mazurka became a popular wholesale item just as the espresso cart revolution was getting started in Seattle--since new operations would look at the offerings that the existing ones had, the Mazurka just became part of the coffee shop parcel. 

It was at the commercial baking space where Jessica met Nancy Mattheiss, who ran a custom cakes business--though their paths took a few loops and turns, a few years later they paired up again, adding a third partner Sue Fenoglio, to open the Mcgraw Street Bakery, where the Mazurka was a consistent bestseller.

Mazurka

Reisman eventually assumed ownership of the bakery, but sold a few years later. The bakery itself was leased out to various different businesses before eventually housing 

Macrina Bakery's Queen Anne location. She continued with a wholesale baking business for a couple more years, but eventually sold that too (along with the Mazurka recipe), in favor of returning back East to be closer to her family. She mentions that she thinks the business had since been sold again; though I can't confirm this, I surmise that perhaps it was sold to or absorbed by Great Harvest Bread Company--they are the only retailer in Seattle that sells a fruit and oat bar specifically called the Mazurka Bar, and that seems awfully coincidental.

Cranberry Oat Bars, Three Sisters

Today, Jessica Reisman owns another bakery/cafe,

Homespun Foods, in the artistic community of Beacon, New York (about an hour outside of NYC). The Mazurka lives on at Homespun, but is called the Mt. Beacon Bar. Though it is still a popular item, it never quite took off the same way it did in Seattle. Perhaps this is due to the weather; perhaps the culture; perhaps they just have different tastes on the East Coast. 

It is my belief though, that the Mazurka was in its element in Seattle. It was in the right place at the right time--and even years later, will remain a delicious historical marker of our cultural past.

As for the Mazurka's place in Jessica's heart and appetite? Well, let's just say she's been making them a long time. "I never touch mazurkas anymore," she laughs over the phone, "though I do love the way they smell."

Mazurkas

Want more lore?

Definitely start out by reading the chock-full-of-carbohydrate novels

Bread Alone

and

The Baker's Apprentice

by

Judith Ryan Hendricks

Heck, while you're at it, go ahead and read her other novel (unrelated to the others but still food-filled),

Isabel's Daughter

Also, for an artifact we unearthed along the way, check out this 1992 article from the

Seattle Times, about Jessica's Mazurkas!

Want to make the Mazurka?

We located the original recipe in

Maida Heatter's Book of Great Cookies; though Jessica admits to having taken some liberties and tried out different fillings, this is where you should start to master the mysterious treat:

POLISH WEDDING CAKES

These are called Mazurka in Polish. There are many versions, all rich and moist. This one has a crunchy crust and a tart apricot filling. 

Makes 16 2-inch squares 

Apricot Filling

  • 4 ounces (about 24 halves) dried apricots
  • 1/2 cup water
  • 2 tablespoons sugar
  1. Bring the apricots and the water to a boil, uncovered, in a small, heavy saucepan with a tight cover over high heat. Reduce the heat to low, cover the pan, and simmer until the apricots are very tender, about half an hour, depending on the apricots. The fruit should be very soft and the water should be partially but not completely absorbed.
  2. Press the apricots with a potato masher or stir and mash vigorously with a fork. The mixture should be very thick. Add the sugar and stir until it dissolves. Cool to room temperature. If you wish, this filling may be made ahead of time and refrigerated.

Polish Pastry 

Note: this is not like American pastry. It will resemble a crumb mixture.

  • 1 1/4 cups sifted all-purpose flour
  • 1/4 teaspoon salt
  • 1 cup dark brown sugar, firmly packed
  • 6 ounces (1 1/2 sticks) cold butter, cut into 1/2-inch pieces
  • 1 3/4 ounces (1/2 cup, firmly packed) shredded coconut
  • 3/4 old fashioned or quick cooking (not "instant") oatmeal
  • 2 ounces (generous 1/2 cup) walnuts, cut medium fine
  1. Adjust an oven rack one-third up from the bottom and preheat oven to 325 degrees.
  2. Place the Flour, salt, and sugar in a mixing bowl. With a pastry blender cut in the butter until the mixture resembles coarse meal. Stir in the coconut, oatmeal, and walnuts.
  3. Place half (3 cups) of the mixture in an unbuttered 8-inch-square cake pan. Press it evenly with your fingertips. Cover with a piece of wax paper and with the palm of your hand press against the paper to make a smooth, compact layer. Remove the wax paper.
  4. Spread the apricot filling smoothly over the pastry, staying 1/4 to 1/2 inch away from the edges. Sprinkle the remaining pastry evenly over the filling and repeat the directions for covering with wax paper and pressing smooth. Remove the wax paper.
  5. Bake for 60 to 70 minutes until the top is barely semifirm to the touch. (note: Personally I find that Maida's bake time is long. I prefer more like 25-30).
  6. Cool in the pan for 15 minutes or so; be sure to cut around the sides to loosen from the pan before cutting and serving.

Thank you to Judith Ryan Hendricks, Jessica Reisman, and Nancy Mattheiss for their help with this story.

Delicious Mazurka

Sweet Surrender: A Little Debbie Death Match

Note: Here's a post from 2009 that really needed to see the light of day again. Enjoy! 

Little Debbie Death Match

Oh, Little Debbie. You loyal lunchtime companion, you siren of saccharine sweetness. With you, we've unwrapped so many smiles--and you've never asked for anything in return.

Which is all to say, Little Debbie, that you never did anything to deserve what follows...but in the dark reality of the real world, sometimes bad things happen to good people. Yup--it's time for a...

Little Debbie Death Match

But first, to get some important information out of the way:

What have you done?

 A side by side comparison of several Little Debbie treats to see which one will rise victorious through various challenges. Winners were determined simply: at the end of each challenge, which seemed the most edible? (Though, as a disclaimer, we did not eat them afterward)

Little Debbie Display

Which Treats Were Used?

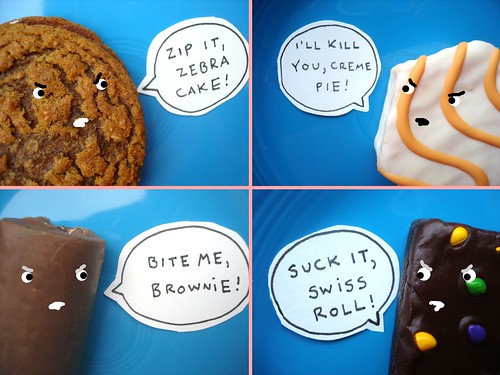
 Since the Little Debbie line boasts over 50 varieties of snack cakes, it was elected (for the sake of brevity, and to conserve cash) to choose just four treats that would be representative of some of the major textures and flavors; ultimately, it was narrowed down to the following contenders from their list of bestselling treats: Cosmic Brownies, Oatmeal Creme Pies, Swiss Rolls, and Zebra Cakes.

Why Did You Do This?

 To see which snack cake is truly superior. And also, you know, for fun.

Let the games begin:

Challenge One: Death by Boiling

Objective:

To see which treat would last the longest when dropped into a pot of boiling water.

See you in hell, cosmic brownie!
Still alive!

Brownie:

Dude. This brownie was a survivor--while the icing melted fairly quickly, even after six minutes the cake part was holding strong and still retaining much of its original form. It wasn't until minute seven that it began to fall apart.

See you in Hell, Oatmeal Creme Pie!
Oatmeal Creme Pie Boiling

Oatmeal Creme Pie:

This little guy never stood a chance. Almost instantly the snack cake began to fall apart when it hit the boiling water; in under thirty seconds, it had completely liquefied, with not even crumbs remaining.

See you in Hell, Swiss Rolls!
Swiss Rolls--After

Swiss Roll:

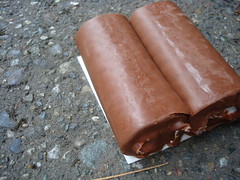
These dudes were probably the luckiest of the bunch: since they come in pairs, at least they didn't have to die alone. When the rolls hit the boiling water, the chocolate glaze melted almost immediately, with the cream filling following in short order--however, the cake held on for dear life, slowly unraveling and remaining solid (albeit bloated and soft) for a good four and a half minutes before the spongy pieces began to fall apart. 

Boiling a Zebra cake
Death to Zebra Cake!

Zebra Cake:

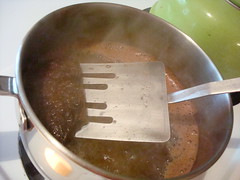
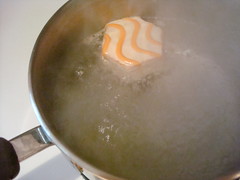
The first thing that happened was that this cake seemed to dissect itself: the top icing and middle creme layer began to melt, thus separating the cake layers, which then began to expand in the water. The pieces held steady for nearly five minutes until they began to disintegrate.

Winner: Cosmic Brownie, which not only lasted longest but also retained the best form.

Challenge Two: Death by Car

Objective: To see which treat would fare best when run over by a car.

Cosmic brownie about to be run over
Sweet Roadkill

Brownie: Held its form surprisingly well, considering that it was a frosted brownie--no frosting stuck to the car wheel. Perhaps because it was so oily? This one was definitely the most interesting to look at, too.

Oatmeal Creme Pie about to be run over
Roadkill

Oatmeal Creme Pie: Like the brownie, this little sandwich cookie fared pretty well, retaining its general makeup and not even losing much filling. 

Swiss Roll about to be run over
Sweet Roadkill

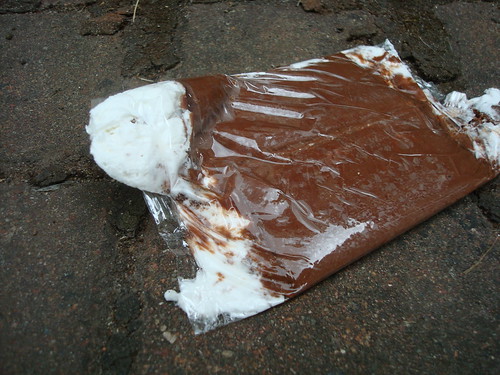
Swiss Roll: Total Goners. They stuck everywhere: the tire, between the treads, the ground. It was grisly.

Zebra cake about to be run over
Sweet Roadkill

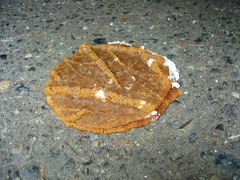
Zebra Cake: Not much better than the Swiss Rolls--it seemed as if this snack cake exploded under the weight of the car. 

Winner: Oatmeal Creme Pie. While it was a hard decision between this and the brownie, ultimately the fact that the filling was intact made it slightly more appetizing.

Challenge Three: Death by Flight

Objective: To see which snack cake would fare best after being dropped from a second-story window.

Fallen brownie

Brownie: After landing on its side, Brownie almost looked normal...but upon closer inspection, had a strange and unnatural twist in its side. Sure, it survived...but it would never be the same.

Oatmeal Creme Pie after falling

Oatmeal Creme Pie: The cookies acted as a protective buffer, and quite honestly, this one probably just could have been dusted off and given to a friend, and nobody would have been the wiser.

Fallen Swiss Cake Roll

Swiss Roll: The roll cracked open at the seam, allowing the sweet cream to ooze out--the equivalent of a confectionery head wound?

Massacre! Creme Filling
Fallen Zebra Cake

Zebra Cake: Poor, poor Zebra Cake. This one fared the worst, hitting a step on the way down and leaving a sad trail of creme filling as it went. Zebra Cake was so not okay.

Winner: Oatmeal Creme Pie. It didn't seem to have suffered very much at all, other than collecting some dead leaves and dust.

Challenge Four: Death by Danny

Objective: To see which treat will fare best when jumped on by my friend.

Jumper
Danny jumps on it

See? He meant business. 

Brownie after being jumped-on

Brownie: Not so bad at all. It definitely suffered, but didn't lose its form under the weight of the mighty jump.

Oatmeal Creme Pie, Smashed

Oatmeal Creme Pie: Sure, it's only a small bit of creme filling poking out of the top cookie...but who's to say it's not a cookie concussion, bound to claim the cookie's life at any moment?

Smashed Swiss Cake Roll

Swiss Roll: Oh, poor swirly treats: the creme that makes them so delicious was also their downfall, popping out at the ends and rendering them limp and a shadow of their former selves.

Ouch!

Zebra Cake: Though the form was somewhat intact, the moment the cellophane was lifted, half of the frosting and cake came with it. Another one bites the dust.

Winner: Brownie. It was close, but ultimately the Oatmeal Creme Pie looked like it might not survive.

Which Snack Takes the Cake?

Looks like it's a tie between the Oatmeal Creme Pie and the Brownie--but if you want a sweet survivor, stay away from the the iced snack cakes--they're total softies.

Conclusion:

Overall, these Little Debbie treats are hardier than you might think: they're willing and able to withstand all sorts of hardship and will generally remain surprisingly edible. Of course, whether this information is comforting or horrifying is up to you. Naysayers may express horror at the health implications of ingesting foods that won't die. But isn't it much nicer to think that if you grew up eating them, you might have absorbed some of these sweet super powers?

Little Debbie Death Match

Favorite Recipe: Lemon Berry Cupcakes by Pâtisserie Natalie

Hi buddies! This recipe was originally published in 2009 on this site; it's so good that it's worth revisiting. In case it's been a while, or if you have never seen this one before...enjoy!

Lemon Berry Cupcakes by Pâtisserie Natalie

CakeSpy note: since these headnotes were written years ago, obviously a bit out of date. But honestly, that's part of the fun: revisiting the past and reflecting on how many things have changed!

From CakeSpy: When you visit Pâtisserie Natalie, you'll undoubtedly be impressed. The pictures are simply gorgeous; the recipes are creative and sophisticated, yet unfussy. Here's a note from the girl behind the blog:

From Natalie: Hi, my name is Natalie, from Pâtisserie Natalie. I'm so excited to get to do a guest post for CakeSpy; I've been a fan for a long time. I'm a high school student from Seattle who loves photography, food styling, and baking. I've been interested in the arts since I was really little, and found my real calling through blogging. I didn't discover the food blogging world until recently. I also didn't realize how much I would love it. My blog gives me a way to share my design and creative flow with other people, as well as see other artist's work.

Lemon Berry Cupcakes by Pâtisserie Natalie

I started baking more seriously about 2 years ago, but it is now an addiction. Ask anyone who knows me and they will tell you I am more frequently in the kitchen then not. I absolutely cannot stay away from my kitchen aid mixer and my camera. I am self-taught in html/css coding, and do all my own graphics and layout work for my blog (CS Note: she's interested in pursuing a career in web/graphic design and photography).

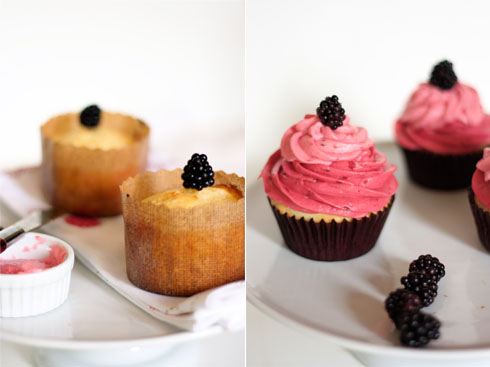
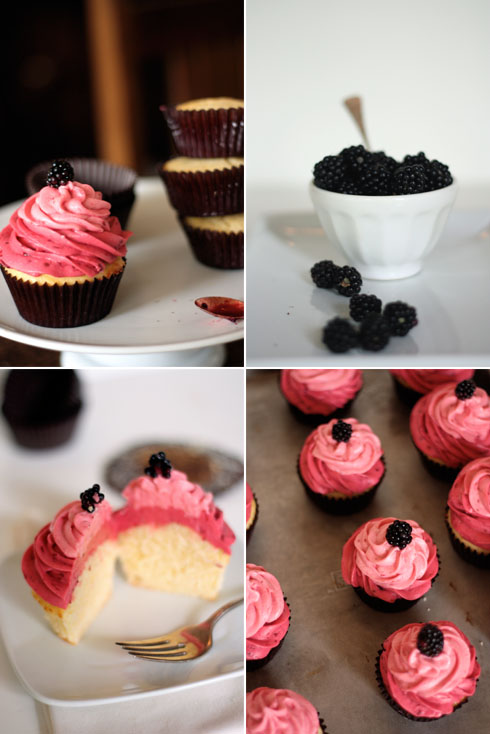
I decided to make these Lemon Berry Cupcakes because as many people know, Seattle doesn't have that many sunny days during the year. Summer flavors for me are lemon and berries. Seeing as the sunny days are limited, I felt that I needed to make something that used those flavors. While I don't mind the rain at all (I love it, actually), many people are a little bummed that our summer days here are ending. With that in mind, I made these cupcakes as a sort of "summer revival." I've been working on the recipe for this lemon pound cake for a while, but I think I've finally got it. I'm often disappointed by lemon cake, as it doesn't actually taste lemony. That is not a problem for this cake at all. It's very moist and soft, which is not usually the case with pound cake. The frostings are made from raspberries and blackberries, which is why those frostings are

so

pink.

Lemon Pound Cake

  • 3 cups all purpose flour
  • 1 teaspoon salt
  • 1/2 teaspoon baking powder
  • 1/2 teaspoon baking soda
  • 2 sticks unsalted butter; softened
  • 2 cups sugar
  • 3/4 cup plain yogurt
  • 3 tablespoons lemon zest
  • 2/3 cup lemon juice
  • 5 eggs
  1. Preheat oven to 350 degrees F.
  2. Sift together the flour, salt, baking powder, and baking soda. Whisk together in a large bowl thoroughly, and set aside.
  3. In a stand mixer, beat butter and sugar until smooth.
  4. In a medium bowl, stir together yogurt, lemon zest, and lemon juice.
  5. Add the eggs to the butter and sugar one at a time, beating in between each addition.
  6. With the mixer on a low speed, add the flour mixture in 3 parts, alternating with the yogurt mixture in 2 parts. Start and end with the flour mixture.
  7. Line a muffin pan with paper liners and scoop even amounts of the batter into the cups, filling almost to the top.
  8. Bake for 16 minutes, rotating the pan after 8 minutes. Once golden brown around the edges, remove from oven and place on a cooling rack for at least 2 hours before icing.
Lemon Berry Cupcakes by Pâtisserie Natalie

Blackberry & Raspberry Buttercreams

  • 2-1/2 sticks unsalted butter; softened
  • 1 teaspoon salt
  • 2-1/2 cups powdered sugar; sifted
  • 1/4 cup blackberry sauce
  • 1/4 cup raspberry sauce
  1. Beat butter and 1 cup of powdered sugar until smooth. Divide into two parts, removing half from the mixer bowl. Add the blackberry sauce to the mixer bowl, along with 3/4 cup of powdered sugar. Place buttercream in a piping bag and pipe a circle around the outer edge of the cupcake top, spiraling in towards the center.
  2. In the same mixer bowl, add the remaining half of the butter and powdered sugar that was set aside. Add the raspberry sauce and 3/4 cup powdered sugar and beat until smooth. Place in a piping bag and pipe an extra dollop on top of the blackberry buttercream.

Blackberry Sauce

  • 1 cup blackberries
  • 2 teaspoons sugar
  • 1 teaspoon lemon or lime juice

Combine ingredients in a sauce pan and place over medium heat. Stir frequently until juices from berries boil. Using a wooden spoon, crush the berries in the pan. Let boil for 2 minutes to make sauce more dense. Strain the mixture if you prefer to have smoother frostings. Cool in refrigerator.

Raspberry Sauce

  • 1/2 cup raspberries
  • 2 teaspoons sugar
  • 1 teaspoon lemon or lime juice

Combine ingredients in a sauce pan and place over medium heat. Stir frequently until juices from berries boil. Let boil for 2 minutes to make sauce more dense. Cool in refrigerator.

Chocolate Chip Pistachio Cookies for Christmas

I'm bringing back this recipe because it's truly THE BEST! This is the only cookie recipe that I *always* make; others come and go.

Cookies

One of the most wonderful things about a recipe is all the places it can go.

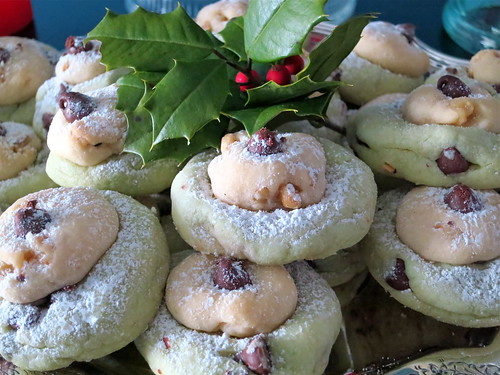
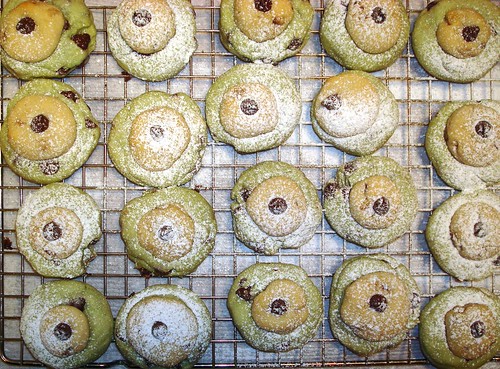
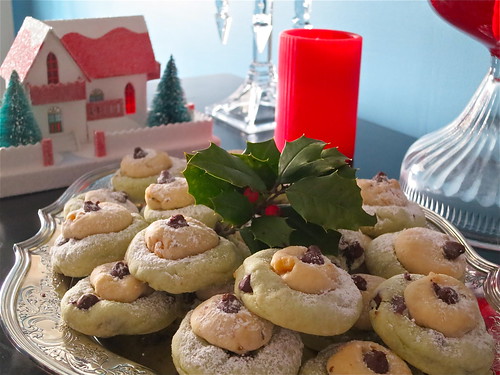
Take, for instance, a recipe for two-tiered Chocolate Chip Pistachio Cookies that appeared in a women's magazine in the early 1980s. How could the recipe developer have known what a role this recipe would end up playing in the Spy family's lives?

Chocolate Chip Pistachio Cookies

After all, it was this recipe that struck the fancy of my mother (you know her as SpyMom) and intrigued her enough to bake a batch. And the whole family loved them. They were buttery and lightly crumbly but so soft and just ever so slightly chewy in the center, and the walnuts and pistachio and chocolate just worked so perfectly together. We all loved them so much, in fact, that the next year, she made them again. And the year after that. A tradition was born.

Chocolate Chip Pistachio Cookies

But somewhere along the line--was it when her children went to college, moved away, began having their own lives?--the cookies stopped being made. Every year someone (usually me) would lament the fact that they were missing from the festivities, but year after year, they did not make an appearance.

Chocolate Chip Pistachio Cookies

But this year, we brought the recipe out from hiberation. SpyMom found the handwritten recipe and told me that this was during her "penmanship phase", when she would stay up at night practicing perfect penmanship, trying to will her handwriting into something more perfect than it was. 

Pistachio Cookies

Since then, her handwriting has reverted back to its old, slighly messier, but in my opinion, more charming form.

But how wonderful to encounter this little slice of the past, complete with doodlings (mine? My little sister's?) and speckled with baking debris from years past. 

Chocolate Chip Pistachio Cookies

I baked the cookies while my parents were out, and when they returned, my mother shrieked. "What?" I cried out, thinking that perhaps she'd seen a mouse. But no. "They're just like I used to make!" she said. And I may be getting a bit flowery here, but I think that she and my dad both had a little moment, thinking sweet memories. And that made me extremely happy, in turn. 

How's that for season's sweetings?

Chocolate Chip Pistachio Cookies

Chocolate Chip Pistachio Cookies

Makes about 24

  • 3 1/4 cups all purpose flour
  • 2 teaspoons baking powder
  • 1 teaspoon salt
  • 1 cup (2 sticks) butter, softened
  • 1 cup granulated sugar
  • 2 eggs
  • 2 tablespoons milk
  • 1 teaspoon vanilla
  • 1/4 cup chopped walnuts
  • 1 package (3 3/4 ounces) instant pistachio pudding (NOT sugar-free)
  • 6 ounces (half a bag) semisweet chocolate chips, plus 20-30 chips for garnish
  • confectioners' sugar, for dusting

Procedure

  1. Preheat the oven to 375 F. Line two baking sheets with parchment paper, or lightly grease them.
  2. In a large bowl, sift together the flour, baking powder, and salt; set aside.
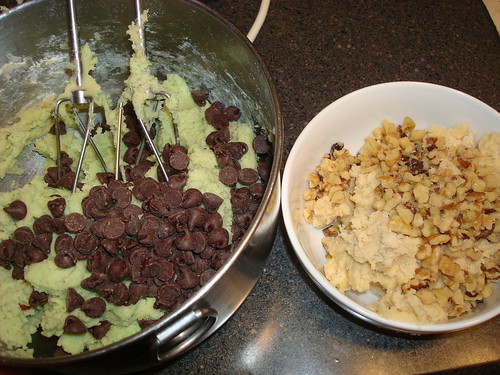
  3. In a separate bowl, using an electric mixer, cream the butter and sugar until smooth, 2-3 minutes on medium speed. Add the eggs, milk, and vanilla; blend until creamy. Add the flour mixture in 3-4 increments, mixing until a stiff dough forms. Remove 1/4 of the dough to a separate bowl; add the walnuts.
  4. To the remaining dough, add the pudding mix and stir until completely combined. Fold in the 6 ounces of chocolate chips.
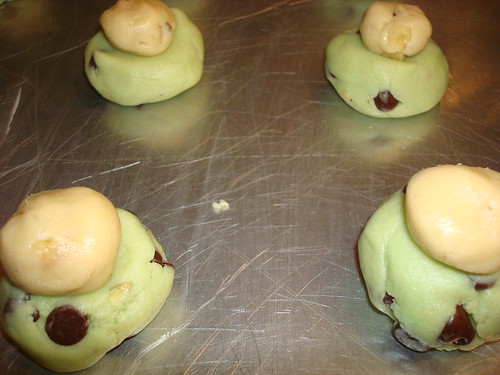
  5. By rounded teaspoonfuls, form the green dough into balls, and place 1 1/2 inches apart on the prepared sheets. Using the back of a teaspoon or a floured drinking glass bottom, gently flatten the tops of these dough rounds. 
  6. Grab the small bowl of walnutty dough. Form the dough into marble-sized pieces, and place a ball of this dough on the top of each pistachio dough mound. Sort of like a two-part snowman. 
  7. Place a single chocolate chip on top of each of the cookies, pressing gently to make sure it will stay in place.
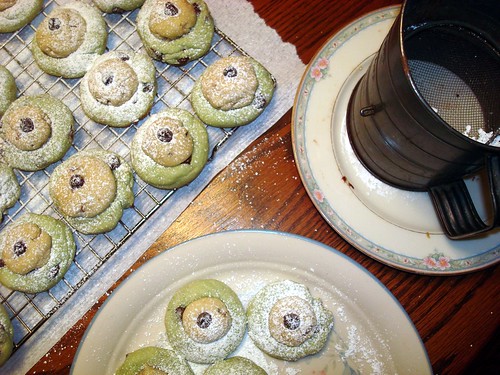
  8. Bake in your preheated oven for 8-15 minutes (listen, that long range is because I never calibrate my oven because I am lazy and I've baked these in a variety of ovens which have ranged though different bake times), or until set. It's going to be hard to see if they have become golden on the bottom, so mainly just look for a matte finish and an ever so slight golden color around the bottom edge. Remove from the oven and let cool on the rack for 5 minutes before transferring to a wire rack to cool completely. If desired, dust with confectioners' sugar.

Baker's Dozen: A Batch of Sweet Links

Double chocolate stout bread pudding with balt marley caramel. Sounds awesome! (Lost Recipes Found)

Rum chocolate pineapple brownies. Interesting. (Recipe for Perfection)

Common cooking mistakes...and how to combat them. (Craftsy)

Raspberry curd tart. I want it. (Tutti Dolci)

A guide to the iconic desserts of Kansas City. (KCUR.org)

Lemon cookie gelato. Please, can I marry this recipe? (How Sweet Eats)

No bake cookie butter bars. Be still my beating heart. (Wallflour Girl)

Bakerella's roundup of the Ben & Jerry's ice cream adventure! (Bakerella)

VERY early morning breakfast bars. I want one, or five. (Salt & Serenity)

Mango cookies. INTO IT. (Whipperberry)

Adventures in Bakebook-ing: a roundup of the totally sweet Sweetapolita blog book tour. (Sweetapolita)

Easy things to draw if you're just getting started. (Craftsy)

Westhaven cake. I'd try it. (Cooks.com)

5 foods to try in Canada. I could go for a beaver tail. (Eturbonews)

How about a Brooklyn egg cream crawl? (Airship Daily)

Ever tried a hedgehog slice? Don't worry, no actual hedgehogs were harmed in the making of. (Giramuk's Kitchen)

Caramelized white mocha meringue. Pinkies out! (Moonblush Baker)

Is rejection worse than death? (CakeSpy)

One response: is rejection worsee than death? (Slow Bloom)

Another response: is rejection worse than death? (Thick Dumpling Skin)

Check me out on the Food Psych Podcast! (Food Psych Podcast)

Book of the week: Betty Crocker's "Frankly Fancy" Foods Recipe Book. This retro recipe pamphlet is one of the more awesome ones that I have come across. It's readily available (and cheap!) on Amazon or ebay - check it out!

Turtles Without Nuts: Fruit Cup Turtles Recipe

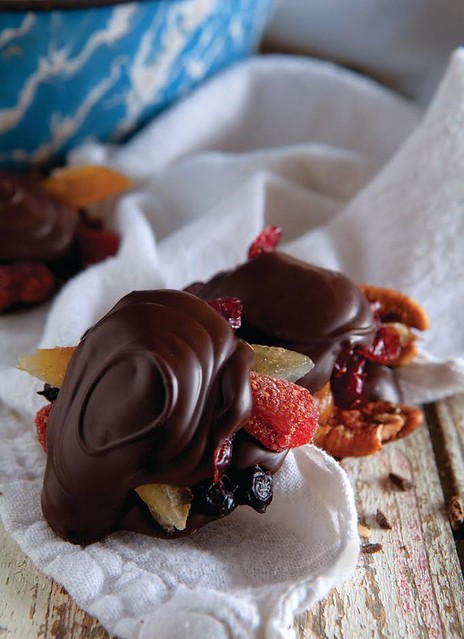
Turtle Tuffle bark

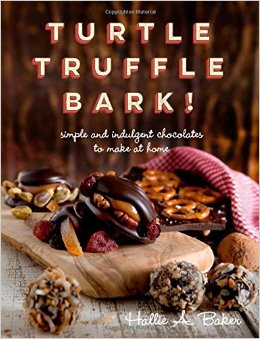
A turtle without nuts? Believe it. This controversial confection is a key player in the new book Turtle, Truffle, Bark: Simple and Indulgent Chocolates to Make at Home.

Is it ok to make turtles with fruit instead of nuts? I say as long as the caramel is present, proceed. What do you think? Here's the recipe. 

Turtle Tuffle bark

Fruit Cup Turtles

Eek! A turtle without nuts? Well, why the hell not?
These days, we’ve got such an assortment of dried fruits to choose from, it boggles the mind. I can’t get

enough of those dried tart cherries, so let’s throw those in, along with chopped papaya and a bit of chopped, candied lemon peel. Let’s pretend these turtles are health food, and top them with toasted pumpkin seeds.

Chocolate color? Choose your poison. There is absolutely no way to do these wrong. Take two of these and call me in the morning!


  • 2 cups dried tart cherries
  • 2 cups chopped papaya
  • 1 cup chopped lemon peel
  • 3/4 pound caramel
  • 1 pound tempered chocolate
  • 1/2 cup roasted, salted pumpkin seeds


Line a sheet pan with parchment paper. Spread cherries in an even layer on the parchment. Layer papaya on top of the cherries. Sprinkle lemon peel on top of cherries and papaya. Set aside.

Place prepared caramel into a bowl. Put bowl in microwave, and heat on high for 45 seconds to 1 minute. Take out of microwave, stir well with medium­sized spatula, and put back in for 30 seconds. At this point, your caramel should be in liquid form.

Scoop a dollop of caramel from the bowl with your small silicone spatula, and using your other spatula, ease the caramel off the spatula and onto the fruit. Try to make them anywhere from 1 1/2 to 2 inches in diameter, depending on the size of the turtles you’d like to make. You’ll end up with 20 to 24 caramel turtle middles.

When caramel is completely cooled, you can start assembling your turtles.

Line one or two 18x13 sheet pans with parchment paper. Using a candy funnel, deposit dollops of chocolate on the parchment paper. Each one should be approximately 1 1⁄2 inches in diameter and there should be about an inch between each dollop. Make about six dollops, then place a caramel middle on each one. Continue making bottoms, topping with caramel, every six or so. When you have all your bottoms and middles done, go back to where you started and top the caramel with chocolate. You want to use enough chocolate to mostly cover the caramel. Sprinkle pumpkin seeds on top.

When turtles are completely hardened, they will last in an airtight container for three weeks. 

Excerpted with permission from Turtle, Truffle, Bark: Simple and Indulgent Chocolates to Make at Home

Chocolate Milk Poke Cake

Seven minute frosting

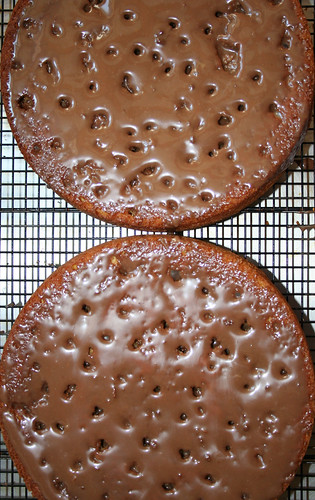
I don't like the term "poke cake" because quite frankly, it sounds kind of dirty. Like, I feel like I should be blushing when I talk about them. But I love, love, love eating them. Because poke cakes aren't anything dirty at all: they're simply cakes which have been poked with a skewer of some sort so that they can be more receptive to delicious soaking liquids (tres leches cake would be a famous poke cake, btw. So would Better than Sex Cake).

Seven minute frosting

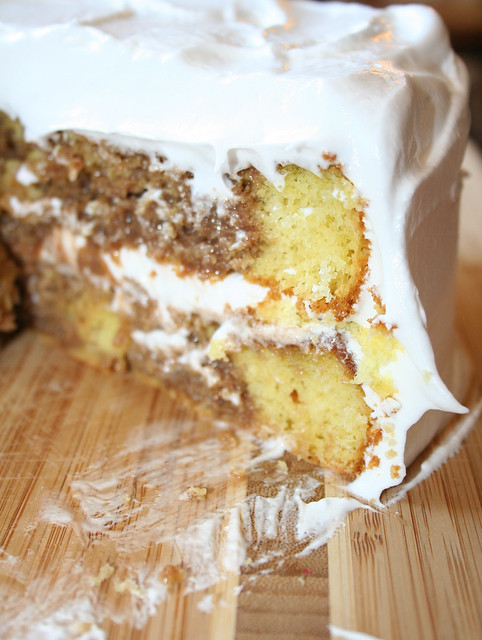
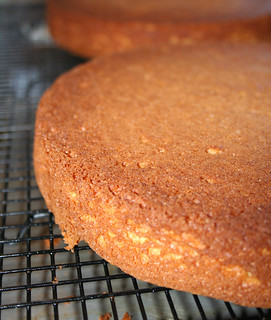
And I have to say: this poke cake is spectacular. It starts with a cake mix, but it's fancied up right quick by using melted butter and milk instead of the water and oil called for on the package, and then once baked, it's poked and soaked (see? dirty-sounding!) with an absolutely dazzling chocolate and sweetened condensed milk mixture. Even served just like that, this cake could make you cry with joy.

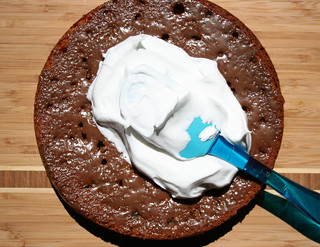
But save the tears, because there's still frosting! I used seven minute frosting, but you can use whatever type of buttercream or topping you'd prefer.

Seven minute frosting

It's a joy to dig into this cake, because it has all the joy of a yellow cake but the moisture and decadence of a gooey chocolate dessert. 

I'll leave it at this: it's a great cake. And anyone you make it for should consider themselves very lucky! 

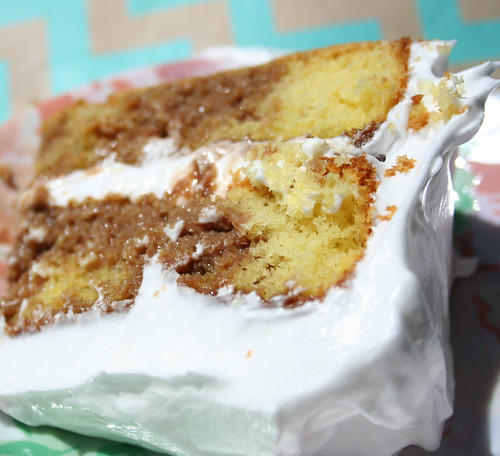
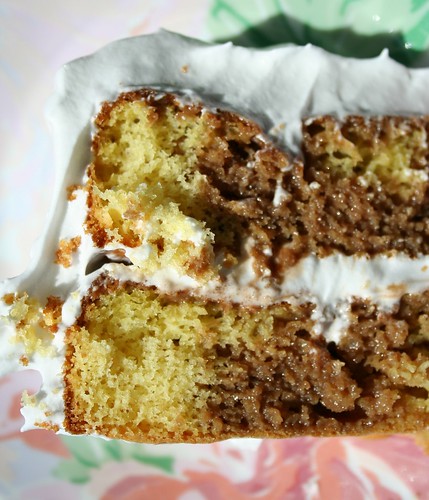
Chocolate milk poke cake

Printable version here

Makes one, two-layer, 8-inch cake

For the cake

  • 1 box cake mix (I used Pillsbury yellow cake)
  • 1 stick butter, melted
  • 3 eggs 
  • 3/4 cup milk
  • pinch salt

For the topping

  • 4 ounces dark chocolate
  • 1 can (14 ounces) sweetened condensed milk 
  • Pinch salt 

To top it all off

  • 1 batch seven minute frosting (recipe here) or buttercream of your choice

Procedure

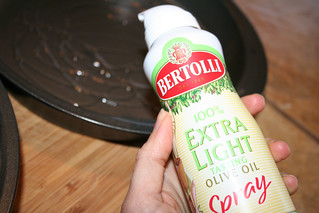
  1. Preheat the oven to 350 degrees F. Generously grease two 8-inch cake pans. I greased mine with some Bertolli spray because it had recently been sent to me and I thought it would be nice to say thanks. They didn't pay me to say that. 
  2. Poke cake
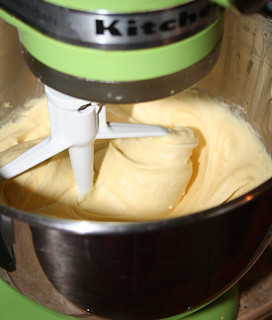
  3. Combine all of the cake ingredients in the bowl of a stand mixer. Blend on medium speed until smooth and lump-free.
  4. Poke cake
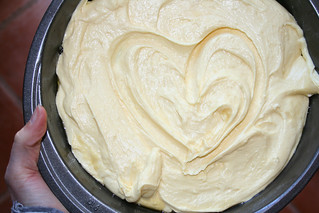
  5. Divide into the two cake pans, and bake for 30 minutes or until golden and a cake tester inserted in the center comes out mostly clean.
  6. Poke cake
  7. Remove from the oven, and after a few minutes, invert on to a wire rack set above a baking pan (to catch drips in the next step). 
  8. Poke cake
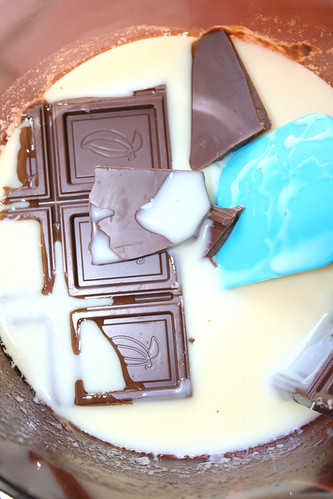
  9. In a medium saucepan over medium heat, combine the sweetened condensed milk and chocolate, stirring frequently, until the chocolate has melted. Remove from heat and stir in the salt. You can also do this while the cake bakes (that's what I did). 
  10. Poke cakePoke cake
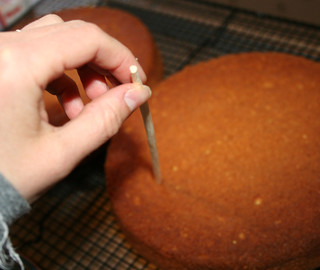
  11. Poke the cake all over at 1 inch intervals using a chopstick--but don't go all the way to the bottom.
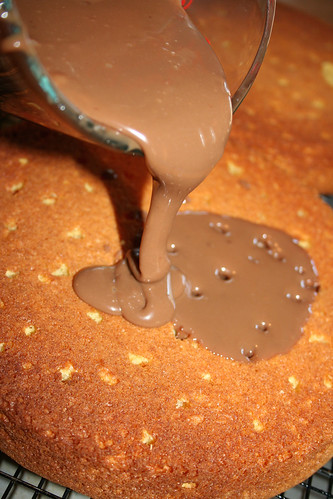
  12. Pour the chocolate mixture gently on top. If you're careful you shouldn't have too much loss of chocolate goo. Because it is tasty, and you want it in your mouth, not on the bottom of a pan. 
  13. Poke cake
    See how interesting they look?
Poke cake
    Let the cakes set for a while. Meantime, make some frosting. I used seven minute frosting but you can use whatever kind you like.
    Frost the top of one of the layers, stack the second, and frost the sides and top. Enjoy! 
Seven minute frosting

Have you ever tried a poke cake?

Grandma's Killer Chocolate Cake from Author James Patterson

Mystery Writers of America cookbook excerpt

Here's a riddle: what kind of cakes do mystery writers like?

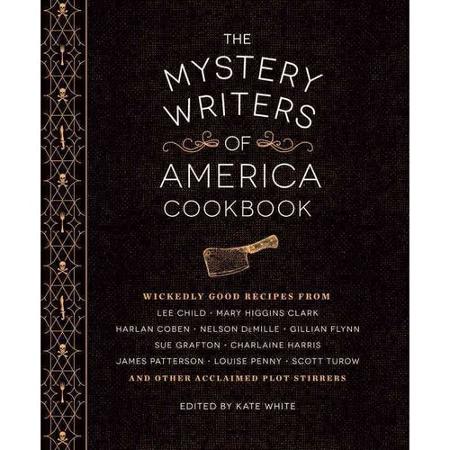
Happily, the new book The Mystery Writers of America Cookbook: Wickedly Good Meals and Desserts to Die For is ready and willing to answer this question in the most delicious way. It is a collection of recipes culled from famous mystery writers, and it makes for mighty sweet eating. 

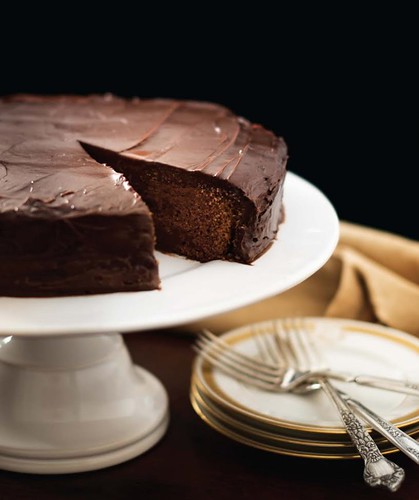
When choosing an excerpt recipe to feature here, my eye was drawn right away to "Grandma’s Killer Chocolate Cake: via mystery writer James Patterson. I hope you'll enjoy!

Grandma's Killer Chocolate Cake

Recipe headnote:

Here’s one “killer” Alex Cross always loves to catch—Grandma’s Killer Cake! A special family recipe dating from the 1940s, this decadent cake seems to get better with age; it is tastier on day two. And you need to be a good detective around the house after it has been made, sitting there in its glass­domed cake stand, staring back at you with deadly temptation, because a piece seems to mysteriously disappear every time I go into the kitchen. Not to be caught red­handed, so looms the “Killer Cake Killer”!

YIELD: 1 SINGLE­ LAYER 9x12 INCH CAKE OR 1 DOUBLE LAYER 9­ INCH CAKE

CAKE

  • 2∕3 cup butter
  • 2 cups granulated sugar
  • 2 eggs
  • 2 cups flour
  • 11∕3 cups buttermilk
  • 11∕3 teaspoons baking soda dissolved in 2 ∕ 5 cup hot water 31∕2 squares bitter chocolate, melted gently
  • 1 teaspoon vanilla extract

FROSTING

  • 1∕2 cup butter
  • 3 squares bitter chocolate
  • 2 cups granulated sugar
  • 2∕3 cup milk 1 teaspoon vanilla extract
  • 1 teaspoon almond extract


1. Preheat oven to 350°F. Cream butter and sugar together. Add eggs.

2. Blend in flour and buttermilk in alternating additions, starting and ending with the flour. Add baking soda mixture, followed by chocolate and vanilla extract.

3. Pour batter into one 9­by­12­inch pan or two round 9­inch springform pans. Bake for 30 minutes, or until a toothpick inserted into the center comes out clean. Remove from oven and let cool.

4. Combine all frosting ingredients in a saucepan, bring to a full boil, and boil for 2 minutes. Let cool. You can put saucepan on ice if necessary to cool quickly.

5. Remove the cake from the pan, frost, and serve.

About the author: James Patterson has sold 300 million books worldwide, including the Alex Cross, Michael Bennett, Women’s Murder Club, Maximum Ride, and Middle School series. He supports getting kids reading through scholarship, Book Bucks programs, book donations, and his website, readkiddoread.com. He lives in Palm Beach with his wife, Sue, and his son, Jack.

Excerpted from The Mystery Writers of America Cookbook: Wickedly Good Meals and Desserts to Die For edited by Kate White. Reprinted with permission from Quirk Books. 

A Sweet Visit to Florence, Colorado

Florence, CO

Last week, I went to Florence, Colorado. In case you are unfamiliar, this is a weird but wonderful little pioneer town in Southern Colorado. It's home to a bevy of antique shops, plenty of unique architecture, and...the penitentiary. Not kidding.

It makes for an interesting town. And happily, I had some time to explore it. Let me tell you what I found there:

Before I go into food, let me tell you that there is an enterprising artist in Florence who carves tree stumps into elaborate works of art. Here I am next to one of them.

Florence, CO

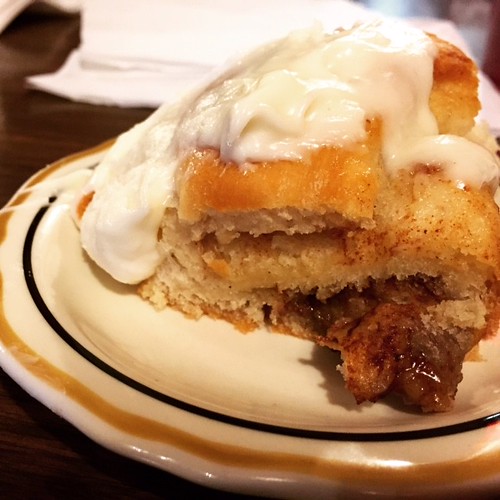
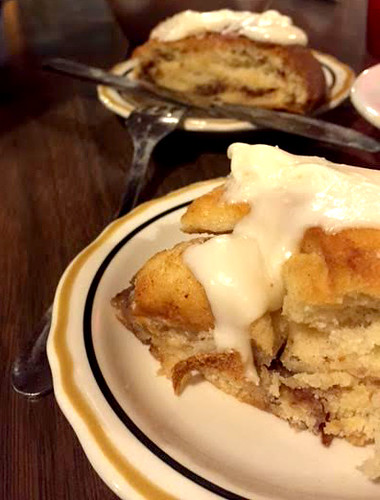
The first culinary stop was Two Sisters, which is an establishment which seems like it's of a bygone era, or at least a David Lynch movie. We got some very hearty beef strogranoff, which was the special of the day. To our amazement, when dessert came (included with dinner)...it was cinnamon rolls. Cinnamon rolls at night? Don't mind if I do.

Florence, CO

I was surprised to see that Two Sisters had mixed reviews on Yelp. It's certainly not the place to go if you're into organic food, or even vegetarian food. But as a special occasion trip to the Colorado frontier, I thought it was full of charm and homestyle goodness.

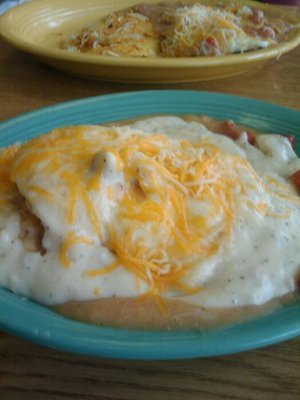
The next morning, we went to a place called the Rose Bud Cafe. Everything you ordered arrived covered in gravy. It was that type of place. They did have cinnamon rolls, but we didn't partake. But it did get me thinking: perhaps gravy and cinnamon rolls were the official foods of the town. 

Photo: Rose Bud Cafe Yelp page

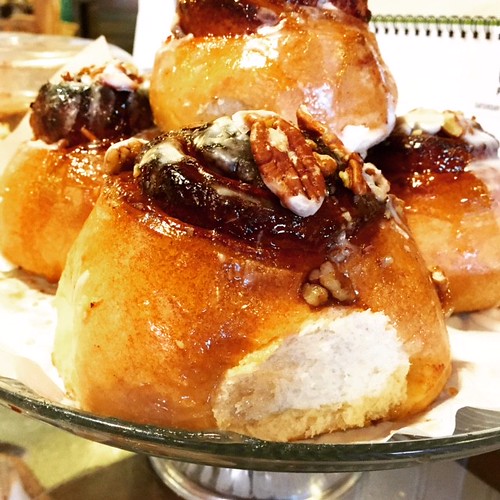
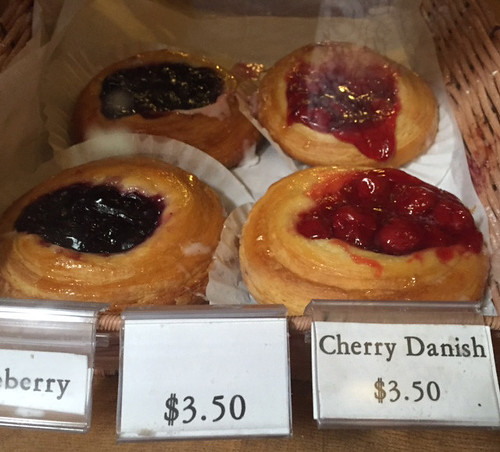
After breakfast we went to the local bakery, Aspen Leaf, and picked up a variety of treats, including pecan brownies, bread pudding, and bear claws. Oh, and yes: they had cinnamon rolls.

Florence, CO Florence, CO

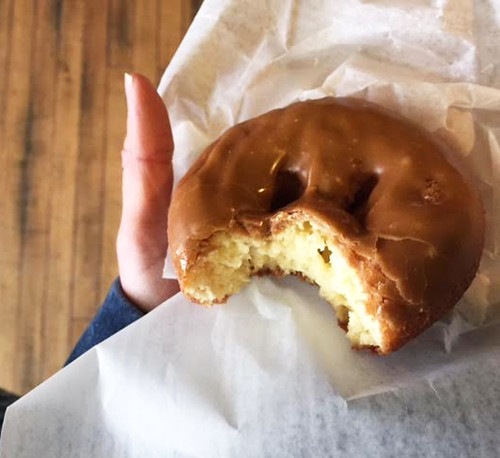
We went to the local coffee shop, The Pour House, and got coffee. And a doughnut, made in nearby Cañon City. Why not? 

Florence, CO

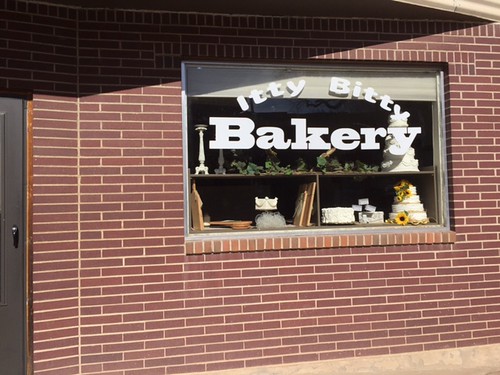
We walked by this place and were intrigued, but it was not open. Florence, CO

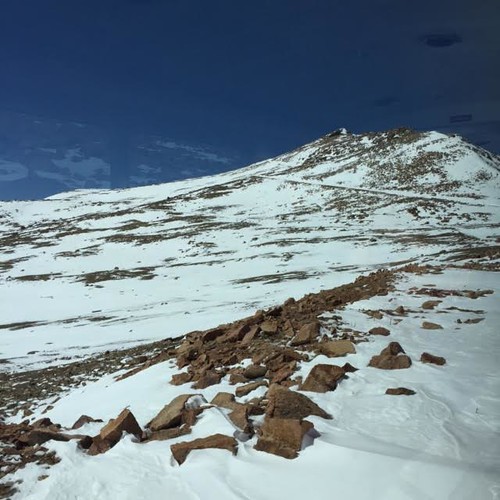
That day, we went to the Pikes Peak cog railway. Florence, CO

Here we are from very high altitude!

Florence, CO Florence, CO

For dinner, we went to my cousin Jason's house. Seriously, dudes, he built a house. They have chicks. Baby chicks. So cute! 

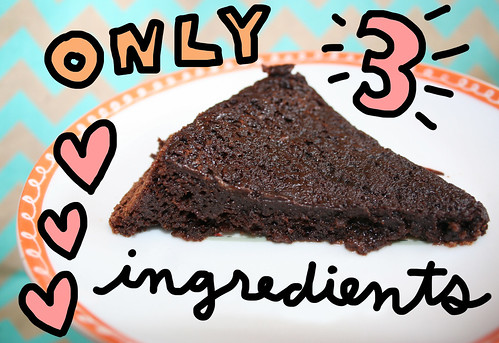
I made the three ingredient chocolate cake from this very blog for dessert and we ate it before it even cooled. Classy!

3 Ingredient Chocolate Cake

The next morning, we went back to Two Sisters for breakfast, since it was Easter and it was the only thing open. Cinnamon roll? Oh, too full. 

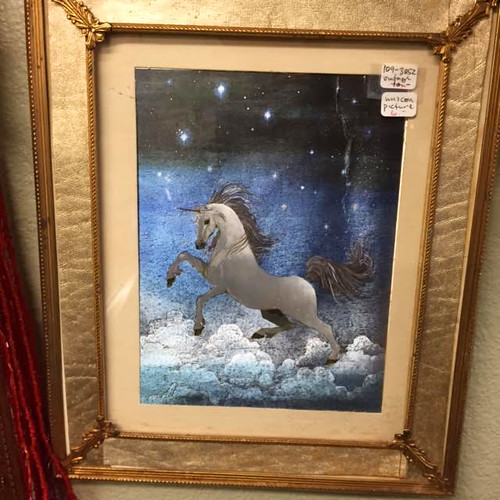
Luckily, a couple of the antique stores were open on Easter, so we toured them and I got THIS treasure:

Florence, CO

I probably should have bought this, but I didn't. If you are going to Florence anytime soon, it's all yours.

Florence, CO

We got home feeling tired and full. Overalll, it was a great and sweet trip!

Places Mentioned: 

Two Sisters

Rose Bud Cafe

Aspen Leaf

The Pour House

Pikes Peak

Yoberri, Santa Fe: Where I Ate Frozen Yogurt and Didn't Hate It

News flash: I ate frozen yogurt and I didn't hate it.

If you read this site, you know that I have strong feelings about frozen yogurt. It's not ice cream. It never will be. Keep it off my dessert plate, please. 

But as part of an ice cream and frozen treat expedition for an article I was writing for New Mexico magazine, I found myself duty-bound to sample the frozen yogurt at local Santa Fe mini-chain Yoberri. And I didn't hate it.

What is so special about this particular variety of fro-yo?

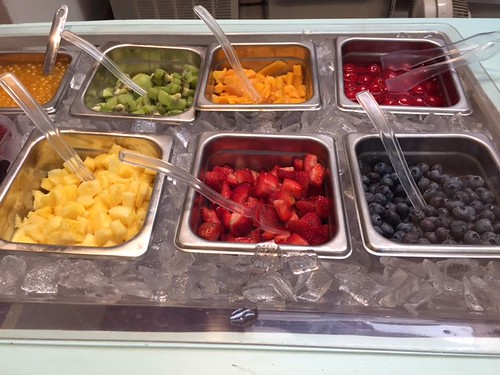
Yoberri, Santa Fe

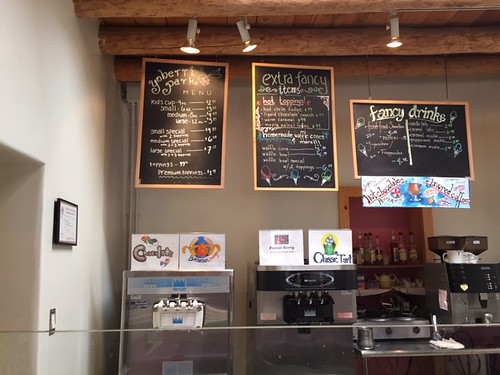
Perhaps it's the fact that it's made in-house, with quality ingredients. Perhaps it's because they make it with care and precision, and it has a smooth, non-grainy texture.

Or maybe it's the toppings, which include homemade maple fudge sauce, chocolate chili sauce, and more. And fruit, if you're into that (I AM NOT). 

Yoberri, Santa Fe


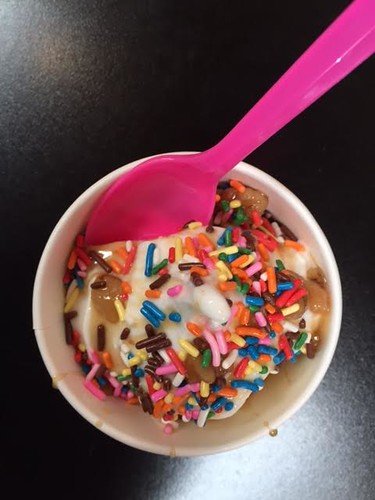
Whatever it was, I found this frozen yogurt downright enjoyable. I got the "classic tart" vanilla, and topped it with aforementioned maple fudge sauce and (natch) rainbow sprinkles. And I ate every bite. 

Yoberri, Santa Fe

Don't get me wrong, my personal preference is still for ice cream; I'm of the "gimme the cream!" sort of mentality that I'm sure other ice cream aficionados will appreciate. But as frozen yogurt goes, this is some of the best I have tasted, and I would eat it again. 

There, I said it. I enjoyed eating frozen yogurt. 

Yoberri, two locations in Santa Fe; online here

Baker's Dozen: A Batch of Sweet Links

Homemade battenberg cake

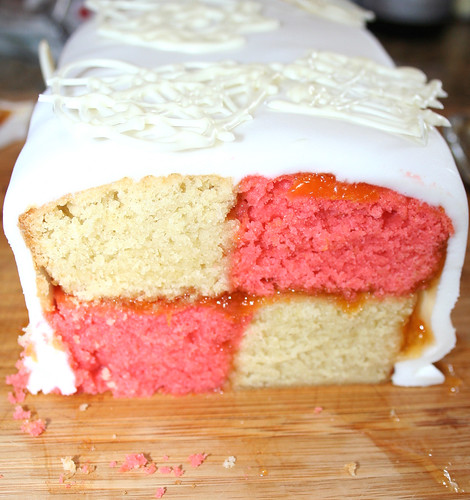
Battenberg cake! Make it now. (CakeSpy for Serious Eats)

Marble halvah recipe. I'm gonna try it! (Joy of Kosher)

I've been nominated to go back to Bali to teach. Vote for me? (Vote here)

My best friends, Ben and Jerry, have a sweet new product. Worth your time (Brr-rito)

Speaking of my bffs Ben and Jerry, did you see the cute cartoon I made to document my visit? (CakeSpy)

Easy pancake rolls, three ways. Don't you love the post already? (Crazy for Crust)

How to maintain a healthy relationship with sugar. By my friend Pam! (Peaceful Dumpling)

What was Abraham Lincoln's last meal? (History.com)

That led me to wonder: what about other famous people's last meals? (Mental Floss)

My kind of museum show: an exhibit on New Jersey diners. (GMnews.com)

Good eggs: the many purposes of eggs in baking (Craftsy)

Muscovado chocolate chip cookies. Get a little fancy, why don't you. (Love and Olive Oil)

In praise of doodling. (CakeSpy for Craftsy)

Carrot cake pop-tarts. (The Emotional Baker)

Matcha chantilly cakes. SO elegant. (Sprinkle Bakes)

Shortbread cookie truffles. Awesome. (CakeSpy)

Book of the week: 

Will It Waffle?: 53 Irresistible and Unexpected Recipes to Make in a Waffle Iron. Seriously. A dude puts every type of food in a waffle maker with one question above all others as motivation: will it waffle? You'd be surprised how often the answer is yes. 

Big note:

be sure to listen to me live on Sunday! Here are the deets:


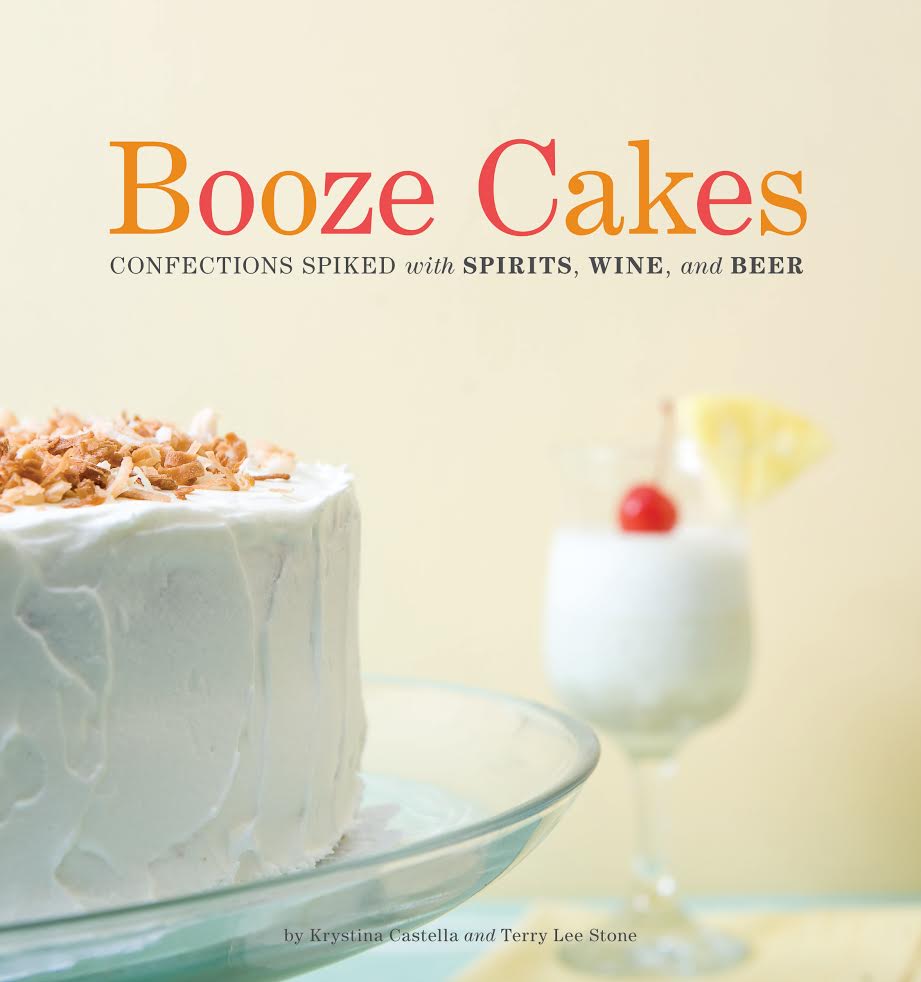
Intoxicating: Tipsy Cakes Class on Craftsy

I want to tell you about my friend Krystina Castella's new class, Tipsy Cakes, on Craftsy. Actually, I'll let her tell you about it. Seriously--it's such a fun class! Booze and cake, what could be wrong? Read on to learn more, directly from Krystina:


Are you a fan of creating cake flavors that have a boozy touch?

I just launched a new class Tipsy Cakes for Craftsy.com (note: you can check out the class trailer here!). The class paired with my and Terry Lee Stone’s Booze Cakes book (Quirk Books) is now the most comprehensive assemblage of technique and tested recipes on baking with alcohol out there.


I had been noticing ads for craftsy.com popping up in my browser over the past several months due to my 3­year­old sons obsession with watching sewing videos. So when a food anthropologist friend of mine who currently works for the company called me and said they have launched into cakes and asked me to develop a course based on the Booze Cake book for them I jumped at the chance. I was excited to have the opportunity to give Booze Cakes book fans more and something different. So what I decided to focus on is adding the collection of already creative and tasty recipes in the book with a behind the scenes focus on technique.


Why is baking with alcohol so much fun?

There are so many uncommon and interesting flavors that you can’t get with the typical vanilla and chocolate flavorings. When I started baking with alcohol it opened up a whole new world of ingredients and flavor profiles to experiment with and a whole set of recipes.

I worked out the curriculum and tested new recipes for months to get the techniques down. In the dead of winter I left the 87­degree temperature of Los Angeles for a week of the beautiful snowy streets of downtown Denver. The space where we baked and shot the class was great old cooking school. The support team from Craftsy that I was provided for the class was top notch.

Although I have written 8 cookbooks (7 on baking) and have worked as a professor teaching in front of people for over 20 years, shooting an on­line cooking class was something new for me. When on a photo shoot for a cookbook I am the producer­ the behind the scenes person and the food is in front of the camera­ not me­ and I was a bit nervous. Although after a day of practicing my jitters faded away and I got the hang of it and loved every minute of it.

My goals in Tipsy Cakes is to:

  • Take the mystery out of baking with alcohol, even for a beginning baker.
  • Teach how to incorporate almost any alcohol into cakes.
  • Show students how much flavor can be added with alcohol and discover what flavor profiles are the best with different alcohol types.
  • Offer base recipes with endless variation possibilities so students can adapt their own recipes to include their favorite booze.


In order to help student create their own recipes I created a flavor profile chart for the class. On it I mention suggestions of flavors to try out for your own recipes.


Pairing alcohol with cake: some basics

  • The first place to start is to look at popular cocktails. The White Russian Cake I developed for the class is made with similar ingredients as a White Russian drink: vodka, cream and coffee liqueur.
  • Alcohols paired in cocktails also make great inspiration for cakes. For instance, the B­52 drink is made with Coffee liqueur, Irish cream and Triple sec; you might try to make a B­52 cake with coffee liqueur cake with Irish Cream Buttercream and a Triple Sec Soak.
  • One good rule of thumb when thinking about how to pair alcohols with both sweet and savory flavors is to think about what you like to eat with a favorite alcohol.
  • Do you like to snack on cheddar cheese or eat other salty flavors such as salted nuts when you drink beer? Adding them to a beer cake will also taste good.
  • Another place to look for inspiration are the flavor overtones in the alcohol. For example white wine have citrus, apple, plum and mango, hazelnut overtones. Therefor orange, lemon, apple, plum and mango cakes will taste great with white wine added. 

Other things you'll learn in the class

The course consists of 7 classes, each focusing on what to consider when baking, soaking or adding to frostings and making garnishes. In each class students learn how to get the most flavor in their cake from specific classifications of alcohol.

In the Rum Lesson students learn how to make a soak.

In the Fruit and Nut Liqueurs Lesson students learn to add sweetened fruit­ and nut­flavored liqueurs into fillings and frostings. In the Coffee and Cream Liqueurs lesson students learn how to retain alcohol in baking while still giving the cake enough time to bake through.

In the Hard Alcohol lesson students learn to exercise moderation, and incorporate small amounts of hard liquor to create surprisingly subtle flavors.

In the Beer Lesson I discuss different types of craft beer and explore some exciting flavor combinations that work with each.

 In the Wine Lesson students learn the benefits of reduction and how to create powerful and complex flavors.

Finally in Cocktail Cakes, the most fun lesson, I pull together the techniques demonstrated throughout the class and show a collection of cakes based on favorite mixed drinks.

Along the way students learn about flambé sauces, how to make a poke cake, an ice cream cake, and edible cocktail garnishes including chocolate and strawberry shot glasses. Also on craftsy.com you can ask me any questions you have about baking with booze and post your creations. I hope to hear from and see what you make there – Happy baking and good eating.

Special for CakeSpy readers: get 50% off the class here! 

Note: if you think Krystina is cool (she is!), you can follow her (and the class) on Facebook.

My Delicious Adventure with Ben & Jerry's

Vermont topper

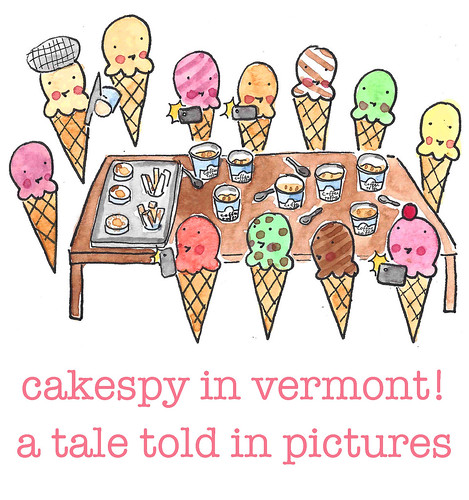
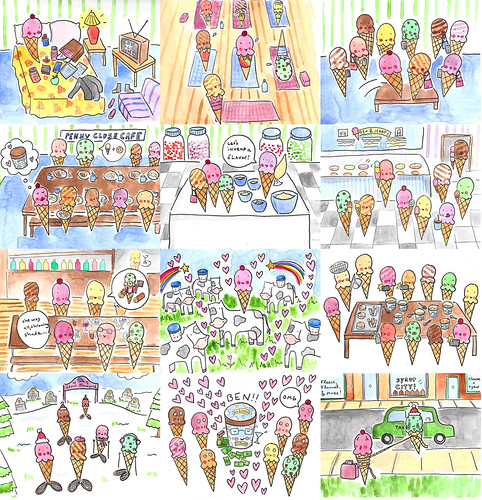
So, I recently went to Vermont. As a guest of Ben and Jerry. You might know them from the ice cream in your supermarket. Let me guide you through the experience in PICTURES. 

My Ben & Jerry's Adventure in Vermont

Vermont! I didn't know who else would be there for the event, and I was a little nervous. But I felt a bit better after I found an awesome goodie back including all sorts of made-in-Vermont treats and a fleece jacket emblazoned with the Ben & Jerry's logo in just my size, and after I had turned on Law and Order, of course.

Vermont trip

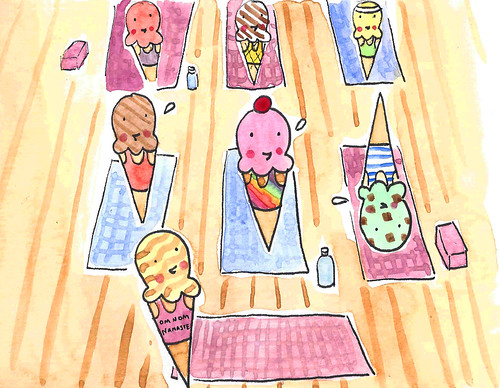
The next morning, I took a yoga class at a nearby studio before the Ben & Jerry's events started. Om nom namaste!

Vermont trip

Afterward, I returned to the hotel, got ready and headed down to the lobby, where I found who else but BAKERELLA! I did kind of tackle her. That part is factual. Vermont trip

We all went to the Penny Cluse Cafe, which used to be one of the first Ben & Jerry's scoop shop locations. Perhaps most importantly: we ate in the room where chocolate chip cookie dough ice cream was invented. Vermont trip

We headed to the corporate offices of Ben & Jerry's, where we split into teams. Mine included Bakerella (my darling!) and Nick from On Second Scoop. We got to invent an ice cream flavor with a flavor specialist who looked just like Alan Arkin. You can't really see it in ice cream form, but trust me on this one.

Vermont trip

We got to see the faux scoop shop in their HQ where they train franchisees. We also got to eat ice cream. Vermont trip

After our flavor adventure, we had a nice dinner out. Most importantly of ALL: it was on this fateful evening that I was exposed to some cultural phenomena I had not been previously: first, the term "lumbersexual"; second, the term "throwing shade". I now strive to use these terms in at least every other sentence. Vermont trip

The next morning, we got to visit one of Ben & Jerry's dairies. As long as you have absolutely no follow up questions, this is exactly what it was like. Vermont trip

After that, we got to go to their factory and see the ice cream made. For no particular reason, men wearing nets in over their hair hack ice cream for a job there!

Oh, I'm kidding. They slice the pints at random to make sure the fillings are evenly distributed. It does look like a Damien hirst ice cream art installation when they do it, though. 

Vermont trip

Since we were in Vermont, it was the law that we go snowshoeing. Since we were at Ben & Jerry's, our journey ended at the Flavor Graveyard, where they pay homage to flavors no longer in circulation. Vermont trip

WE GOT TO MEET BEN. As in, Ben & Jerry's. He was a really nice guy and he gave us each a stamp so that we could stamp dollar bills with political statements. I'm not kidding. Vermont trip

When it was time to go, I didn't want to leave.Vermont trip

But I did. I missed Porkchop and my sweetie too much to stay in Vermont, so I took a plane back home.

The End. 

Vermont

CakeSpy Undercover: Cloud 9 Creamery, Sante Fe

I get excited about ice cream. And I know, especially in the safe place of this website, I am not alone.

So when I was hired to write an article about ice cream for New Mexico magazine, I was super excited about the part of the article where I would be writing about the ice cream establishments of the state. Being a very hands-on person, I took it upon myself to try as many in person as I could.

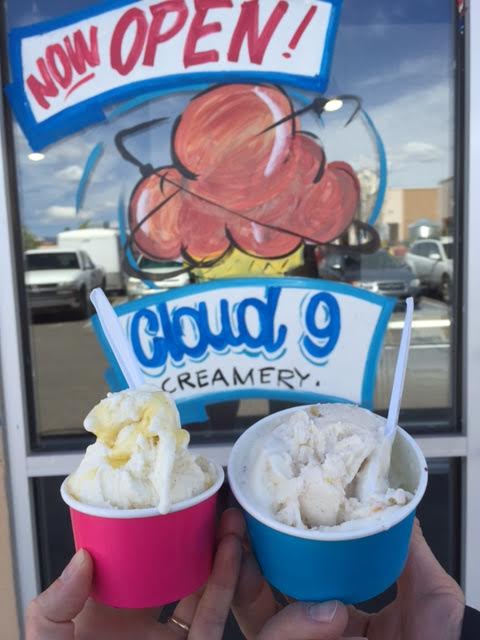
One establishment that impressed me in particular? Cloud 9 Creamery.

Talking to someone in yoga class about how I was going there after class (I really like to brag), another student chimed in and implied that I was in for a real treat. 

Dramatization:

So what makes Cloud 9 so special? Let me give you the 411. 

Cloud 9 Creamery shares retail space with another purveyor of tasty sweets, Cocopelli, in a large strip mall near the movie theatre.

When they first started, Cloud 9 Creamery was making ice cream in single servings using liquid nitrogen to make the ice cream. I don't know how it works exactly, but I know that when I tried the ice cream at Smitten in San Francisco, it amounted to pricey ice cream that took a long time to make. It was very, very smooth and creamy, yes. I was very glad I'd gone. But it took a long time to make, and I was hungry. I still remember that part.

Apparently, this was the reaction at Cloud 9, so they switched to more traditional methods of making ice cream--and gelato and sorbet, too. 

Well, I don't have the benefit of being able to compare the different methods side by side, but what I tasted at Cloud 9 Creamery seriously knocked my socks off.

Made in fairly small batches, owner Nicole uses local ingredients whenever possible, and will follow whimsy or special produce finds to make limited edition flavors (a great score on strawberries in the produce market? There's gonna be strawberry ice cream or sorbet today). This is to say that on the day you visit, there might be something special to try--do yourself a favor and try it, because it might not be there next time.

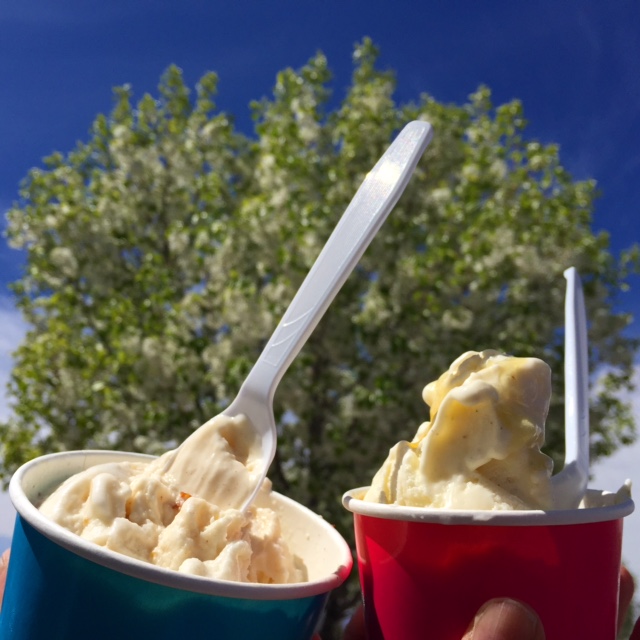
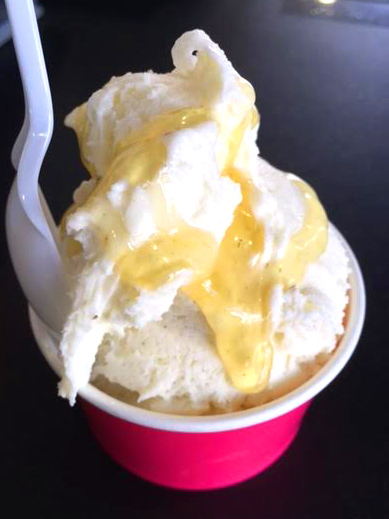
On the day of our visit, since I was focusing on the New Mexico aspect, we stuck to local flavors: for me, the honey-lavender, for my companion, the toasted almond and Sante Fe Pinon. We also tried the salted caramel (awesome), pistachio, and strawberry in little sample spoon sizes. 

How can I explain this ice cream to you?

Well, at the risk of sounding like I've lived in Santa Fe too long: this ice cream tasted happy

I'm a big believer that the maker can impart a flavor on their finished result--no, not by spitting in it or anything, but just by transferring their good vibes. And there were plenty of good vibes in this ice cream. It felt like a place that you could bring your kids, but as adults, you'd love it, too. This is totally in line with the owner's goal to create a family-friendly establishment--and to bring awesome ice cream to Santa Fe.

The flavors were well-balanced, interesting, and very creamy. Crave-worthy. 

We strolled along a sidewalk near the store that had spring blossoms in bloom, and we could almost ignore the commercial hardware store and general mall generic-ness in the sweet bliss of our ice cream moment. 

We both agreed: this ice cream was a keeper. I know I'll be back, and if it's accessible to you, I suggest you check out Cloud 9 Creamery. 

Cloud 9 Creamery, 3482 Zafarano Drive, Santa Fe. On Facebook