What is Baking Chocolate?

It looks like chocolate. It smells like chocolate. But if you've ever tried to take a big bite of so-called "baking chocolate", you know that it is not suitable for out of hand eating, and is not to be treated as a snack. So what is the point of baking chocolate, anyway? 

Let's discuss. 

What is baking chocolate?

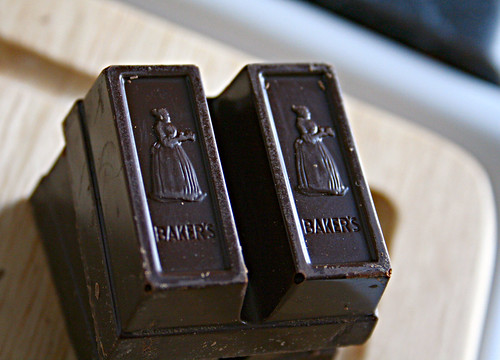
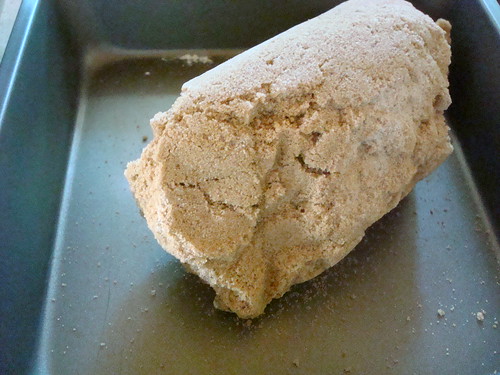
Baker's Chocolate

Photo via Flickr member eggplant

This type of chocolate comes in bars, but not the kind that you’d like to eat as a snack. The reason is that baking chocolate, which also goes by “unsweetened chocolate” or “bitter chocolate”, does not contain sugar. It’s solidified 100 percent chocolate liquor (the center of cocoa beans ground to a liquid), but without the frills--sweeteners, emulsifiers, flavorings--that make chocolate a sweet eating delight.

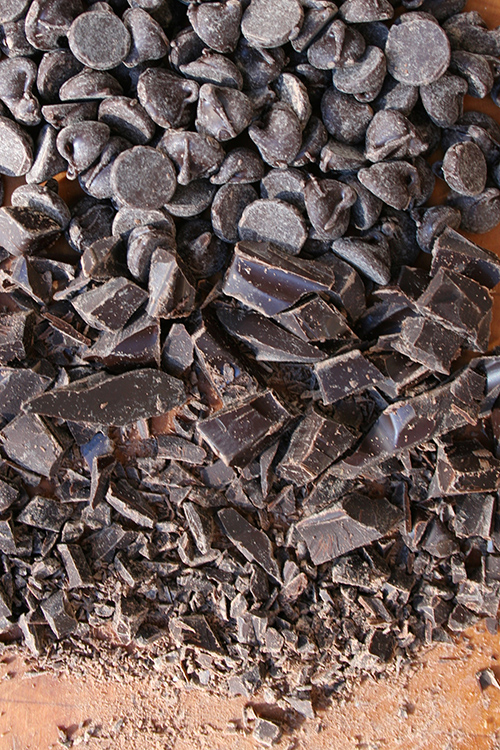
Once that chocolate liquor has been fancied up a little bit with cocoa butter, sugar, emulsifiers, and maybe some flavoring, it becomes dark chocolate. It retains a high percentage of cacao. What most people think of “dark chocolate” is 65% to as high as 99%. The higher the number, the less sweet the chocolate.

Dark chocolate varieties also include semisweet and bittersweet chocolate. They contain less chocolate liquor--a minimum of 35 percent--bittersweet often carrying more cacao than semisweet. And they contain sugar. It’s a variation sugar-to-cocao ratio that differentiates the two. Because of its sweeter flavor, semi-sweet is more commonly used in baking, and it’s the go-to chocolate type for chocolate chip cookies. 

Working with baking chocolate 

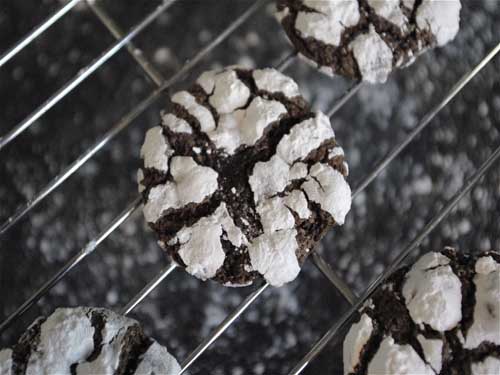
These crinkle cookies are made with unsweetened chocolate in the batter.

If baking chocolate has no sugar, what's the point?

Baking chocolate is not the best choice for out of hand eating, but it's a great component to mix with other ingredients to make a recipe. 

Typically, baking chocolate will be mixed into batter when baking, and the sweetness comes from elsewhere in the recipe, bringing out the flavor of the chocolate. It’s not suggested that you use baking chocolate as a substitute for chocolate morsels in cookies or as a candy coating.

Not to confuse you, but...

bakers chocolate

Photo via Flickr member zanastardust

One of the most famous brands offering baking chocolate is Baker's Chocolate, America's oldest continually run chocolate company. Often, people will refer to baking chocolate as "baker's chocolate", possibly because of the association of this company with producing the unsweetened stuff.

However, the Baker's chocolate brand also offers a variety of sweetened chocolate products, including German's sweet chocolate (an innovation by a gentleman named Samuel German, and where German chocolate cake gets its name), white chocolate, and semisweet chocolate. So while Baker's offers baking chocolate, not all chocolate by Baker's is baking chocolate. Got it? Good. 

Can I substitute another type of chocolate?

Well, I'm not going to flat out reject you here, but I am going to give you some considerations to think about if you want to substitute, say, dark chocolate for baking chocolate.

If your chocolate has sugar added, it may slightly alter the chemistry of the recipe. For instance, if your recipe calls for 4 ounces of unsweetened chocolate and you use 4 ounces of sweetened chocolate, you're adding extra sugar to the recipe, and you can't be quite sure how much. The recipe might come out just fine, or the added sugar might affect the texture or bake time. Or it might just make the recipe too sweet. Is it worth the risk? Up to you.

I hope I've given you a helpful little primer here--feel free to chime in with any questions about baking chocolate and I can add to this article to make it even more helpful. Oh, and if you liked this post, check out the more comprehensive posts on the types of chocolate for baking.

How do you use baking chocolate?

"The Cake"

I need to tell you about something called The Cake.

Here's the story: my darling one has a handwritten book of family recipes, and one is definitely more captivating than any others, because its name is simple, mysterious, and a bit imperious...

It has a credit of Claire Goddard. I have never had the pleasure of meeting Claire, but based on her cake, I'm pretty sure I would like her. 

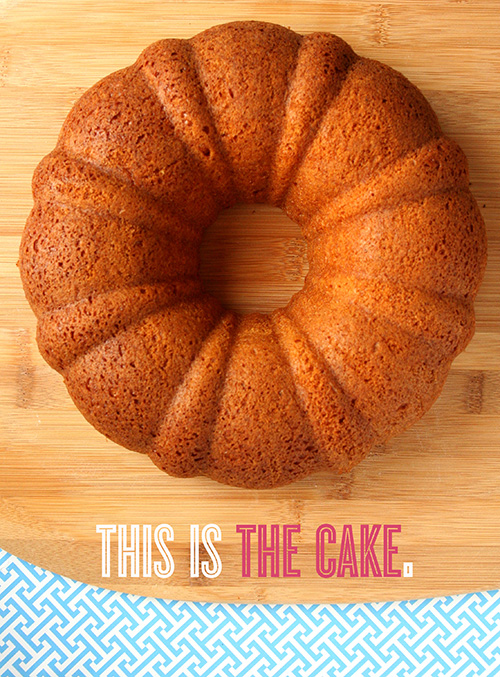
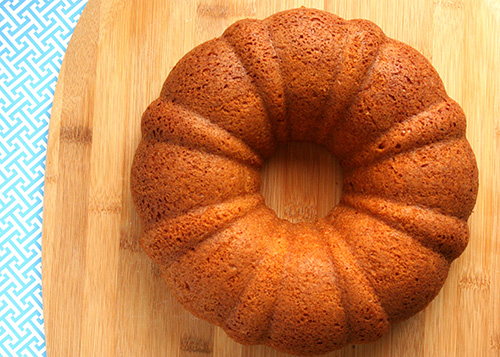
This cake is pretty, but perhaps not exceptional to look at: it just looks like a pleasant cake baked in a doughnut shape.

But one bite will tell you that there is something special about the cake. It's rich, probably owing to the high amount of eggs, and it is a bit tipsy, owing to the whopping 3/4 cup sherry (or rum, thankyouverymuch). It also has that certain addictive quality that boxed yellow cake always seems to impart on a cake (evidence: gooey butter cake). It's the sort of cake that doesn't need frosting...

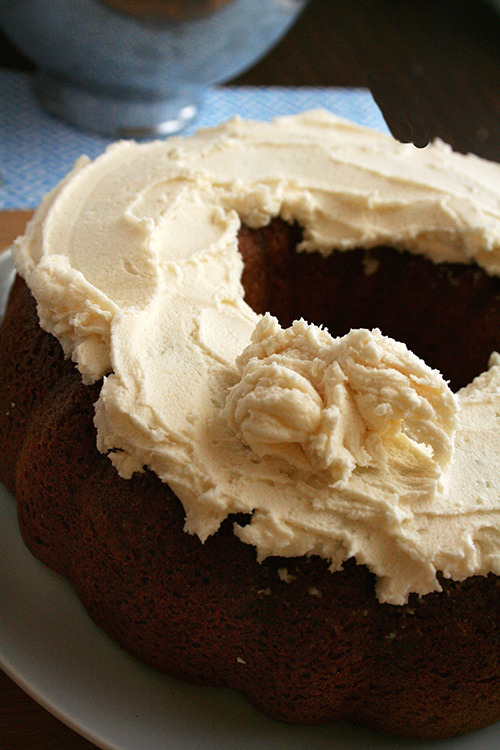
but hey, why not?

Even in spite of the above selling points, I'm not sure how exactly to explain the pleasure of The Cake. It isn't the fanciest dessert you've ever had, but it's got star quality--a certain je ne sais quoi that you can't quite put your finger on, but you're drawn to nonetheless.

The Cake is worth your time--I promise. A little treasure from my family's memory box to yours.

"The Cake"

Slightly adapted from Claire Goddard

Note: the original recipe calls for 3/4 cup vegetable oil; we used part coconut oil. You can use 3/4 cup vegetable oil if you prefer.

I used Pillsbury Super Moist Yellow Cake Mix for this recipe. 

  • Serves 6-8 
  • Prep: 10 minutes
  • Baking time: 45-50 minutes

Ingredients

  • 1 box yellow cake mix
  • 1 package vanilla instant pudding
  • 4 unbeaten eggs
  • 1/2 cup vegetable oil
  • 1/4 cup coconut oil plus 1 tablespoon 
  • 3/4 cup sherry or rum
  • 1 teaspoon nutmeg
  • 1 1/2 cups buttercream frosting, for topping (optional but suggested)

Procedure

  1. Preheat the oven to 350 degrees. Grease a tube or bundt pan; set to the side.
  2. Combine all of the ingredients in the bowl of a stand mixer. Beat on medium speed for 5 minutes.
  3. Transfer to a greased tube pan (we used a bundt pan). 
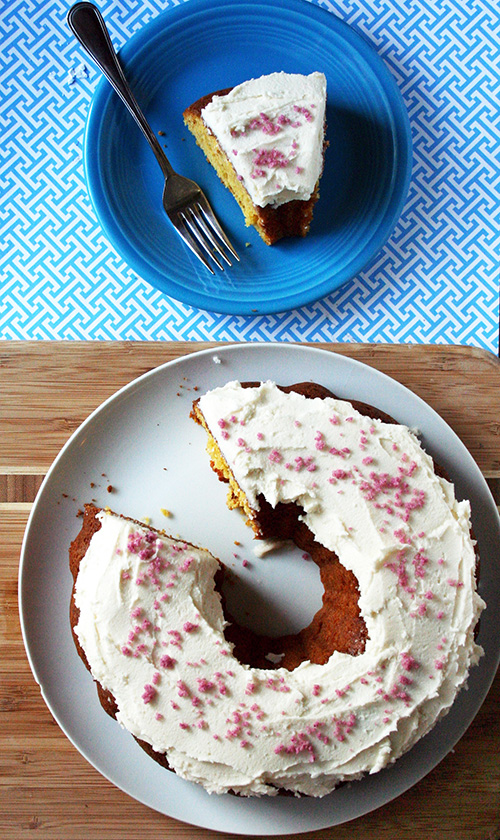
  4. Bake for 45-50 minutes. Let cool for about 20 minutes before inverting on to a serving rack. Serve as-is, or covered with frosting (that is my suggestion) or with ice cream. 

Do you have any mysterious family recipes?

What is Cornstarch and What Does it Do?

I'll just get right into it: what is cornstarch and what does it do?

This question came up when I was chatting with a gluten-free friend who said she'd recently made a GF brownie mix that called for 1/2 cup of added cornstarch in the event of high altitude baking. Well, that's odd, I thought. I wonder why? That seemed like a lot of cornstarch to me. Maybe there are some things I don't know about cornstarch?

And so I figured, for my reference and yours, I'd come up with a roundup of what cornstarch is, what it does, and how to use it in your baking. Ready? Set? Let's go.

Cornstarch: what is it? 

The short version? Cornstarch is derived from the endosperm (tee hee) of corn kernels, which is ground into a find powder. It's used primarily as a thickener and binder both in savory and sweet cooking and baking.

Cornstarch: how is it made?

The long version? It's sort of confusing, but here's what I gleaned from the International Starch (really) page. First, corn is steeped in hot water for up to 48 hours. The germ is then separated from the endosperm, and still steeping, they are both, respectively, ground. Starch is separated from the steeping liquid, the remaining cereal germ, and corn gluten--mainly in centrifuges and hydrocyclones (a cyclone-shaped device). The starch is then modified by applying different reaction conditions - temperature, pH, additives. This process creates the corn starch with unique and reliable properties we use for our culinary projects. 

Key roles cornstarch plays in baking

Lemon meringue pie

Cornstarch as a thickening agent

Cornstarch can be added as a thickener to a variety of mixtures, from gravy to pie fillings to custards or cake fillings. It has more power, ounce for ounce, than flour, which is also used for this purpose; increasingly, the fact that it is also gluten-free is attractive to bakers, enabling them to make gluten-free pie fillings and custards. 

Here's what happens when cornstarch is added to the mix: heat causes the starch to bind with molecules of water, and the starch begins to swell as it absorb the liquid. When the mixture comes to 203 degrees F, the starch will have expanded to about 10 times its size while still in powder form. However, this expanding is finite. You can bring cornstarch-enriched sauces or mixtures close to a boil, but don't let them fully boil and don't stir too vigorously. The starch will start to deflate, erasing the entire purpose of adding it to your mixture. 

The cornstarch will not only become thicker in heat, but as it cools, it will set, so it's a great way to further solidify desserts tending toward gooey such as the filling of Lemon meringue pie, without the cloudy color that flour might impart.

There are considerations for using cornstarch as a thickener. According to this website,

  • If you add cornstarch directly to a liquid, it can get clumpy, especially if added to a hot mixture. First, make a slurry of equal parts cornstarch and a cold liquid. Add this liquid paste to the mixture you want to thicken for better results. 
  • Cornstarch doesn't react well with acidic ingredients. Tapioca starch or arrowroot will work better for thickening acidic mixtures.
  • Cornstarch imparts a glossy, translucent sheen to the mixtures it thickens, so it tends to be used more in sweets rather than savory sauces. 

Cornstarch in cookies and cakes
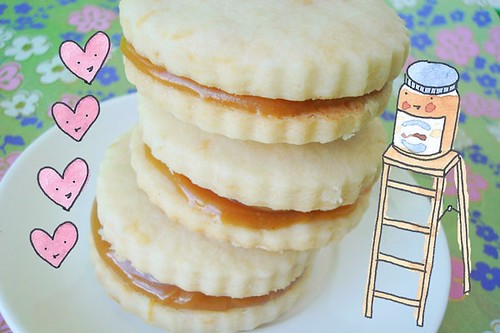
Peanut Butter Alfajores

Cornstarch not only thicken sauces and mixtures, but it can be used in baked goods such as cookies or cakes, too. It is said that cornstarch used in combination with flour can "soften" the harsh proteins of flour, making a more tender baked good. Anecdotally, I can tell you this is true. A recipe such as shortbread which employs part flour and part cornstarch yields a cookie with the perfect crumb: crumbly, but not fall-apart. Tender and delicate, but in a way that the cookie still holds its shape.

As I learned on a King Arthur Flour forum, it is also one of the secrets of cake flour.

Cake flour has been treated with chlorine gas which acts not only as a whitening agent, but also has a maturing effect on the flour. It damages the proteins that form gluten so that these will not form the long stiff chains and networks that make good bread, but also breaks down starches so that these will absorb more water. These hydrated starches then "gel" during baking to provide an alternate structure (alternate to gluten formation) which is desirable for cakes; tight, even crumb, moist, very tender.

You can make your own cake flour substitute, by the way. All you have to do is add two tablespoons of cornstarch per cup of all-purpose flour for a recipe. While it won't yield exactly the same results, it will certainly yield a more delicate baked good than all purpose flour alone. 

Cornstarch as an anti-caking agent

The difference between confectioners' sugar and granulated sugar? Primarily texture--confectioners' sugar has been finely ground (and you can make your own, at home, btw!)--but it's also the fact that confectioners' sugar is mixed with a small amount of cornstarch. The starch acts as an anti-caking agent by keeping moisture and condensation from forming the sugar granules into lumps.

Cornstarch isn't just used to discourage moisture from ruining your sugar. If you buy shredded cheese in the supermarket, chances are it has cornstarch in the mix--this keeps the moisture and condensation from making your cheese slimy. However, with cheese, there is a caution involved. The starch can turn brown quicker than the cheese in heat, so it can give a false indication of doneness. 

Frequently asked questions

Still curious about cornstarch? Here are some answers to commonly asked questions.

Why is cornstarch used so often in gluten-free baking?

Probably first and foremost because it's naturally gluten-free. Both cornstarch and flour are considered "cereal starches"--but the main difference is the aforementioned gluten. Flour has it; cornstarch does not.  But, you know, it also adds structure to baked goods, and this can be helpful when they lack the "glue" of gluten. 

Is it possible I know this stuff by a different name?

I've seen it as "corn starch" and "cornstarch"--I prefer the one-word variation. You'll see it referred to as such in US and Canada; in other countries, it may be called "cornflour"--not to be confused with cornmeal. 

My cornstarch got all clumpy in my pie filling. What's up? 

Nobody likes clumps and lumps in what should be a smooth pie filling. To avoid lumps, make a slurry (equal parts cold liquid and cornstarch) before incorporating the starch into the pie filling mixture. 

I'm sure I did everything right, but the starch didn't thicken my mixture.

Check the expiration date. Cornstarch does not last forever, and an advanced age can very much affect its thickening abilities.

Other possible causes: the mixture got too hot and the starch broke down; you overstirred and the starch broke down.

Help! My pie filling began "weeping". Is the cornstarch to blame?

Cornstarch can thin as it stands. The technical term is "syneresis", and it is characterized by a liquid "weeping" from the filling. It tends to happen more with mixtures including eggs or a lot of sugar. One of the culprits can be overstirring--this can break up the starch and make it thin out. Be sure to follow the instructions on your recipe to ensure that you are following the specified guidelines for how to treat the cornstarch mixture.

Don't have cornstarch?

Here is a list of some substitutes you can use in baking.  

Can I use cornstarch instead of flour?

Go ahead and give it a try. Cornstarch has twice the "thickening" power of flour, so you won't need as much. This helpful table will assist in substitution amounts. 

Recipes with cornstarch
Marquesote

What's your favorite recipe containing cornstarch?

Friday I'm In Love...With Cake For Lunch

Cake for lunch!

When was the last time you consciously and lovingly treated yourself to a cake date? 

I did last Friday at lunchtime, like I do every Friday. It's one of my favorite moments of the week: I call it Cake For Lunch Day. I used to refer to it as my "naughty lunch day", but a beautiful reader comment on my facebook page reminded me that no dessert should really be considered naughty. Well, to be completely honest, I don't mind a little naughty in my life--it keeps things interesting. But I can understand how it might be playing into an unhealthy trend to classify dessert as "naughty", so to make it an accessible day for anyone, Cake For Lunch Day it is.

Important note: Friday is not the only day I eat cake or sweets. It's just the official day I have designated for this ritual. I eat something sweet every day!

Cake for lunch is a political act

Frequently, dessert is strongly associated with guilt. All too often, the presentation of a beautiful cake or pie is greeted with a chorus of responses:

"I couldn't", "I shouldn't", "I wouldn't want to spoil my diet!"

So when do we deserve cake? When we reach our "goal" weight? When it's our birthday? When we get the new  job?

Why do we have to wait for "someday"? While it's true that we shouldn't be eating cake all day every day, there is a part of these responses that smacks of sad exclusion: I can't eat cake because I don't deserve it. 

Having suffered from a potpourri of eating disorders in the past, I used to be scared of cake. I still am, sometimes. But this fantastic ritual has given me something sweet that I would like to share. It is a pleasure to eat cake for lunch. But it is also a statement: I deserve pleasure.

The unofficial rules of Cake For Lunch Day

Cake for lunch!

On Friday morning, I eat breakfast as usual. Whatevs. Then I go about my duties for the day.

And then when it's lunch time, I go out on a spying mission for cake. It can be any type of cake I feel like; the only real "rule" is that it has to be made by someone else. Not because I can't bake, but because it's a real treat of a whole different level when someone else makes it. I generally like it to be a nice, fat slice of cake. 

I then come home with my cake, pour a glass of milk, and eat it for lunch. Sometimes I will eat the whole slice, sometimes half and then eat the rest after dinner. Sometmes I will eat 3/4 of it, take a short break, then finish it off with another mini-glass of milk. Usually, I will accompany my cake for lunch with either a beach-type novel or a fresh issue of In Touch Weekly. Is it still a guilty pleasure if I am proudly announcing it?

The positive effects of Cake For Lunch

Cake for lunch!

Some people might be tempted to start in with the naysaying, with statements like "eating cake for lunch isn't healthy!" or "you should really watch carbs during midday" or "is the cake at least gluten-free?". Probably, I am making some nutritionist somewhere scrunch up their nose. Heck, even my formerly anorexic-leaning self wants to start calculating how many calories were in that slice of cake and how little I can eat for the next week to "make up for it".

But I resist all of these voices. Because here's the thing: when the cake is gone, I always have a feeling of supreme happiness. Look at this wonderful thing I just did for myself! Even though the cake is eaten in less than 20 minutes, the experience has ripple effects of happiness that last all day long. These happy ripples make the following happen:

  • I am nicer to people and even to my pug.
  • I don't feel like it's a hassle to hold a door open for someone or let someone into my lane of traffic.
  • I feel calmer, which makes me feel better if I encounter a long line at the post office or see someone pull out a checkbook in the grocery store line.
  • I have just enough of a sugar high that makes me want to turn the radio up and do a little dance.

You can't tell me that these things don't contribute to making the world just a little nicer. 

The best thing about Cake For Lunch Day (aside from the cake)

The best part of Cake For Lunch Day isn't the cake itself. It is the fact that I took the time and energy to be sweet to myself. To give myself something that is in the scheme of things unnecessary, and a thing that sometimes society can deem downright devilish. 

But I am not anorexic or bulimic anymore. I don't have to just dream about cake, or deprive myself then binge on it in such a dissociated way that I don't even stop to taste or enjoy.

Breaking free of an eating disorder means that I am free to treat myself to, eat, and enjoy cake. On the one hand that might seem a a gift I've always had the ability to give myself...but now, I'm willing to receive and enjoy it. Maybe you could, too.

Make your own Cake For Lunch Day

Cake for lunch!

I urge you to make room for a dessert date in your life. If you want, it can be Cake For Lunch Day on Friday, just like me--it's a day good enough to share, and I like the thought of virtually being a lady who lunches with you.

It doesn't have to be a slice of cake--it can be a brownie, or a cookie sandwich, or even a slice of pie. What it does have to be, however, is something that gives you pleasure.

So go ahead, I dare you--no, I invite you--make a date with yourself to enjoy cake. Because we all deserve to enjoy something sweet.

How do you treat yourself (cake-related or otherwise)?

Fat and Sweet: Roly Polies Recipe

Making Pie crust with Spymom

Growing up, when SpyMom brought out the pie plate and the rolling pin, the entire family got very excited. 

You may assume that it was because it was pie time.

I know what time it is.

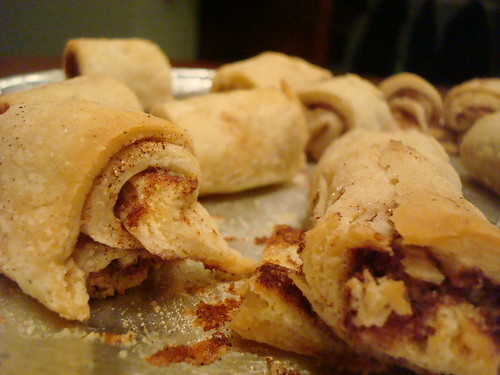
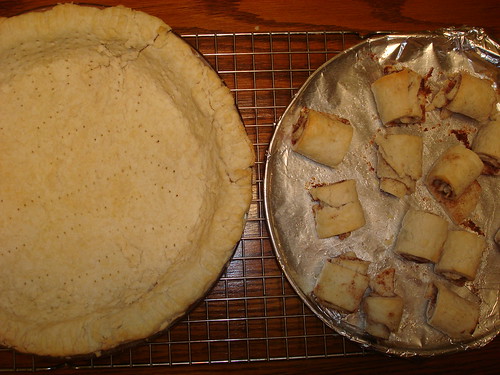
But, well, you'd be wrong. Because although we weren't going to turn away one of SpyMom's pies, what we really craved were the precious bits created with the leftover scraps of dough, which she'd polka-dot with butter then sprinkle with cinnamon and sugar and then roll into spirals, baking them in the residual heat of the oven and presenting them to her hungry masses under the name Roly Poly. 

I have no idea why SpyMom called them Roly Polies--she said that she had started making them because that's how she'd been taught to use the leftover pie dough from a neighbor, when she was a girl. It's likely owing to their short and squat nature. After all, when I just now looked up the definition of "roly-poly" in the dictionary (it was there!), it said "A short plump person or thing."

Making Pie crust with Spymom

I don't know how to scientifically explain how such a simple thing as coating pie crust with butter, cinnamon, and sugar creates a treat with an almost crack-like addictive quality. But just take a bite. You'll lose yourself in the gooey midsection of this pie crust cookie-treat, which is soft, but lightly salty, and gooey. You'll want more. I guarantee it.

And to prove it, I will present evidence of how beloved these treats have become in my family. No longer are they the way to use up leftover pie crust: my mom will actually make up an extra batch just to make roly polies.

Making Pie crust with Spymom

Me, I'm just as happy cutting simple strips. You can see for yourself the next time you've got some extra pie crust rolling around--but be warned, you may be setting yourself up for a lifetime of craving.

Roly Polies

Ingredients

  • Leftover pie crust
  • Butter
  • Cinnamon
  • Light or dark brown, or granulated sugar

Is your oven already heated? If not, preheat it to 400 degrees F.

Making Pie crust with Spymom

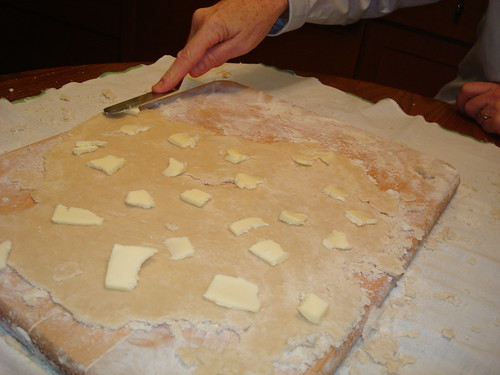
Dot the crust all over with butter. Making Pie crust with Spymom

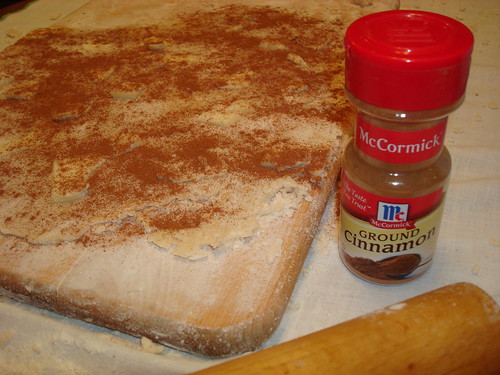
Now, coat it with cinnamon. If you want, give it a sprinkle of sugar, too. Making Pie crust with Spymom

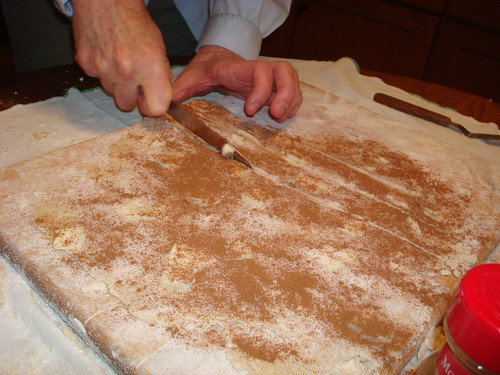
Now, slice it into strips.

Making Pie crust with Spymom

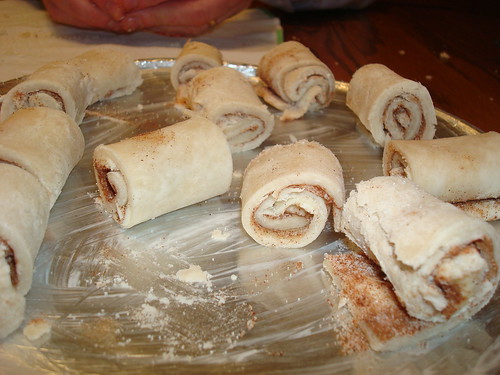
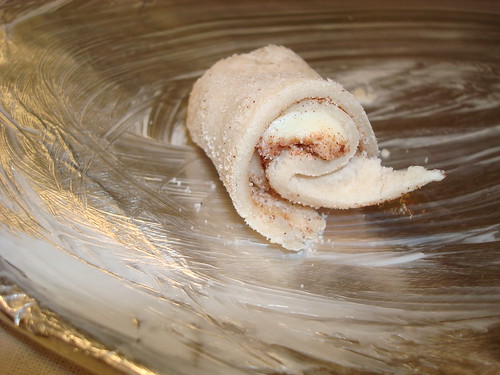
And then roll them up.

Making Pie crust with Spymom

Place them on a greased baking sheet. Making Pie crust with Spymom

Bake for 5-10 minutes, or until golden.

Enjoy! Did you have any treats like this in your house while you were growing up?

Ingredient Availability Cake: Brown Sugar Congo Cake

Brown sugar congo cake

Something I really, truly love is the phenomenon of how recipes evolve over time. What makes a recipe change? I suppose a number of things play into it: modern tastes, ingredient availability, time constraints, technological advances. Sometimes all of these things. Sometimes just one. 

I bring this up because it's a very roundabout path that led me to sharing this cake recipe with you. 

Brown sugar congo cake

What happened first, many years ago, before I was a professional CakeSpy, was that a little boy brought Congo Bars (made by his mother perhaps) to a class event. A little girl who may have already taken a shine to the boy for SURE took a shine to these bars, and kept the recipe. When she went to college, she began baking, but the recipe changed because of her limited equipment and ingredients. One notable change, for the better, she thought, was swapping out vanilla for kahlua or Baileys or liqueur. It didn't hurt anything, she realized.

I'm not this girl, but I met her recently. She brought these Congo Bars to my book signing in Collegeville, PA, and was kind enough to share the recipe with me.

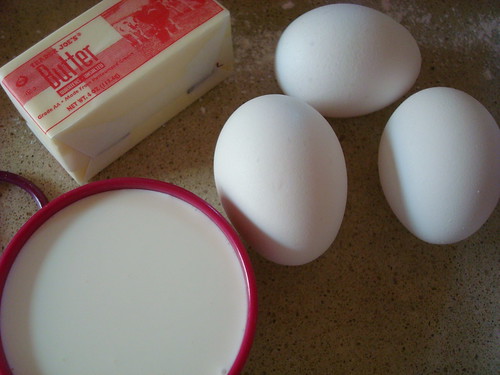
But then, the other day, when I pulled out the recipe, I realized there were several alterations I'd have to make. For one thing, the recipe didn't include how many eggs went into it, so I took a guess and decided on three, because I have a blondie recipe that has that many eggs. Why not?

Second, I realized that I only had one stick of butter; the recipe called for two. So I wondered...what would happen if I used half butter and half cream?

Brown sugar congo cake

Third, I decided that since I was messing with the formula anyhow, why not try making them more in the method of the Katharine Hepburn brownies from my book? So, I messed with the recipe again in that way.

The resulting recipe differed quite a bit from the delicious Congo Bars that were brought to the event, so I am going to save that recipe and share it with you another time. But I can say that while my result was very different, it was still pretty darned good. So here's the recipe as I made it, which I'll dub Brown Sugar Congo Cake.

Brown sugar congo cake

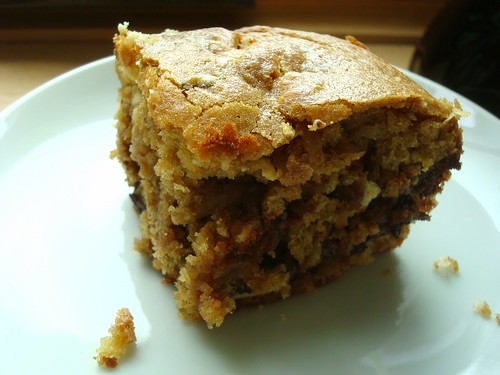
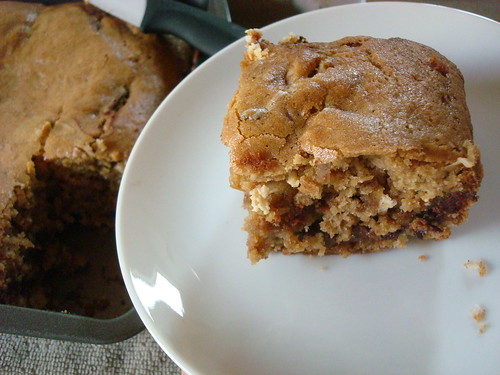
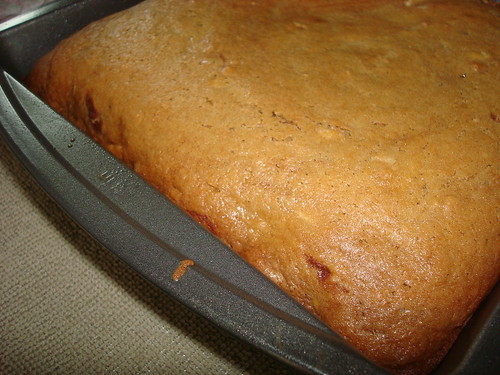
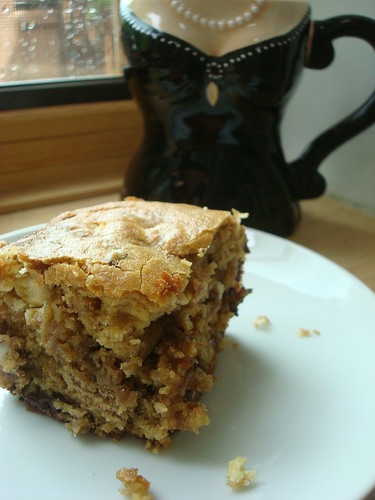
This light and fluffy cake is nicely chewy in the areas that have chocolate or gooey fillings, and it actually seems appropriate as a morning cake. I found it was especially lovely when topped with cream cheese or almond butter. 

Brown sugar congo cake

I should also tell you that the brown sugar I used was hard as a rock. But it wasn't a worry! All I did before making the recipe was heat the oven to 300, and then place the rock of brown sugar on a large plate and into the oven. After a few minutes the heat made it soften enough that I could break it up. Keep in mind, though, that this method must only be used pretty directly before baking, as the sugar will re-harden after an hour or so if not used. 

Brown sugar congo cake

Brown Sugar Congo Cake (Printable version here)

Makes 9 servings

Ingredients

  • 2 cups flour
  • 1 tsp baking powder
  • 1/4 tsp baking soda
  • a hefty pinch of salt
  • 1 stick butter
  • 1/2 cup heavy whipping cream
  • 2 cups brown sugar (light or dark. Your preference. I used light.)
  • 3 eggs
  • 2 tbsp. Coffee Liqueur or any liqueur that strikes your fancy.  
  • 12 oz chocolate chips or discs (semi-sweet)
  • 1/2 cup toasted sweetened shredded coconut
  • 1/2 cup toasted almonds
  • 1/2 cup toasted pecans

Procedure

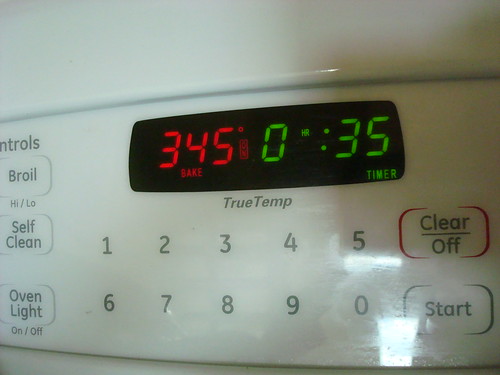
  1. Preheat your oven to 345 degrees (yep-- not 350).
  2. Brown sugar congo cake
  3. Sift together the dry ingredients; set to the side. Grease (with BUTTER) an 8x8-inch pan very well, especially the corners.
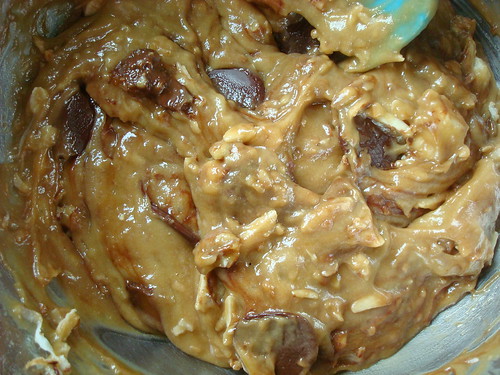
  4. In a large saucepan over medium-low, melt together the butter and cream, until the butter has completely disappeared. Add the brown sugar, stirring until completely dissolved into the mixture. Remove from heat.
  5. Add eggs, and mix until smooth. Add the dry ingredients in 3 batches.
  6. Brown sugar congo cake
  7. Mix in chocolate chips and any other stuff you want to add.
  8. Brown sugar congo cake
  9. Pour mixture into pan and spread evenly.
  10. Brown sugar congo cake
  11. Bake in your preheated oven for 30-35 minutes, or until golden on top and a cake tester comes out mostly clean.
  12. Brown sugar congo cake
  13. Remove from oven. Let them cool, and serve! Great in the morning with cream cheese or almond or peanut butter; great at night with ice cream. 

Happiness is a Dairy Queen Sundae

Dairy Queen

It's a funny thing about road trips. It's like by getting in a car and traveling a distance, your senses go through an awakening of sorts. All of a sudden you're a stranger in a strange land, and your senses are honed in this new world. Rather than drifting through your day in usual habits, you're practically pelted with new experiences, places, sights, and things. It's a fantastic opportunity to regain a certain curiosity about the world. 

Of course, there's also the subject of food.

Sometimes, road trips can introduce you to spectacular foods, be it a regional specialty or a blue plate special or a particularly excellent roadside burger. Nobody knows this better than Jane and Michael Stern, pioneers on the subject.

Sometimes, though, the food where you happen to stop during the hours you stop there totally sucks--that unique burger joint is closed for the day and all you've got at your disposal is gas station grub. 

It's times like these--and I am speaking for myself, but perhaps you agree?--that my perception about what is a "good" food and what is just ho-hum shifts. 

Starbucks, for instance. I like Starbucks, but living in a city, they're hardly destination-worthy--they're just around when you need them. But when you've just driven like 600 miles in one of the Dakotas and seen beautiful scenery but not much else for hours, if you see a sign for a Starbucks coming up, it's almost like a divine ray of sun shining right on you. 

Likewise with Dunkin Donuts, Baskin Robbins, and Dairy Queen. 

Now, as you'll know if you are a regular reader of this site...I'm not necessarily a sweets elitist. While I love me a fancy kouign amann or Opera cake or a delicately constructed battenberg cake, there's never been a point at which I feel I'm too good for Pop-tarts, Oreos, or the delectable Vanilla Kreme variety at Dunkin' Donuts. So I should say that I'm not opposed to eating mass produced ice cream--although I often consider it far more interesting to try regional joints with interesting flavors.

But I've got to tell you, that last week, when I was road tripping from Santa Fe to Los Angeles, when I stopped at the first eatery I'd seen for miles and miles, somewhere in either New Mexico or Arizona, and the single only eatery in town was a Dairy Queen, I could have wept for joy.

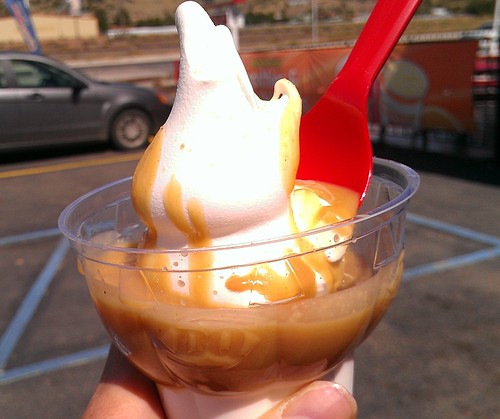
And those tears could have turned to straight-out sobs when I was served a peanut butter sundae.

Now, to the uninitiated, a "sundae" at DQ is really just ice cream with a sauce on top. If you want what I consider a sundae (whipped cream and a cherry in addition to the topping), there's an extra charge.

But sometimes, ice cream with sauce is all you need in the world. And they have quite a few different toppings to choose from at Dairy Queen, including but not limited to toffee, chocolate, peanut butter, strawberry, et cetera. After consulting with the cashier for what was probably an awkwardly long time about their different toppings (I was shown the industrial sized tubs from which they are ladled on to the soft serve ice cream), I decided on the peanut butter.  

The employee got a cup and pulled a lever, and into the cup cascaded a hypnotic stream of extruded soft serve ice cream. A perfect little tail-loop on top. 

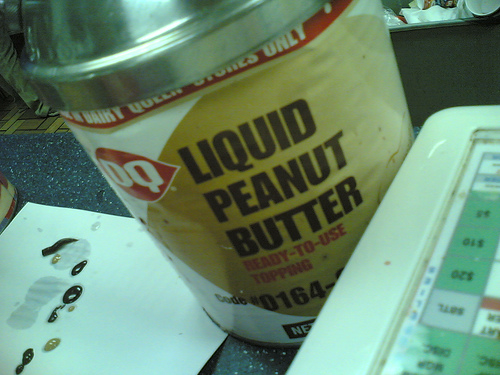
Then, she reached for the industrial sized container of peanut butter sauce--it was called "Liquid Peanut Butter". It had a pump, and she squeezed a generous three or four pumps on to my soft serve. I could tell she liked me! 

Photo via PostneoThen, it was delivered to my hot little hand. It was roughly $3 for the small size.

Now. In my non-road trip life, I would rarely have indulged in a moment like this. I would have been seeking out the really good stuff--the Salt and Straw, the Cupcake Royale, the Hoffman's, the ultimate Maple Creemee in Vermont.

But at this particular moment, outside of that Dairy Queen somewhere in New Mexico or Arizona, sitting outside under an umbrella, listening to the whizz of cars whooshing by on the nearby freeway, I stopped to savor. I paused. I watched the workers across the street at an auto body shop. I enjoyed every bit of my ice cream, one little spoonful at a time, industrial topping and all.

And I'll tell you, the experience was absolutely perfect. 

What's your favorite guilty pleasure food while road tripping? 

The Story of Animal Crackers

Animal crackers

CakeSpy Note: Sometimes, I like doing sweet things for you, readers. And so I decided to share an inside look at one of my favorite stories--and recipes!--from my new book, The Secret Lives of Baked Goods: Sweet Stories & Recipes for America's Favorite Desserts. This tale is all about animal crackers. Enjoy! 

“Animal crackers and cocoa to drink that is the finest of suppers I think; when I am grown up and have what I please I think I shall always insist upon these.”

—Actor and writer Christopher Morley

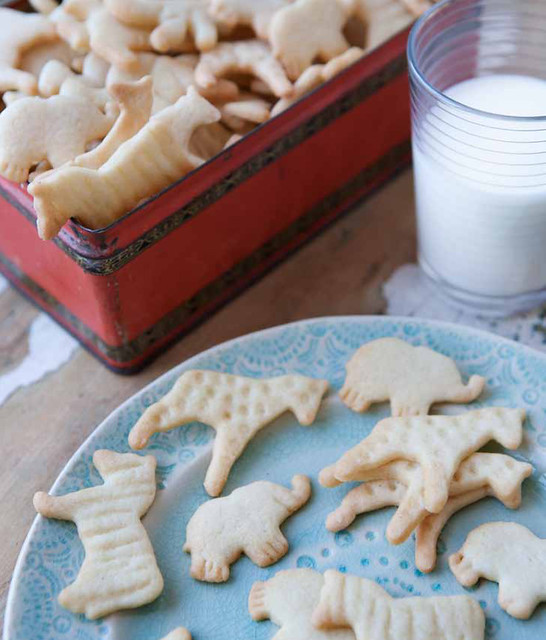
Everyone loves those curious animal-shaped cookies that pack a crunch and are called “crackers.” But how is it that these proud little animals began marching their way into our mouths and hearts?

Well. The custom of crafting cookies that resemble creatures is nothing new— as early as the 1600s in Germany, bakers were making sweet treats resembling savage beasts. But it wasn’t until the 1800s that the wheels began to turn, set- ting off the chain reaction that made these sweet crackers a snacking staple. For this we owe a thank-you to the industrial revolution: that’s when biscuits, cookies, and crackers began to be manufactured in factories.

In Victorian England, “crisp biscuits”—that’s sweet, cracker-like cookies, to Americans— were very popular. Some of these biscuits were shaped like animals. A hint of things to come was evident when Zoologicals, animal-shaped cook- ies made by Philadelphia baker Walter G. Wilson, were sold at the Centennial Exposition of 1876—the first world’s fair in America. (This pivotal event yielded many innovations, including the introduction of the Dewey Decimal system, the ice cream soda, and the grand debut of the Statue of Liberty’s torch, before it was affixed to the rest of her body in New York City.)

After acquiring two New York City bakeries that produced animal-shaped biscuits, the National Biscuit Company (later Nabisco) began producing animal-shaped biscuits on a commercial scale which allowed for widespread distribution.

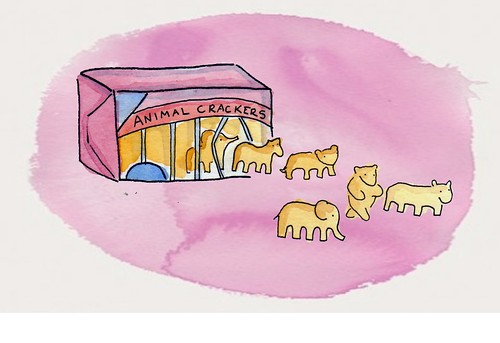
Animal Crackers

Serendipitously, this timing coincided with P. T. Barnum’s growing reputation as an international showman and circus owner. Perhaps sensing a sales opportunity, several companies had begun marketing foods of all sorts with circus-themed packaging, and these biscuits were a natural tie-in. The National Biscuit Company did it most famously, with their 1902 debut of the animal-shaped crackers. Marketed as a specialty holiday item, they were sold in a small box resembling a circus cage with a handle at the top, for displaying as an ornament.

The crackers proved so popular that they were soon being produced year-round, the ornament string promoted as an easy way for children to transport the cookies. In 1948, they were renamed Barnum’s Animal Crackers, which is what they’re still called today. But for all the glittering success of the Barnum associa- tion, the circus man did not receive payment for the use of his name: according to an article in the Washington Post, he never got a cent for the crackers.

Ready for a recipe? Here's an adaptation of the one in the book. For more sweet stories and recipes, buy the book: The Secret Lives of Baked Goods: Sweet Stories & Recipes for America's Favorite Desserts.

Homemade Animal Crackers (Printable version here)

Makes about 6 dozen

Ingredients

  • 2 1⁄2 cups all-purpose flour
  • 1⁄4 teaspoon salt
  • 1 teaspoon baking powder
  • 1⁄8 teaspoon cinnamon
  • 3⁄4 cup (1 1⁄2 sticks) unsalted butter, softened to cool room temperature
  • 1 cup sugar
  • 1 egg
  • 1 1⁄2 teaspoons vanilla extract

Procedure

  1. In a medium bowl, stir together the flour, baking powder, salt, and cinnamon. Set aside.
  2. In the bowl of a stand mixer fitted with the paddle attachment, cream the butter and sugar on medium speed until light and fluffy, 3 to 5 minutes. Add the egg and vanilla, stirring until combined.
  3. Add the flour mixture in 3 additions, mixing after each addition just until incorporated. Scrape down the sides of the bowl as needed.
  4. Form the dough into 2 disks and wrap well with plastic; refrigerate for at least 2 hours or overnight. Chilling the dough will ensure that the shapes hold once cut out and that the dough will not spread too much during baking.
  5. Preheat the oven to 350 degrees F. Line 2 baking sheets with parchment paper and set aside.
  6. Allow the cookie dough to warm slightly at room temperature before rolling it. On a floured work surface, use a floured rolling pin to roll the dough to about 1⁄4 inch thick. Use small animal-shaped cut- ters to cut the dough (of course, other small cutters will work, too). Using a metal spatula, transfer the cookies to the prepared baking sheets. Gather up the dough scraps and re-roll to make more cookies. Leave a small amount of room around each cookie to allow for spreading. If desired, you can use toothpicks to enhance the details on the animals, or add faces.
  7. Let the cookies chill (on the baking sheets) in the refrigerator for 30 minutes before baking. This will ensure even further that the dough retains any details you’ve added.
  8. Bake for 12 to 15 minutes ,or until firm, just lightly brown on the edges, and with a dull finish on top. Let cool on the pan for several minutes, then transfer to a flat surface (they may fall through a wire rack) to cool completely. Store the cookies in an airtight container for up to 7 days.

And in closing:

Per Panati's Extraordinary Origins of Everyday Things, children across America tend to “nibble away at the animals in definite order of dismem- berment: back legs, forelegs, head, and lastly the body.”

Muffin Tops: An Ode to US States With Official State Muffins

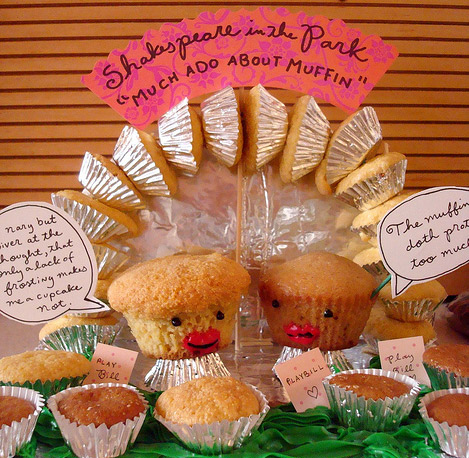
Now, it's true that CakeSpy has gone on the record as saying that muffins are just ugly cupcakes. But the fact is, when it comes to official state treats, more states (3) have declared an official state muffin than have declared an official state cupcake (0, to the best of my research, although some have official state cookies and/or cakes).

And with that in mind, why don't we take a moment to celebrate this trinity of muffin royalty in the US? Here they are:

Massachusetts: Corn Muffin. Though Rhode Island is famous for its corn cakes (Jonnycakes), it's Massachusetts that has made much ado about the muffin. Per FoodTimeline.org, "The schoolchildren of Massachusetts petitioned for the CORN MUFFIN, a staple of New England cooking, and the Legislature made it official in 1986."

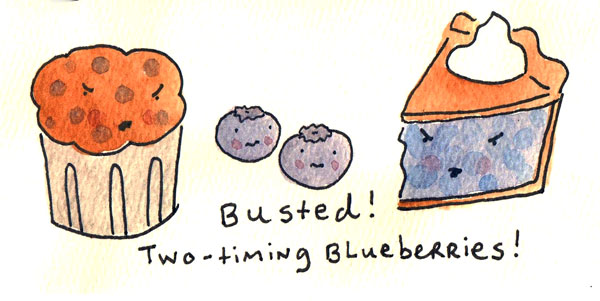
Minnesota: Blueberry Muffin. That two-timing blueberry makes an appearance in official state goodies in both Minnesota and in Maine, where they call Blueberry Pie their official state dessert (although some argue it should be the Whoopie Pie). As I learned here, "Minnesota designated the blueberry muffin as the official state muffin in 1988. Wild blueberries are native to northeastern Minnesota, growing in bogs, on hillsides, and in cut-over forested areas."

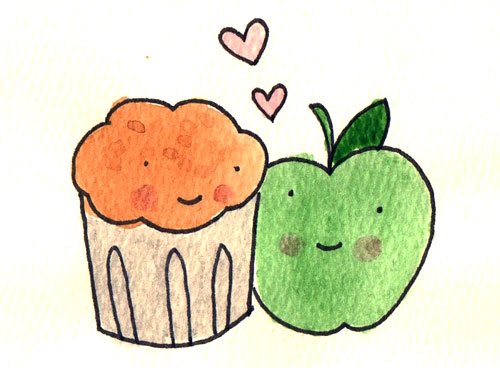
New York: Apple Muffin. That's right! One might think the apple muffin would be the official state muffin of Washington, but one would be incorrect. While the apple is the official state fruit of both Washington and New York, it was the latter that claimed the muffin as well, made official in 1987: "The apple muffin was adopted as the official State muffin of New York in 1987 through efforts of students throughout New York State." That is to say, get on the ball, schoolchildren of Washington! But make it apple cake, OK? Ok. Cool.

For more official state foods, visit foodtimeline.org.

Pie Slam Profiles: Pake Recipe and Story by Alexander

CakeSpy Note: This is part of a series of Pie Slam Profiles, featuring the recipes and stories of each of the 9 entrants in last week's Pi(e) Day Pie Slam! This entry came from Alexander, who made the ultimate dessert: a Pake (a pie baked into a cake!). Here's his story:

 Though we all know of Thomas Cake, know the holiday and have seen the statues of him, most do not know his humble beginnings.

As a young cupcake Thomas attended a mostly pie school. The tartlets would all surround him, throw pits at him, mock his egg content, pull at his ruffled cupcake clothes and call him nothing without frosting.

Thomas hoped to find a friend in the also maligned Concord grape tartlet but Concord’s cruelty ran deepest of them all. He’d shove Thomas into the wet dirt, calling him a mud pie.

The adult pies would look the other way, saying things like “Tartlets will be tartlets,” and “that little cupcake just needs a thicker crust.”

As Thomas grew older, almost a full sized cake, he began stuffing himself with cherries to try and fit in with the pies. But his cake brethren despised those of their kind who filled themselves with fruit, for nothing was more reviled than a fruit cake. Once, his father caught him hiding cherries and shouted, “You are not my son! I didn’t raise a black forest cake! I raised a good, simple chocolate cake!”

 But the political winds were changing: At a national level, the cakes formed an alliance with the also oppressed crumbles, a sizable minority that usually sided with the pies, but were sick of playing second fiddle to them. In a violent coup, cakes and crumbles overthrew the ruling pie majority and secured power through brute force. The now ruling Cake Party banned pies from appearing at Thanksgiving and the pumpkin pies wept.

At first, Thomas reveled in the power of his new social status. He need only threaten to report his pie classmates to the ruling party and he would get whatever he wanted.

But one day, Thomas saw Concord pie by a big mud puddle. As Thomas lifted Concord by the scruff of his tin, intending to make Concord eat humble pie, the Apple pies guffawed in anticipation, their cruel laughter reminding Thomas of his position only weeks before. Instead he gently lowered Concord to dry land and asked, “Can’t we all just get along?”

From then on, Thomas became an advocate for downtrodden desserts. Pie, cake, brownies, cookies clafouti and even donuts soon marched to his rallying cry of dessert equality. Even the soufflés rose to the occasion.

 The King Cake feared Thomas’ 350 degree rhetoric. One day, Thomas simply disappeared, never to be seen again. Rumor had it, the King Cake had personally stabbed Thomas in the back with a cake server, but most believe he was simply dumped in a compost pile and left to rot.

But, Thomas’s ideas live on! The next time you think of ordering a cake for a birthday or consider entering a pie into a fair, remember Thomas’s teachings! Consider instead, a panna cotta or maybe even a Pavlova. Don’t be slave to your sweet preconceptions! Remember, our enemies are not the pies or the cakes but the soups, the salads, the main course, the Atkin’s Diet! Sweet solidarity!

Chocolate and Cherry Pake

Crust:
  • Make a "sturdy" pie crust. I usually follow Ken Haedrich's food processor recipe from his book "Pie."
  • 2 3/4 cups all purpose, 1 tablespoon sugar, 1 teaspoon salt, 2 sticks cold butter, 1/2 cup cold water. Follow standard crust directions, but mix two egg yolks into the cold water to make the crust sturdier.
Pie Filling:
  • 1-1/2 lb. Bing cherries, pitted (4-1/2 cups)
  • 1 cup  sugar
  • 1/4 cup MINUTE Tapioca
  • 1 Tbsp.  lemon juice
  • 1/4 tsp. almond extract
  1. Mix fillings and let sit for 15 minutes, Fill crusts and bake at 400 for 45-50 minutes.

Cake Batter:


  1. Make a basic chocolate cake batter. I usually use something similar to this (a decently sturdy cake, not the total fall apart cake on the back of Hershey's Cocoa Powder box (a surprisingly good recipe):
  2. Prepare two cake pans. Pour just enough batter to cover the bottom of one pan, then place the cherry pie into it. Drop the pan on the counter to remove air bubbles and to settle the pie in the batter. Just barely cover the exposed top of the pie with batter. Pour the remaining batter into the other pan.
  3. Bake. The cake pan with the pie will take much longer as the pie is absorbing most of the heat (especially if the pie has already cooled.) Remove the normal pan when it's done, remove the pie/cake pan when it's slightly underdone. Let both cool, then cut the normal cake layer into two or three layers (depending on the thickness.)


Frosting:


  • Make a buttercream  (1/2 cup butter, 3 1/2 confectioner's, 1 pinch salt, 1 teaspoon coffee or espresso.)


To assemble:


  1. Place the cake enclosed pie as the bottom layer. Frost with butter cream. Place a normal cake layer on top of it. Frost and sprinkle with cherries and cherry kirschwasser. Do the same for the remaining layers, but do not frost and cherry the final layer.
  2. Cover the entire pake with stabilized whipped cream and decorate with chocolate shavings. Refrigerate so the whipped cream doesn't go bad.


Pie Slam Profiles: Blueberry Pie by Wendy Johnson

CakeSpy Note: This is part of a series of Pie Slam Profiles, featuring the recipes and stories of each of the 9 entrants in last week's Pi(e) Day Pie Slam! This entry is for Blueberry pie, by Wendy Johnson. Here's her story, followed by her recipe.

Pie : a (true) love story

Did Grandma Radi make pies?  I asked.

No, that’s the one thing she couldn’t cook.  They came out tough.

And Grandma Johnson?

No, she couldn’t really cook anything.

Well, how did you start making pie?

I just taught myself, the first pie I made was when we were first married, maybe just a week. That was the best pie I ever made, I could never get them to turn out as good.

What kind was it?

Lemon meringue.

Mom was red-eyed, staring out the passenger window as we drove through the stultifying Texas landscape of oil wells, pawn shops and used car dealerships.

She would silently work a crossword for awhile, or concentrate on her knitting, and then suddenly start in about how they met, about the awful yellow sweater he was wearing when his friends came up to her friends after a Sweet Home High School Basketball game.

Or about how he courted her in his father’s 1960 dark blue Buick LeSabre convertible with the white ragtop. Ray Charles would’ve been singing “I can’t stop loving you.” They’d put the top down, blast the heat and cruise around Buffalo, New York in the chilly spring of 1962.

As we neared Birmingham Alabama, she told me without malice of how dad’s parents had offered him money to prevent the marriage of their son to the daughter of Italian immigrants. Of how my Grandmother, on her death bed, had said to my mom, “I was pretty hard on you wasn’t I? I’m sorry for that.”

The Lemon Meringue was the first tradition that they alone owned. Not from his family or hers. My mother created pie for my father. Over the years they shared, almost 50, she honed her skill, her deft first generation hands turning flour and butter and fruit and sugar into expertly sculpted deliciousness, perfectly balanced between sweet and tart, between lightness and substance.

And what about the last pie, do you remember what it was?

It must’ve been blueberry. Your father loved blueberry.

Here's the recipe:

Blueberry Pie

For the Butter Pastry:

  • 2 cups all purpose unbleached white flour
  • 1 teaspoon kosher salt
  • 1 cups unsalted butter (or 2/3 cup butter and 1/3 cup leaf lard.) 
  • 1/3 cup cold water (may add 1-2 tsp cider or white vinegar.) 

For the Filling:

  • 3 cups Blueberries and 3 cups Wild Blueberries 
  • ½-1 cup light brown sugar (or to taste)
  • 1-2 tablespoons cornstarch
  • The juice of one fresh-squeezed lemon
  • Nutmeg (1/4 tsp), Cinnamon (2 tsp), Cardamom (1/4 tsp), Ground cloves (1/4 tsp) and ground ginger (1 tsp.) (add spices to taste)

 Procedure 

  1. Put everything in the refrigerator for an hour or so before making the pastry (the mixing bowl, the water, the lard, the butter).  Preheat the oven to 350.  Combine the flour, salt, and butter in a large mixing bowl and work with a pastry cutter until the butter chunks are the size of peas. You should still be able to see small pieces of butter. Transfer the mixture to a large mixing bowl and use your hands to flatten some of the bits of fat into flakey pieces. Add the water all at once and gather the jumble together without really stirring or kneading, just until the mixture comes together to form a shaggy mass. Without handling the dough any more than necessary, divide in half and press each half into a disk. Wrap in plastic wrap and refrigerate it while preparing the berries.
  2. Wash fresh berries, or use frozen.  Put all berries in bowl and toss with sugar, cornstarch, lemon juice and spices.  Add more sugar or spices to taste, but be careful not to over sweeten.
  3. On a well-floured surface, roll out one disk of the pastry into a 12-inch circle onto floured parchment paper.  Lift the parchment paper and place dough-side down into a buttered 10-inch pie pan. Press the pastry into place and pour in the berry mix. Roll the second disk of dough into a 12-inch circle and plant it squarely on top of the filling. Crimp the edges together to create a seal, then trim off an excess dough. Pierce the top crust with a fork or knife to vent juices. Bake until the crust is golden brown and the filling is boiling out of the crust a bit, about 1 hour. Cool thoroughly on a rack before slicing.

(Pastry recipe adapted from: Greg Atkinson, Copyright 2007)

Pie Slam Profiles: A Post-Pie Slam Story from Sarah Spiller

CakeSpy Note: This is part of a series of Pie Slam Profiles, featuring the recipes and stories of each of the 9 entrants in last week's Pi(e) Day Pie Slam! This follow-up entry comes from Sarah Spiller, a Seattle University Student and dorm baking expert, who writes about the humbling experience of her first pie-baking experiment and how she brought it all back home with a second pie.

Like my gnocchi dinner party disaster of December ’10, my entry to the Pie Slam last week can only be described as an epic fail. While I thoroughly enjoyed the company and stories of the other entrants, I could not help but be haunted the entire night by my personal pie fail. What started as a pumpkin cream pie somehow melted into what can only be called pumpkin soup during the journey from my dorm room to the judging table. I could blame it on my weak dorm fridge or the hot lights of the CakeSpy gallery, but ultimately the pumpkin soup can only be blamed on myself.

Not one to wallow in my baking failures (since mistakes – both massive and minor – are inevitable in a baker’s career), I set my sights on redeeming myself. Not for anyone else, not even for the pie gods, but to prove to myself that I could again master the pie – that I would not fall victim to its pastry challenges.

Spring break has been the perfect opportunity to get my pie redemption. Living in a house of hungry college friends on Whidbey Island, and finally blessed with a beautiful, fully equipped kitchen, baking was my first priority. I whipped out the lime green Kitchenaid mixer within hours of arriving and got to work on a classic apple pie recipe from Martha Stewart.

Just my luck, the pie that was not for judging or consumption by well known bakers of Seattle, turned out beautifully. Warm, aromatic, and simply stunning in the late afternoon light, it was the pie of my dreams. However, like all my pies, it was not picture perfect. My lattice crust had some gaps, and rolling out the dough was certainly a challenge. But after slicing and serving with vanilla ice cream, I didn’t hear a single complaint from my friends. No one minded that my crust wasn’t as perfect as Martha’s, or that I didn’t have any lemon juice to add to the apples. All they cared about was the taste and the effort that went into the pie.  

Many people consider pie to be an unattainable holy grail of baking – too many challenges and chances for failure. But really, any pie that tastes delicious and makes people happy is no failure at all.

To find the recipe for the pie featured in this post, visit Martha Stewart's site!

Pie Slam Profiles: Pumpkin Pie in a Gingersnap Crust by Sarah Spiller

Note: This is not Sarah's pie, but it gives you an idea.CakeSpy Note: This is part of a series of Pie Slam Profiles, featuring the recipes and stories of each of the 9 entrants in last week's Pi(e) Day Pie Slam! This entry came from Sarah Spiller, a Seattle University Student and dorm baking expert. Sarah was disappointed with the end result as the pie was soft when served-- but when put into cups for individual servings, it was very delicious, and nobody complained one bit.

Here's her story:

My Grandma Brennan was a no frills baker. An amazing baker, but a no frills baker. Snickerdoodle, oatmeal raisin, molasses, and gingersnap cookies were right up her alley. Classic birthday cakes and summer fruit pies were always top notch. She was a master at canning, piecrusts, and putting hot, wholesome meals on the table. Dessert was always present, even when it was just a dish of Tillamook ice cream (Brown Cow was her favorite, and mine too). I picked up a lot of things from my grandma, namely my love for green beans that have been cooked into soft submission, probably a result of many days spent with my grandma as an infant.

I also seemed to inherit her love for baking and even greater love for pumpkin pie. Never ever a picky kid, I picked up on the greatness of pumpkin pie at a very early age. Around kindergarten, when the buildup before Thanksgiving was big – full of hand turkey crafts and talking about being thankful – all I could think about was pumpkin pie. I WAS OBSESSED. When the day finally came, all I could do was wait – wait those torturous hours before I would receive my beautiful, luscious, perfectly spiced piece of creamy pie.

When it FINALLY came time to slice the pie, my grandma sliced and handed to me what may have been the BIGGEST piece of pie I had ever seen in my six years of life. My eyes lit up with excitement, thrill, and disbelief that this huge amazing piece could possibly be for me! But I didn’t dare say a word and quietly started back to my seat at the kids’ table. Suddenly, my grandma looked up and realized what a large piece she had given me by accident and said, “Oh that’s far too big for Sarah,” and took it back. My eager grin turned to sheer disappointment in the blink of an eye. My parents were watching the whole thing and trying very hard not to burst out laughing. Grandma cut my piece in half and gave it back, still a fairly large portion for a little girl. It was delicious in all ways possible, of course, but I was still hankering for more.

That other half slice haunted me the rest of the evening. Being a very observant mother, my mom picked up on this and offered me a solution = pie for breakfast, possibly some of the greatest words to come out of her mouth. I was unsure if my mom would follow through, but the next morning when I asked for pie for breakfast, I was greeted with a beautiful piece of pie, even better the next day. This blossomed into a family tradition that I am always happy to participate in each year.  

Things haven’t really changed at all. I’m still obsessed with pumpkin pie and Thanksgiving, waiting for weeks in anticipation for the big meal. This being my first year away from home, I made several phone calls to my mom before my trip home, making sure EVERYTHING would be exactly the same. I told her all menu changes must go through me – the president of the Thanksgiving Board of Trustees. While my grandma now has Alzheimer’s and no longer bakes the pies, she can still remember this story and chuckles at it every year – jokingly reaching for my plate. Now the baking responsibilities are in my hands – but so is the serving knife, guaranteeing a very big slice for me, both after dinner and for breakfast.

Here's the recipe:

Recipe for Pumpkin Pie (Adapted from Joy the Baker)

For the Crust:
  • 1 1/2 cups finely crushed graham crackers or crisp ginger snap cookies
  • 2 tablespoons granulated sugar
  • Pinch of salt
  • 5 tablespoons unsalted butter, melted and slightly cooled
Procedure
  1. In a medium bowl, combine crushed graham crackers or ginger snaps with sugar, salt and melted butter.  Toss together to coat the entire mixture in butter.  Press into a 9-inch baking dish, a tart pan with a removable bottom or 8 individual ramekins.  I like making these no bake desserts in a tart pan or in individual ramekins so I don’t have to fuss with fighting to remove the sliced pie from the pie pan.
  2. Bake at 350 degrees F for 15 minutes.  Remove from the oven and cool completely before adding the filling.
For the Filling:
  • 1 (8-ounce) package cream cheese, softened
  • 5 tablespoons unsalted butter, softened
  • 1 1/2 cups powdered sugar
  • 1 tablespoon pure vanilla extract
  • 1 teaspoon molasses
  • 2 1/2 teaspoon pumpkin pie spice
  • 1 (15 ounce) can pumpkin puree
Procedure
  1. Beat cream cheese and butter in the bowl of an electric stand mixer until smooth and creamy.  Both fats should be well softened to ensure the filling is lump free.  Add the powdered sugar to the mixture and beat until smooth and fluffy.  Add the vanilla extract, molasses, pumpkin pie spice and pumpkin puree and beat until thoroughly combined.  If you find that your filling is lumpy, pass it through a fine mesh strainer into a bowl.  I did that.  No shame in that game.
  2. Spoon the filling into the cooled pie or tart shell, or divide into individual ramekins.  Let pie chill in the fridge overnight.  This is actually important… the pie won’t be settled enough in 2 hours.  Overnight is best.
For Topping:
  • Cool Whip
  • 2 tablespoons pure maple syrup
Procedure
  1. Beat together cool whip and maple syrup until cream is in soft peaks.  Spread over the chilled pie. Slice and serve.