Cake That Looks Like Pie: Blueberry Chocolate PiCake Tutorial

Photos: Cake Gumshoe SetiaCakeSpy Note: This is a guest post from Cake Gumshoe Setia, who just started blogging at cakesbysetia.blogspot.com.

I love cake. I bake cakes for many people and many occassions, and am constantly brainstorming my next cake project and an occassion to make it for. So, imagine my surprise when I happily tell my husband that I have a wonderful cake idea in store for his birthday, and he responds "I was actually thinking I might want pie". (Insert gasp of horror here). Pie? Seriously? You are asking a lover of cakes - a cake-artist-in-the-making, if I may be so bold, to make you a PIE?

Don't get me wrong, I have nothing against pie. In fact, on occassion, I quiet fancy a slice; heated, served with a side of vanilla ice cream. I can even make a decent pie when I put my mind to it. Yet that is not the point, is it? The point, if not already apparent, was that I was desperately excited to come up with some wonderful cake creation for my husband's birthday. Sure, I knew he was probably teasing about the whole pie thing...right? However, I was now bound and determined to make something a bit tongue-in-cheek that would teach him a lesson, and yet give him what he wanted at the same time.

A cake that looks like a pie seemed like a pretty obvious solution! Why not? I'd never made one - it sounded like good fun! He'd get a good laugh! Perfect. Hmmm...yet it didn't seem quite perfect enough. More brainstorming required... Then I remember hearing of a place in Philidelphia that serves a dessert called "Pumpple Cake". It looks like a regular cake from the outside, but has an entire pie - two in fact - (apple inside vanilla cake, pumpkin inside chocolate cake, double stacked) on the inside. Now this got me thinking...What if I took that a step further? A cake disguised as a pie is great fun. But a PIE, disguised as a CAKE, further disguised as a PIE...well that is just genius!! (At least in my muddled little mind!)

My husband loves blueberries; fresh blueberries, blueberry pancakes, blueberries on cereal, and yes, of course, blueberry pie. And what goes swimmingly with blueberries - or any kind of berry for that matter, I asked myself? Why, chocolate of course! And so, I went forth and baked...And the results, in my opinion, were both pleasing to the eye and to the palate! Voila! A deep-dish blueberry-looking pie!

Here's how you make it happen.

Blueberry Chocolate PiCake Instructions


  1. Make favorite never-fail chocolate cake recipe.
  2. Pour enough batter into the cake pan to just cover the bottom.
  3. Insert pie onto batter.
  4. Pour remaining batter on top and around sides of pie.
  5. Bake the cake/pie as directed- takes considerably longer than regular cake-baking time. It seems like the top will never cook, but be patient, it will! Just keep watching it!
  6. Turn pie over onto work surface so it is upside down.
  7. Smother with a delicious chocolate ganache. Smooth ganache with hot knife to ready it for the fondant.
  8. Decorate to look like a deep-dish pie, using fondant. (I decided to do a lattice "crust" on the top).
  9. Use a little brown food colouring and vodka mixed together to 'paint' more colour onto the fondant, giving it a more "baked" look.
  10. Add fresh blueberries as desired.


Cake Byte: Cake Pops by Stick & Pop, NYC

Cake Pop Wants to know where its face went.Dear Stick&Pop,

I don't want to be to forward, because I just met you, but I think I love you. But no, I don't want to break up my marriage. Because you see, Mr. CakeSpy loves you too.

What we propose is that you leave NYC and move to Seattle, live in our spare bedroom, and instead of paying rent, give us an endless supply of your delicious cake pops.

Please, consider it.

Love, 

CakeSpy&Co.

- - - - - - - -

OK, so the preceding is a slight dramatization of actual events. We haven't invited the owners of Stick & Pop to live with us--yet.

But after each bite of their delicious pops, we're coming closer and closer. Not convinced? Well, read their bio and you might come a few steps closer:

French Culinary Institute graduate, Jacki Caponigro, and design professional, Christy Nyberg, launched Stick&Pop in New York in the Fall of this year. The pair has crafted a menu of 12 delightfully creative flavors that are as fun to look at as they are enjoyable to eat.

The eye-catching flavor, Darling (marble cake dipped in white chocolate and covered in sugar sprinkles), made a splash as The Savoy Hotel re-opened in New York—the treats were covered in gold and silver sprinkles to announce the occasion.

The diversity of flavors on the menu though, show that Stick&Pop is not relying on the novelty of a new “food-on-a-stick” but instead putting flavor and creativity at the helm. Johnny Cakes, for example, is peanut butter cake dipped in dark chocolate covered in pretzel and sea-salt and Griswald is essentially a S’more on a stick.

These cake pops are hands down some of the best I've ever tasted. The interior cake is decadently moist and buttery, and the candy coating is firm but not to the point of cracking and hurting the roof of your mouth--and each is so adorably decorated that you can't help but fall in love a little bit, just looking at the packaging.

Favorites so far? The "Darling" (marble cake, rolled in white chocolate and coated in sprinkles); the "Birthday Cake" (buttery cake coated in dark chocolate, with sprinkles); and of course, the "Johnnycake" (peanut butter cake coated in dark chocolate, with pretzel coating).

Seriously, I don't know what else to say other than these pops are a good investment. Lucky you if you live in NYC and can access them easily; even if you're not, they're worth the splurge for a special event.

Find out more at stickandpop.com.

Blue Days, Starry Nights: An Awe-Inspiring Van Gogh Cake

Friends, I want to share with you the most inspiring cake I've seen in some time: the Starry Night Cake that my friend Jenny in Baltimore made for a friend's birthday.

This cake, of course, prompts so many questions--including A) How on earth did she do it? (apparently it took 5 1/2 hours, and I'm not surprised). B) How on earth could they cut into that beauty? C) How did it taste? (I've tasted Jenny's work so I know it was good)...

but most importantly...why doesn't this super-talented girl have her own bakery? Count CakeSpy as an avid fan and customer-in-waiting.

For a gallery of photos of the cake and the eating of, visit Jenny's Facebook page!

Out Like a Lamington: A Sweet Recipe from Joy of Baking

You know what they say about March: in like a Lion, out like a Lamington. At least, that's what I say. OK, technically I've never said that before today.

Nonetheless, I couldn't imagine a sweeter way to say "smell ya later" to March than with these traditional Australian treats, named after Lord Lamington (Governor of Queensland from 1896 - 1901) comprised of dense cake absolutely coated in rich fudge coating and feathered with sweet coconut on top of everything.

My suggestion? Make some today. No fooling, it's a sweet way to end one month and go into another--and nobody would call an April that began with a leftover Lamington breakfast "the cruelest month".

This recipe is lightly adapted from the one on Joy of Baking.

Lamingtons

For the cakes

  • 2 cups all purpose flour
  • 2 teaspoons baking powder
  • 1/4 teaspoon salt
  • 1/2 cup unsalted butter, at room temperature
  • 3/4 cup sugar
  • 2 eggs
  • 1 teaspoon vanilla extract
  • 1/2 cup cream or milk (I used cream) 

For the chocolate Frosting:

  • 4 cups (1 pound) confectioners' sugar, sifted
  • 1/3 cup cocoa powder
  • 4 tablespoons unsalted butter
  • 1/2 cup cream or milk

For the coating: 

  • 2 cups shredded coconut

Procedure


  1. Preheat oven to 350 F. Place oven rack to middle position. Grease an 8x8-inch baking pan and set to the side.
  2. In a large bowl, sift together the flour, baking powder, and salt. Set to the side.
  3. In the bowl of an electric mixer, beat the butter until soft. Add sugar and beat until light and fluffy--2 or 3 minutes. Add the eggs one at a time, beating well after each addition. Scrape down the sides of the bowl occasionally. Add the vanilla and beat until combined.
  4. With the mixer on low speed, add the flour mixture and milk in alternating increments, beginning and ending with flour.
  5. Spread the batter into the prepared pan and smooth the top with an offset spatula. Bake in your preheated oven for about 25-30 minutes, or until a cake tester or toothpick comes out clean.
  6. Cool the cake in the pan on a wire rack for 10 minutes. Place a wire rack on top of cake and invert, lifting off pan. Once the cake is cool, cut it into 16 2-inch squares. Wrap the cake (as one unit is fine) in plastic wrap and refrigerate for several hours or even overnight--this makes it much easier to coat with chocolate later on.
  7. Make the chocolate frosting. Place the confectioners' sugar, cocoa powder, butter and milk in a double boiler. Heat on low, stirring the mixture until it becomes smooth and of pouring consistency.
  8. Assemble your Lamingtons. Make a production line; put the 16 squares of cakes on a wire rack that is placed over a baking sheet (to catch the dripping chocolate).  Have the coconut ready on a large plate and the chocolate frosting. Ladle the chocolate frosting over each square of cake, making sure you cover all sides. (It is best to do a few squares at a time.)  With a small offset spatula or knife transfer the chocolate covered cake to the plate of coconut and roll the cake in the coconut, covering all sides.  Gently transfer the lamington to a clean wire rack to set.  Repeat with the rest of the cake squares.  Once the Lamingtons have set, store in an airtight container for several days.


Note: Also, Joy of Baking has a helpful tip: When you ladle the frosting over the cake, some of the frosting will drip onto the pan. Pour this frosting back in your bowl and reuse (strain if necessary).  If the icing becomes too thick to pour, simply place the frosting back over the saucepan of simmering water and reheat until it is of pouring consistency. (You may have to do this a few times as the frosting has a tendency to thicken over time.  Add a little more milk to frosting if necessary to get pouring consistency.)


Cake for a Cause: A Sweet Event with CakeSpy, Electrolux, Kelly Ripa, Cake Boss, Foodbuzz and More!

From Left: Kelly Ripa, CakeSpy, Cake Boss, Kelly, Carlo's Bakery baker, ErikaI don't know how to tell you this...but I'm kind of a big deal.

OK, maybe not--but I sure did feel like one earlier this week when I was lucky enough to be part of the amazing "Kelly's Cake-Off" event in NYC.

What was the deal?

Dig it: So Foodbuzz, where I am a featured publisher and who helps me out with the advertisements you see to the right of the main body of this page, in collaboration with Electrolux's Kelly Confidential program, decided to put on an event in NYC wherein 15 lucky food bloggers would be flown out for an event, Kelly's Cake Off. They put us up in a totally sweet fancy hotel and fed us delicious vittles at the famous (and amazingly delicious) Spotted Pig restaurant. It was all coordinated by the fine folks at Weber Shandwick.

Basically, Kelly's Cake Off consisted of all of us gathering in a very cool space in the same building as the Food Network Studios and the Chelsea Market (also the former Nabisco factory!). We then learned some sweet cake decorating tips from Buddy Valastro, owner of Carlo's Bakery in Hoboken (and oh, you may know him as the Cake Boss from the TV) and Kelly Ripa, and then we were set into 5 teams of three to decorate cakes using fondant, buttercream, and various sugars and glazes (yum). Each team had a different cake: our theme was "Snow Day"--behold this beauty:

Our finished entries were then posted online, and for each vote received, Electrolux will donate $1 toward theOvarian Cancer Research Fund

Basically, this event was a triple threat of awesome. Sweet cake, sweet sponsors, and a super sweet cause. It was incredibly fun too, which certainly doesn't hurt--and oh man, the cake even tasted good! (um, so did the countless other pastries furnished by Carlo's Bakery).

But in case you don't believe me, you can see the video for yourself:

I've got to send my most sincere thanks to all of the awesome bloggersFoodbuzz, the Cake Boss and Carlo's Bakery crew, my amazing team (Erika and Kelly), Electrolux, and Kelly Ripa

How can you be part of the awesome? Go vote for my cake, the "Snow Day". Yes, you've got to sign up using your email address, but I'm totally worth it, am I not? Also, you can vote once a day, and I fully expect you to do so, or I will never talk to you again. And trust me, I will know.

Have I made myself clear? Vote here.

Lovin in the Oven: Almond Tea Cake Recipe

Almond Tea Cake
So, a few weeks ago I received this package in the mail with a bunch of recipes from Love N Bake, a company which makes fancy pastry fillings (almond paste, praline filling, chocolate filling, etc). "Whatever" I thought.

And then two days later, a big ol' box of said fillings arrived in the mail. Sweet! I was excited not only because they were free (cheapskate!), but because each flavor had recipes on the label (don't you just love back of the box recipes?). So I set to trying out the recipe on their almond paste package, for Almond Tea Cake. Don't let its unassuming appearance deceive you--this cake is heavenly. Simultaneously light and buttery all at once, it's got an amazingly luxuriant feeling in the mouth, and is equally as delicious as a breakfast treat, teatime companion or (with whipped cream) a respectable dinner dessert.

Almond Tea Cake

  • 1/2 cup almond paste (I used Love N Bake's...but you probably guessed that)
  • 3/4 cup sugar
  • 1 stick (4 ounces) butter, softened
  • 3 eggs
  • 1/2 teaspoon baking powder
  • 1/2 cup flour
  • 1 tablespoon vanilla
  • Optional: 1/2 cup white chocolate, cut into coarse pieces (I scattered them on top just before baking--yum)
Procedure

Beat the almond paste with the sugar in the bowl of an electric mixer. Add ther butter and beat until fluffy. eat in the eggs. Stir well and then fold in the baking powder, flour and vanilla.
Spread the batter into a greased 8-inch cake pan. If you'd like to add the white chocolate, add it now, scattering it evenly over the surface of the cake (it's ok if some sinks). Bake at 350 degrees for 30 to 35 minutes or until a toothpick inserted in the cake comes out clean. Cool on a rack, and unmold. If desired, dust with powdered sugar before serving.

Nothing Bundt Cake: Chocolate Banana Bundt Cake for a Rainy Day

Rainy day cake
What is it about baking cake that always brightens up the darkest day or mood? Surely it's not just the taste, although that certainly doesn't hurt. It's the the full sensory experience: reading a recipe. Gathering and mixing together the ingredients; seeing them come together. Putting the batter in a pan...and that amazing cake-baking aroma while it bakes. By the time the cake is done, eating it is almost secondary (note: almost), as you've already gotten so much satisfaction out of making the finished product.

In Seattle, I couldn't imagine a cozier bakery for a rainy day than Macrina Bakery, so I was thrilled when they sent out their coffee cake recipe in a recent newsletter. Any fruit of your choosing makes a nice complement to the dense butteriness of the cake, which is perfect for breakfast; I used bananas and topped the cake off with a generous dose of chocolate and nuts, which is guaranteed to make the darkest days brighter.

Rainy Day Bundt Cake

- adapted from Macrina Bakery's Fresh Fruit Coffeecake -

Makes 1 Bundt cake

  • 3 cups unbleached all-purpose flour (I used whole wheat--worked nicely with the banana)
  • 1-1/2 teaspoons baking soda
  • 3/4 teaspoon salt
  • 2 cups ripe fruit (I used bananas)
  • 12 tablespoons unsalted butter at room temperature
  • 1 cup granulated sugar
  • 1/2 cup light brown sugar
  • 2 eggs
  • 1-1/2 teaspoons pure vanilla extract
  • 1-1/2 cups buttermilk

Chocolate topping:

  • 1 teaspoon shortening
  • 3 ounces semisweet or dark chocolate

Directions:
  1. Preheat oven to 350º F. Oil a 12-cup Bundt pan.
  2. Sift flour, baking soda and salt into a large bowl and toss with your hands to combine. Remove 1/4 cup of the flour mixture and set bowl aside.
  3. In a separate medium bowl, combine fruit and the reserved 1/4 cup of flour mixture. Toss until fruit is evenly coated and set aside. Tossing the fruit in flour helps keep it from sinking to the bottom of the coffeecake _ a true disaster!
  4. Combine butter, granulated sugar and brown sugar in the bowl of your stand mixer. Mix with the paddle attachment for 5 to 8 minutes on medium speed. The mixture will become smooth and pale in color. Add eggs, one at a time, making sure the first egg is fully mixed into the batter before adding the other. After the second egg is incorporated, add vanilla extract and mix for 1 minute. Scrape down the sides of the bowl with a rubber spatula and mix for another 30 seconds to make sure all of the ingredients are fully incorporated. Remove the bowl from the mixer.
  5. Alternately add small amounts of flour mixture and buttermilk to the batter mixing with a wooden spoon just until all dry ingredients are incorporated. Gently fold in the flour coated fruit making sure the fruit is evenly distributed through the batter. Spoon batter into the prepared Bundt pan filling two-thirds of the pan.
  6. Bake on the center rack of the oven for 1 hour and 30 minutes, or until top is golden brown. Check the center of the coffeecake with a skewer. It will come out clean when the cake is done. Let cool in a pan for 45 minutes.
  7. Loosen the sides of the cake with a sharp knife. Place a serving plate upside-down on top of the cooled Bundt pan and invert the pan to remove the cake.
  8. For chocolate topping: melt chocolate and shortening in a double boiler. Pour gently directly on to the cake. Toss some walnuts, powdered sugar, or both, on top if it suits you.
  9. Enjoy!


A Cake Bakes in Brooklyn: An Outer-Borough Version of Basbousa for Serious Eats

A Delicious Semolina cake called Basbousa
CakeSpy Note: Hey, check out my latest entry for Serious Eats! Here's a preview:

When I was in college, I waited tables at a Middle Eastern restaurant on Atlantic Avenue in Brooklyn. While the restaurant specialized in homemade falafel and pita bread pizzas, our secret weapon was really a simple semolina cake called basbousa.


Basbousa was basically our quick fix for any situation. Complaining customers received it as a pacifier. Friendly guests received it as a reward. Homeless people who were denied the use of our bathroom received a slice as consolation.

The cake's virtue is its simplicity: it's sort of like cornbread, only made with semolina. What really makes it shine, though, is that it's topped while still hot with a sweet glaze which oozes into every little nook and cranny of the porous cake. Finished off with a sprinkling of almonds on top, it makes the perfect complement to a strong Turkish coffee. For a recipe that tastes very similar to the Brooklyn version I remember, visit Serious Eats!


For the full post and recipe, visit Serious Eats!


A Sweet Love Whose Name Cannot Be Spoken: Store-Bought Cakes

Photo c/o Flickr User gearys
No matter how many gorgeous homemade cakes I try, no matter how many fancy pastries I sample, I will always have a lingering love for grocery store-bought birthday cake. 
Cannonball!
I'm not talking about a fancy cake that you might buy at the bakery of an upscale store like Whole Foods. No. I am talking about the garishly frosted, probably not trans fat-free, gonna-leave-a-greasy-slick-on-your-tongue, packed in a plastic cake cover type of store bought cake that you'd see at national grocery store chains.
Grocery Store cakes: I love them.
Now, I realize that on so many levels, they are an inferior product. They are not made with the care that goes into the cakes at most retail bakeries, nor are they made with the same caliber of ingredients. They don't look or taste as good.
Burger Cake

And yet--in spite of these powerful arguments against them--sometimes nothing else will do. So what gives? 

Is it Nostalgia? Perhaps it can be blamed on growing up in the suburbs, where for every birthday party with a homemade cake, there were probably four with store-bought cakes? Perhaps somewhere in that combination of bright frosting in colors never found in nature, that inch-and-a-half slick of waxy-sweet frosting, and soft and spongy cake, it's all about trying to conjure up a simpler and sweeter time in life?


Cupcake Cake at QFC
Or is it Simply Bad Taste? Or are these cakes like the relationship that you know is toxic but you just can't give up, because even while it's so bad, it's also so good? Is confessing a love of store-bought cake simply admitting that deep down, you've got bad (not to mention unrefined) taste?


Or perhaps it's a bit of both: sweet nostalgia and trashy taste? While I can't answer it definitively, I can say one thing for sure: grocery store-bought cake, I just can't quit you (and I don't want to, either).

What about you? Do you have a soft spot in your heart for store-bought cakes, or is CakeSpy simply guilty of bad taste?


Cakewalk Special: A Carrot Cake Caper in Seattle

Photo c/o K. Morales, Carrot Cake from Macrina
Easter may be over, but even if you've already devoured the last Cadbury Creme Egg, there’s no need to stomp on daffodils or snatch at flavorless jellybeans in a fit. Instead, hop along to the next sweet fix with our Carrot Cake Tour of Seattle, provided by our newest Cake Gumshoe, Seattle-based Kitty Cake. She bravely sampled, reported on, and (very skillfully!) photographed some of the best spots for Carrot Cake in the city. Here are her findings and thoughts:

Photo c/o K. Morales, Carrot Cake Cupcake from Cupcake Royale
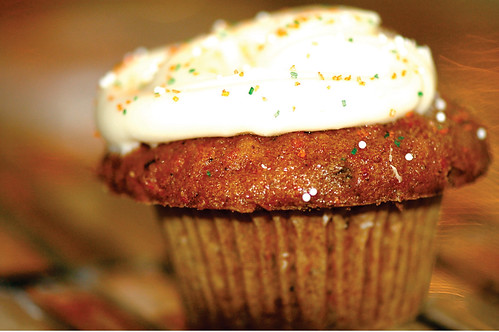
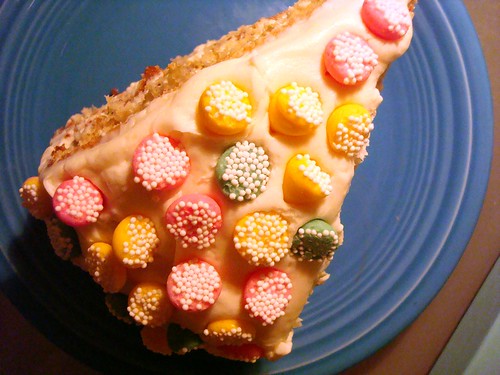
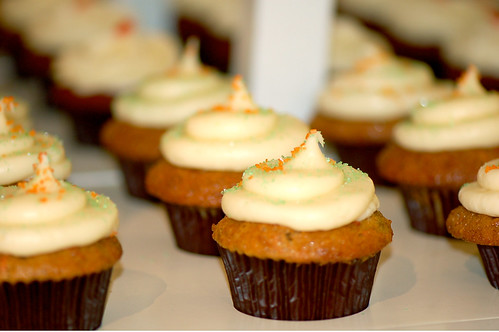
CUPCAKE ROYALE Carrot Cupcake – This retro-cool cupcake clearly likes to party--and it’s easy to get the party started when wearing sweet cream cheese frosting, sugary sprinkles, and a hint of cinnamon. 

Ingredient notes: No raisins. Yes walnuts.
Availability / where to buy: Available daily. Multiple locations; online at cupcakeroyale.com. (New location coming soon!)
-------------------------------------------


Photo c/o K. Morales, Carrot cake from Decadence Custom Cakes, Seattle
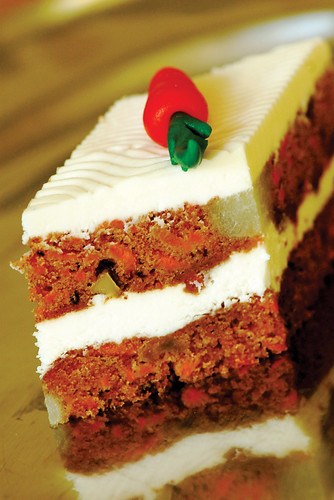
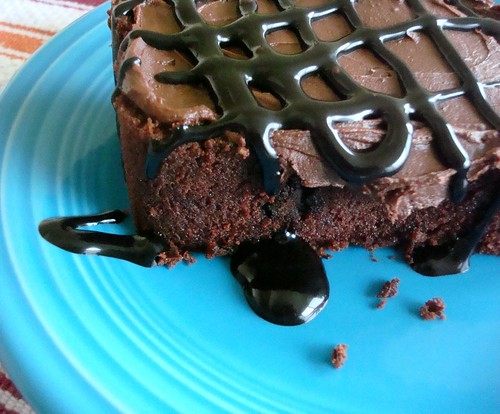
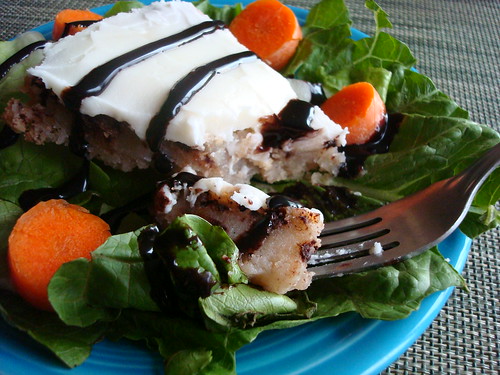
DECADENCE CUSTOM CAKES Classic Carrot Cake – Owner/Pastry Chef, Dan Mikosz doesn’t diss the common man. Sure, Dan’s love of quality ingredients and all things pretty has him in high demand by boutique hotels, lavish weddings, and special events; but he does not ignore the call of the wild cake child. Plan ahead at least 48 hours, and a moist-moist, poached-pear party, carrot abundant cake, topped with just-sweet-enough, creamy-creamy frosting and the most charming marzipan carrots you will ever meet, can be yours.

Ingredient notes: No raisins. Yes walnuts. Pear.

Availability / where to buy: Available by advance order only; Decadence Custom Cakes is located in a commercial kitchen at 501 2nd Avenue West in Queen Anne; online at decadencecustomcakes.com.
-------------------------------------------


Photo c/o K. Morales, Carrot Cake from Hiroki
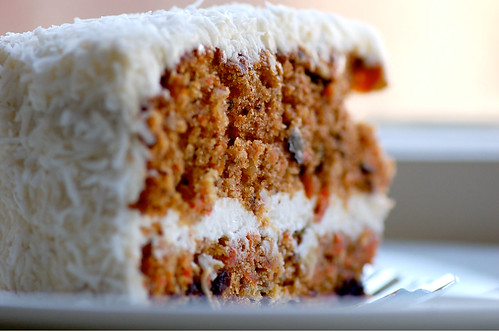
HIROKI Carrot Cake with Coconut & Pineapple – We called to verify some of the ingredients in this treat, but the only thing the guy on the other end would reveal was that the raisins are specialty raisins and not available to the average consumer. Gee, thanks. Discover for yourself what’s in this super-secret recipe, which includes not-too-sweet, smooth coconut-covered cream cheese frosting, specialty raisins, fat shreds of carrot, chopped walnuts, and a subtle touch of pineapple – a super moist mystery.

Ingredient notes: Yes raisins. Yes walnuts. Pineapple and coconut.


Availability / where to buy: Available frequently, call ahead to confirm. HIROKI, 2224 N 56th St; online at hiroki.us.
-------------------------------------------


Photo c/o K. Morales, Carrot Cake from Macrina
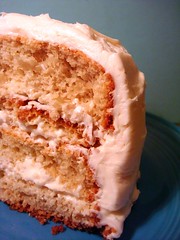
MACRINA BAKERY Old Fashioned Carrot Cake – Not afraid of confrontation, this venerable cake looks you straight in the eye and demands that you eat your vegetables (well, at least one). Toasted walnuts, tangy citrus cream cheese butter cream, and plenty of fresh carrots make us want to ask for more. 

Ingredient notes: No raisins. Yes walnuts.


Availability / where to buy: Available frequently; call ahead to confirm. Various locations; online at macrinabakery.com.
-------------------------------------------


Photo c/o K. Morales, Carrot Cake from Metropolitan Market, Seattle
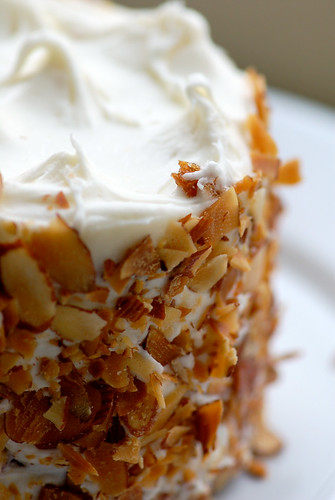
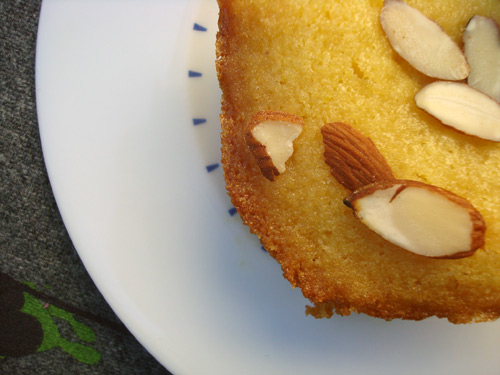
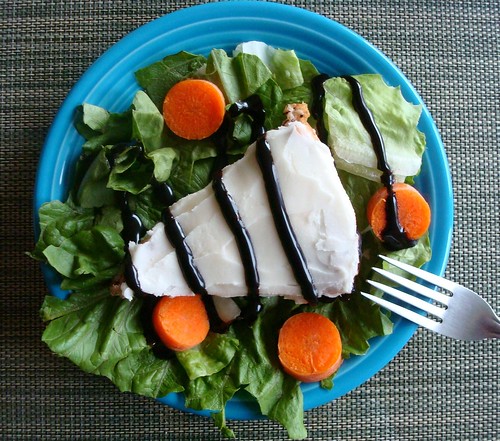
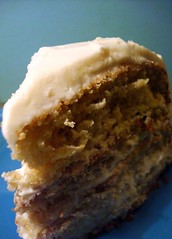
METROPOLITAN MARKET 4-inch Orange Almond Carrot Cake – You must be a fan of orange extract to enjoy this little treasure, as the sweet and creamy frosting is fragrant with orange, which is sold at Metropolitan Market but is baked by Montlake Mousse. The toasted almonds help cut the sweetness, making for a cake that we’re not certain we want to share.

Ingredient notes: No raisins. Yes almonds.


Ingredient Specifics: “Carrots, sugar, canola oil, cake flour, eggs, baking soda, salt, ground cinnamon, pure vanilla extract. Frosting: powdered sugar, cream cheese, unsalted butter, orange extract, almond extract, shaved almonds.”
Availability / where to buy: Available daily; call your local Metropolitan Market to confirm. Various locations; online at metropolitan-market.com. For other Montlake Mousse retailers, visit montlakemousse.com.
-------------------------------------------


Photo c/o K. Morales, Carrot Cake Cookie sandwich from Essential Baking
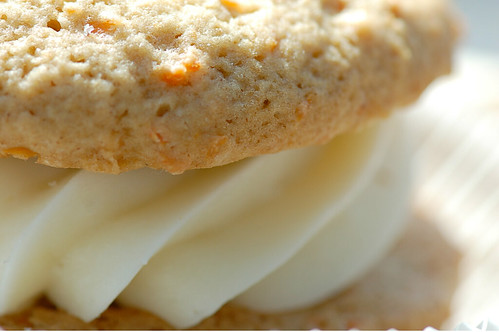
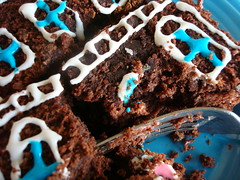
THE ESSENTIAL BAKING COMPANY Carrot Cake Cookie Sandwich – The sandwich may look ladylike, but our dear Spy was anything but dainty trying to keep this happily-spiced and well-carroted cookie sandwich intact (thanks to the firmness of the not-too-sweet cream cheese frosting center) as it was gobbled up in the driver’s seat of the car (looked too good to wait).

Ingredient notes: No raisins. No nuts.


Ingredient Specifics: Wheat four, carrots, butter, sugar, brown sugar, eggs, ground cinnamon, vanilla extract, baking soda, cream cheese frosting (cream cheese, powdered sugar, sour cream, vanilla extract).
Availability / where to buy: Available frequently; call ahead to confirm. Various locations; online at essentialbaking.com.
CakeSpy Note: We recently spied another carrot cake cookie sandwich at local coffee shop Cafe Javasti; for information and locations, visit javasti.com.
-------------------------------------------


Photo c/o K. Morales, Carrot Cupcakes from Trophy Cupcakes
TROPHY CUPCAKES Old Fashioned Carrot Walnut Cake with Cream Cheese Frosting – A parade of deliciousness that rivals any Easter candy leftovers. Cinnamon, nutmeg, golden raisins, and slightly tangy cream cheese frosting get this carrot cupcake a standing ovation.

Ingredient Notes: Yes raisins. Yes walnuts.


Availability / where to buy: Available Tues., Thurs., and Sat. at Trophy Cupcakes, 1815 N. 45th Street, Suite 209; online at trophycupcakes.com (new location coming soon too!).


  • As for the important question of whether or not buying in bulk can be a beautiful thing, Kat votes YES when it comes to Costco's (4401 4th Ave. South) surprisingly delicious carrot cake, which serves 48 and is satisfyingly moist, filled with apricot mousse and topped generously with rich cream cheese frosting.
-------------------------------------------
Footloose and frosting-free: Of course, oh so generously, Kitty also wanted to offer up some suggestions for those of you who want the carrot adventure, minus the frosting (ie, those who like to suffer); and so, for your consideration, a few carrot muffins:

Photo c/o K. Morales, Carrot Muffin from Flying Apron, Seattle
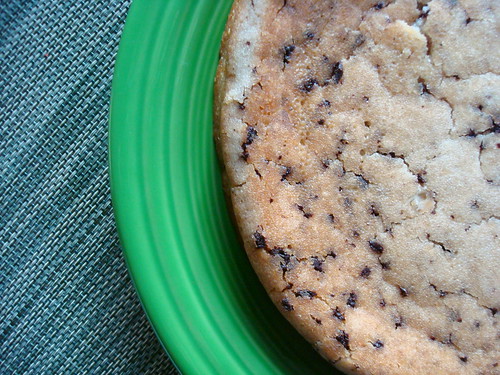
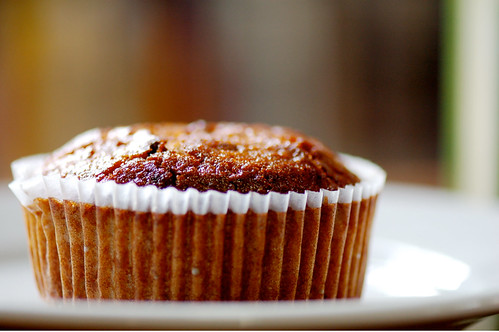
FLYING APRON BAKERY Carrot Muffin – Sitting smart in the Fremont Public Library, this carrot muffin knows what’s good for you. Like bunnies, these giant juicy raisins seem to multiply with each bite. Nuts and coconut add a great crunch/chew factor to a very moist muffin. Who knew being this good could feel so… well, good?


Ingredient notes: It’s the Big O! Organic, that is. Yes raisins. Yes walnuts. Coconut.


Ingredient Specifics: “fruit juice sweetened, organic brown rice flour, organic garbanzo bean flour, certified gluten free oats, organic coconut, organic walnuts, organic raisins, filtered water, concentrated pear, peach and pineapple juice, organic canola oil, pure vanilla extract, baking soda and sea salt”


Availability / where to buy: Available daily at Flying Apron Bakery, 3510 Fremont Ave N; online at flyingapron.net.
-------------------------------------------

LOUISA’S BAKERY AND CAFÉ Morning Glory Muffin - Good morning, Morning Glory! Louisa’s Bakery helps out Caffe Vita on occasion, so look for these delicious muffins when picking up your coffee.

Ingredient Notes: No raisins. Yes walnuts. Currants and pineapple.

Availability / where to buy: Available daily at Louisa's Bakery + Cafe, 2379 Eastlake Ave. E.; 206-325-0081.

-------------------------------------------
MACRINA BAKERY Morning Glory Muffin - Crazy moist and good for you.

Ingredient notes: Yes raisins. Yes walnuts. Apple, pineapple, coconut.

Availability / where to buy: Available daily. Various locations; online at macrinabakery.com.
-------------------------------------------

(Final Disclaimer: Secure your carrot cake by calling ahead to ensure that it exists [not in the existential kind of way, as this will leave you hungry, though perhaps philosophically satisfied.] Bakers sometimes enjoy playing with our emotions and don’t necessarily keep set daily  menu selections.)

Of course, this is just a few of the fine establishments in the Emerald City offering our favorite orange-hued treat-- you have a favorite that is not listed above, please submit it and--please--share the details of its goodness.


She's a Brick House: The NYC Brownstone Front Cake

Brownstone front cake
What's in a name? They say that a rose by any other name would smell as sweet--but would it be as compelling? 

Take for instance the New York City Brownstone Front Cake. Certainly that's a much more appealing and interesting name than say, "Chocolate Loaf Cake"--and certainly the name is what lured us to learn more about, and bake, this cake. 

New York City Brownstone Front Cake

As Maida Heatter notes above, the Brownstone Cake is not something easily defined: the name has been used to describe cakes of caramel and chocolate, served as loaves or as layer cakes (if you're interested in learning more about its history, click here). But what holds true in each version is that this is a serious, dare we say brick house, of a cake: moist, rich, and very dense. 
Using Maida's recipe as a starting point, we made our own version of the Brownstone cake, in a loaf pan. The result was an almost brownie-like cake. Because it was a large one, we let it stand as a loaf and let each eater choose their own adventure with their slice. It's an easy one to enjoy plain, iced (top picture), a la mode, or completely over the top-chocolatey (below). 

Ridiculously over the top chocolate brownie cake

New York City Brownstone Front Cake (adapted from Maida Heatter)
  • 2 ounces unsweetened chocolate
  • 1 cup boiling water
  • 1 tsp. dry instant coffee
  • 1 3/4 cups unsifted unbleached flour
  • 1/4 cup unsweetened cocoa powder (we used Hershey's Special Dark)
  • 1 tsp. baking soda
  • 1/8 tsp. salt
  • 4 ounces (1 stick) unsalted butter 
  • 1 3/4 firmly packed cups light brown sugar
  • 2 large eggs
  • 1 tsp. vanilla extract
  • 1/2 cup sour cream
  • *Optional Cakespy additions for added decadence and deliciousness:
  • 2 heaping tablespoons dark chocolate peanut butter--this gave it a richer, deeper dark chocolate color than some other examples of the cake we've seen.
  • 1 generous handful chocolate chips
Directions:
  • Adjust a rack one-third up from the bottom of the oven and preheat the oven to 325 degrees. You need a loaf pan with a 9-cup capacity (we didn't so we made two loaves using a smaller loaf pans). Butter the pan. (The original recipe calls for a breadcrumb mixture to line the pan but we didn't do that).
  • Chop the chocolate into coarse pieces and place it in a small saucepan off the heat. Add the boiling water and instant coffee. Stir until the chocolate is melted. (Maida's note: the mixture is in a saucepan so that if necessary it can be placed over heat until the chocolate is melted). Stir to mix and set aside.
  • Sift together the flour, cocoa, baking soda, and salt and set aside.
  • In the large bowl of an electric mixer beat the butter until soft. Add the sugar and beat until well mixed. Beat in the eggs one at a time, and then beat in the vanilla. On low speed add about half of the dry ingredients and beat to mix. Beat in the sour cream and then the remaining dry ingredients. Still on low speed, gradually add the melted chocolate mixture, scraping the bowl as necessary with a rubber spatula and beating until thoroughly mixed.
  • *At this point, figuring it would be delicious, we also stirred in a generous handful of chocolate chips, and about 2 heaping tablespoons' worth of dark chocolate peanut butter (we used Peanut Butter and Co.'s), in little chunks here and there in the batter.
  • Pour the batter into the prepared pan(s). 
  • Bake for about 1 1/2 hours or until a cake tester gently inserted in the middle comes out dry.
  • Cool the cake in the pan for about fifteen minutes. Then cover with a rack, turn the pan and rack upside down, and remove the pan, leaving the cake upside down to cool on the rack.

Empty pan, baby!Brownstone Front cake deliciousness

Now, this is the point at which we split paths with Maida. Rather than making her suggested Brownstone Icing,  as mentioned above, we left the cake as-is and let each eater choose their own adventure; the most delicious variation was undoubtedly the over-the-top chocolatey slice, on which we slathered on a bit of leftover chocolate buttercream frosting from a recent bout of baking and topped it with Hershey's chocolate syrup; to those who might consider this a bit excessive, it really is quite good lightly iced or even plain as well.


*As an added note, those who find this cake of interest may also get some extreme enjoyment out of David Lebovitz's Devil's Food Cake recipe.

Well-Dressed: The Salad Dressing Cake

Salad Dressing Cake
The New Year is upon us, and with it comes that most dreaded, terrible custom: The New Year's Resolution. Proclamations of healthy eating and new gym memberships are as plentiful as the popping of champagne corks less than a week before. However, as we all know, few stick to those resolutions--so when you've given up, when you're ready to come back to the dark side, we present the Salad Dressing Cake.

Now, the name "Salad Dressing Cake" can be misleading--this is not some sort of exotic balsamic-glazed confection. No sir, the dressing we're talking about here is the one that dresses salads of the potato and macaroni varieties: mayonnaise. Now, for all those naysayers, a few points. If you're disgusted by this cake but you're one of the many who indulged in bacon-flavored baked goods in the past year, you take a long look at yourself in the mirror before you judge the mayo cake. Because what makes up mayonnaise--egg yolks, oil, vinegar--is all stuff that would go into a cake anyway. And as a note to vegan readers, the recipe works just fine with Vegenaise as well.

Cake
We were surprised by this cake. It's probably the most dense, moist, rich cake we've ever made--it has a slightly tangy flavor, not unlike a sour cream cake. In our version, instead of using 4 tbsp of cocoa powder as in the original recipe, we substituted the same amount of ground Callebaut chocolate--this not only gave the cake a nice added texture and color, but added a nice bittersweet flavor contrast. Topped with a simple buttercream frosting, it's actually quite a pleasant cake. 
Moreover, the biggest problem with this cake is not the flavor but the gross-out factor--no matter how you put it, no matter how many justifications you have, Salad Dressing Cake does not sound delicious or appetizing. Still, once you get past that hurdle, you might be pleasantly surprised. Our advice? Serve now, and tell the tasters what they ate later
Salad Dressing Cake


Salad Dressing Cake (Via reliableanswers.com)

  • 2 cups Flour
  • 2 teaspoons Baking Soda
  • 1 cup Sugar
  • 4 tablespoons cocoa (we used ground chocolate--see above)
  • 1 cup warm water
  • 1 cup Miracle Whip or mayonnaise salad dressing (or vegenaise for a vegan option)
  • 1 teaspoon Vanilla
  1. Mix all ingredients together, beat until smooth. Grease a 13"x9" cake pan (we used a circular pan) and dust with flour. Bake at 350° for 30-minutes or until a toothpick inserted in the center comes out clean.
  2. Frost when cool; we used this simple buttercream frosting:
  • 2 cups (4 sticks) unsalted butter, room temperature
  • 1 pound confectioners' sugar, sifted
  • 1 teaspoon vanilla extract
  • 1/8 teaspoon salt
  1. In a mixer bowl fitted with a paddle attachment, combine butter, sugar, vanilla, and salt. Beat on high speed 2 to 3 minutes, scraping down the sides of the bowl occasionally.
If desired, serve on top of a real salad for a delightfully mischievous presentation.


Cutting (Cake) Corners: Cakespy Experiments with a Daring Bakers Challenge

Mischief
In case you didn't know it, the Cakespy team is part of a group called the Daring Bakers. Each month, a challenge is posted for members, and each member posts their results on the same day on their websites. This month, we were encountered by a challenge that was tres exciting to us: the Perfect Party Cake by Dorie Greenspan. But--and here's a moment of honesty--when we started looking through the recipe, it seemed awfully...involved. (Of course, at Cakespy, as much as we admire fine baking, we are the first to call ourselves expert tasters, novice bakers). And so, making like Shary Bobbins in the Simpsons, we decided to see how much we could get away with by "cutting every corner". But truly, this was an experiment of curiosity rather than pure brattiness. Though we suspected that our end result would be less than bakery-caliber, we wanted to know--would it be completely inedible? Or would it be, you know, kind of ok? Here's how it went.


Here's the original recipe, and the ways we messed around with it in blue italics:

For the Cake
  • 2 1/4 cups cake flour (we used all-purpose)
  • 1 tablespoon baking powder
  • ½ teaspoon salt
  • 1 ¼ cups whole milk or buttermilk (we used soy milk)
  • 4 large egg whites
  • 1 ½ cups sugar
  • 2 teaspoons grated lemon zest (we left this out)
  • 1 stick (8 tablespoons or 4 ounces) unsalted butter, at room temperature (we got impatient so we nuked it)
  • ½ teaspoon pure lemon extract (we left this out--no lemon handy)

For the Buttercream
  • 1 cup sugar
  • 4 large egg whites
  • 3 sticks (12 ounces) unsalted butter, at room temperature
  • ¼ cup fresh lemon juice from 2 large lemons (we left this out)
  • 1 teaspoon pure vanilla extract

For Finishing (we left this out--just frosted it, plain and simple)
2/3 cup seedless raspberry preserves stirred vigorously or warmed gently until spreadable
About 1 ½ cups sweetened shredded coconut


Getting Ready
Centre a rack in the oven and preheat the oven to 350 degrees F. Butter two 9 x 2 inch round cake pans and line the bottom of each pan with a round of buttered parchment or wax paper. Put the pans on a baking sheet. (We didn't have parchment or waxed paper so we just buttered those babies and hoped for the best.)

To Make the Cake

  1. Sift together the flour, baking powder and salt.
  2. Whisk together the milk and egg whites in a medium bowl.
  3. Put the sugar and lemon zest in a mixer bowl or another large bowl and rub them together with your fingers until the sugar is moist and fragrant. (since we had no lemon zest, we just added it to the butter and proceeded to step #4)
  4. Add the butter and working with the paddle or whisk attachment, or with a hand mixer, beat at medium speed for a full 3 minutes, until the butter and sugar are very light.
  5. Beat in the extract, then add one third of the flour mixture, still beating on medium speed. (we just added the flour mixture).
  6. Beat in half of the milk-egg mixture, then beat in half of the remaining dry ingredients until incorporated.
  7. Add the rest of the milk and eggs beating until the batter is homogeneous, then add the last of the dry ingredients.
  8. Finally, give the batter a good 2- minute beating to ensure that it is thoroughly mixed and well aerated.
  9. Divide the batter between the two pans and smooth the tops with a rubber spatula.
  10. Bake for 30-35 minutes, or until the cakes are well risen and springy to the touch – a thin knife inserted into the centers should come out clean
  11. Transfer the cakes to cooling racks and cool for about 5 minutes, then run a knife around the sides of the cakes, unfold them and peel off the paper liners. (ours came out just fine! yess!!)
  12. Invert and cool to room temperature, right side up (the cooled cake layers can be wrapped airtight and stored at room temperature overnight or frozen for up to two months). (We put it in the fridge to kind of speed up the process, but then got nervous about it cooling unevenly and took it back out again to do it Dorie's way).
CakeCake 
To Make the Buttercream
  1. Put the sugar and egg whites in a mixer bowl or another large heatproof bowl, fit the bowl over a plan of simmering water and whisk constantly, keeping the mixture over the heat, until it feels hot to the touch, about 3 minutes.
  2. The sugar should be dissolved, and the mixture will look like shiny marshmallow cream. (Ours did, sort of).
  3. Remove the bowl from the heat.
  4. Working with the whisk attachment or with a hand mixer, beat the meringue on medium speed until it is cool, about 5 minutes.
  5. Switch to the paddle attachment if you have one, and add the butter a stick at a time, beating until smooth.
  6. Once all the butter is in, beat in the buttercream on medium-high speed until it is thick and very smooth, 6-10 minutes.
  7. During this time the buttercream may curdle or separate – just keep beating and it will come together again. (It did curdle, but we beat on and it did come together again--whew!).
  8. On medium speed, gradually beat in the lemon juice, waiting until each addition is absorbed before adding more, and then the vanilla. (We had no lemon juice to add).
  9. You should have a shiny smooth, velvety, pristine white buttercream. Press a piece of plastic against the surface of the buttercream and set aside briefly.

Sweet Cake MischiefSweet, Sweet Mischief 
To Assemble the Cake
  1. Using a sharp serrated knife and a gentle sawing motion, slice each layer horizontally in half.
  2. Put one layer cut side up on a cardboard cake round or a cake plate protected by strips of wax or parchment paper. (We just put it on a plate).
  3. Spread it with one third of the preserves. (We skipped this, and just applied the buttercream to the sides and top).
  4. Cover the jam evenly with about one quarter of the buttercream.
  5. Top with another layer, spread with preserves and buttercream and then do the same with a third layer (you’ll have used all the jam and have buttercream leftover).
  6. Place the last layer cut side down on top of the cake and use the remaining buttercream to frost the sides and top.
  7. Press the coconut into the frosting, patting it gently all over the sides and top. (We didn't use any coconut, but we topped it with our favorite melty mints, which made it very happy-looking and, you know, covered a multitude of sins).
DSC06586
And so, having broken half of the rules in the recipe, how did it all turn out? Well, if we're completely truthful, our result was more "charming" in that only-a-mother-could-love-it kind of way, as opposed to say, showstoppers like this or this (both entrants who *ahem* followed the recipe...or, more so than us anyway). While the taste was good--certainly, our plates were cleaned without effort or complaint--it wasn't truly great. Ultimately, each step or ingredient that we deemed unnecessary during the baking process showed its importance in the final result--it lacked the certain je ne said quoi that the lemon likely lends to the final product; the presentation, while "rustic", lacked the panache and beauty that the preserves and strawberry would have given.
So, would we do it again? Well, OK, we might not be completely converted to following the recipe exactly--but we'll likely try much harder next time. After all, a lot of thought, testing and tasting goes into these recipes--and by people far better at baking than us--and hey, it's the least we can do to try to honor that expertise if we want a truly delectable baked good.


Happy Cakes: Cakespy Offers Sweet Prozac Alternatives for Dull Winter Days

The chocolate boxes are empty; the red roses are wilting. Without a doubt, post-Valentine's Day can be a bummer time of year, with not much other than the chance green-dyed pastry and Irish Soda bread between now and Easter Candy. Happily for you, Cakespy has put together a list of some confectionery Prozac alternatives: happy desserts, perfect for the dark winter days still ahead.


Topping off the list is the Basque Cake (or, if you're feeling authentic and/or fancy, the Gâteau Basque). Really, the Basque cake is probably the embodiment of sunshine in a cake; not a bread, not a pie, not a cake, but some delightful amalgamation of all three, with all sorts of variations depending on where your recipe comes from geographically. As its name would imply, it hails from the Basque region, a magical area that straddles the border between Southern France and Spain, and is traditionally served in June when cherries are plentiful (there's even a cherry festival each June in the town of Itxassou). Just a taste of this cake, with a fruit complement, is like tasting the sun itself, transporting your tastebuds to a warmer climate, surrounded by trees bowed with the weight of their own fruit. Basque in the sun, indeed. Recipe listed below.

Still not happy? What can we say: when life's a drag, get dragées! San Francisco-based Miette Patisserie has just revamped their site and added an online store, so these Frenchie treats can be delivered right to your home. While dragées may also refer to the crunchy-silver ball bearing-esque cake toppings that have been banned in California, the type we're referring to here are what may also be known as Jordan Almonds; entire almonds coated with a sugary shell and finished in lovely pastel colors which the French have been serving up since the 13th century. The contrast of the tender almond with the crunchy, ever-so-slightly vanilla-y sugar coating never fails to bring a smile to our faces; you too can have this joy for just $5 plus shipping by visiting miettecakes.com.


Frown not upside down yet? While personally we've begun to suspect that you might be soulless, nonetheless we've got one more fail-safe happy idea, provided by Cake Gumshoe Karen (who also works at a very cool company, Mailbox Tees): an over-the-top Rainbow Layer Cake! While some may say (shun the non-believers) that simply adding food coloring doesn't change a cake's taste and character, we suggest that you hold off on making judgements til you taste this rainbow; we think you'll find that yes, magic does add a little something to the mix. Recipe listed here.


Gâteau Basque (Basque Cake)

Servings: 8
Preparation time: 15 minutes
Cooking time: 25 minutes
Ingredients:
  • 2 cups flour
  • 6 oz (12 Tbs) butter
  • 2 eggs
  • 3/4 cup sugar
  • 1 teaspoon baking powder
  • 1/2 cup black cherry jam
  • 1/2 Tbs butter and 1 Tbs flour to prepare the mold
  • 1 yolk for decorating the cake
Directions:


Pre-heat the oven to 400 Degrees Fahrenheit.
Using 1/2 Tb, butter a round 7" pan. Coat the pan with flour.
In a bowl, mix flour, sugar and baking powder together and then add eggs and soft butter.
Split the dough into 2 parts, roll one out and place it in the pan, rising up the side of the pan by 1/2”.
Pour the jam on top of the dough.
Roll the second part of the dough on the table (after sprinkling some flour on the table) to form a round crust the same size as the pan.
Put it on top of the jam and stick the edges with the bottom dough. It is important to keep the jam inside the crust.
Mix an egg yolk with a few drops of water. Paint it on top of the crust.
Place in the oven for 25 minutes.

Recipe thanks to France Monthly.

Want to learn more about all things Basque? Check out The Basque History of the World: The Story of a Nation by Mark Kurlansky. Planning a visit to la belle France? We suggest trying to fit in a visit to the Gâteau Basque Museum (it exists!); find out more at legateaubasque.com


The Next Big Thing: Tres Leches Cake


Through our lives, we've seen so many cake phases come and go. There was the Funfetti phase; the ice cream cake phase; the cupcakes baked in sugar cones phase. We've seen cakes come and go out of vogue. Carrot cakes have made way for Hummingbird cakes; Red Velvet was tacky, but now it's kind of cool again.

Well, it's time to make way for the new cake on the block: Tres Leches (or, Pastel de Tres Leches, literally meaning "cake of three milks"). It's long been a staple dessert in Latin America, and it's coming to the USA with the fervor of Selena's crossover album. Usually made sans butter and soaked in three types of milk (evaporated milk, condensed milk and either whole milk or cream), in spite of being so dairy-dominant, the cake remains quite light and unsoggy when made correctly.

We predict you'll be seeing it a lot more in the future, but for the meantime check out these places in the Seattle area:

Borracchini's Bakery: Who would have thought an old-school Italian bakery would be on to this trend? 2307 Rainier Ave. S (between S. Walker St. & S. College St.); online at nowcake.com.

El Diablo Coffee Co.: Call for availability; their menu rotates. 1811 Queen Anne Ave. N (between W. Howe St. & W. Blaine St.); online at eldiablocoffee.com.

Salvadorean Bakery: Don't go here for the ambience--it's in a strip mall--but rather go for the authentic cakes. 1719 SW Roxbury St (between 17th Ave. SW & 18th Ave. SW).

NB: We've also heard it's on the menu at El Camino (607 N. 35th St b/t Evanston Ave. N & Fremont Pl. N; online at elcaminorestaurant.com) and Senor Moose Cafe (5242 Leary Ave. NW b/t 20th Ave. NW & NW Ione Pl.; online at senormoose.com.)

All Dolled Up


Good news: getting all dolled up doesn't just mean a hasty trip to Forever 21, nylon tips and "borrowing" your roommate's pushup bra for a night out in Pioneer Square anymore.

Now you can accessorize--your cakes that is--with paper doll cupcake picks by Katydid Designs. Featuring imagery like mini Jackie-O and Shirley Temple-looking doll faces as well as lilliputian Our Lady of Guadalupe cutouts, the picks bring a certain kitschy-cool aspect to even the most unassuming cakes and pastries. And at just $5 for a pack of six, you can afford to spread this style around.