
 CakeSpy Note: This is a guest post from Bird, who would like to introduce herself thusly: Hi everyone, I'm Bird from Bird Crafts and I love to blog, chat, craft and design printable party goodies (which you can get at my shop on Etsy). You can also find the full tutorial on her site.
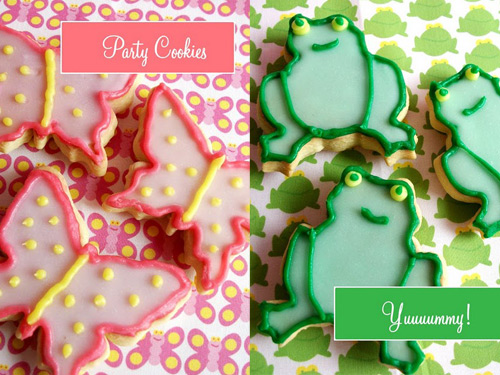
Yep, these are my first decorated cookies. I don't say that to brag, but rather as a huuuuuge disclaimer and perhaps as an incentive for you to have a go too. 'Cause if a total cookie virgin can ("can" being a very loose term here...), then anyone can!
I got my cookie dough recipe and cookie cutters from a baking supplies on-line shop as they make tons of cookies for demonstration purposes, and so I figured their recipe would stand the test. And it did!
It held the intricate frog and butterfly shapes beautifully and tasted great! The only ingredient missing was 2 tea-spoons of bicarbonate of soda or some other raising ingredient, I think.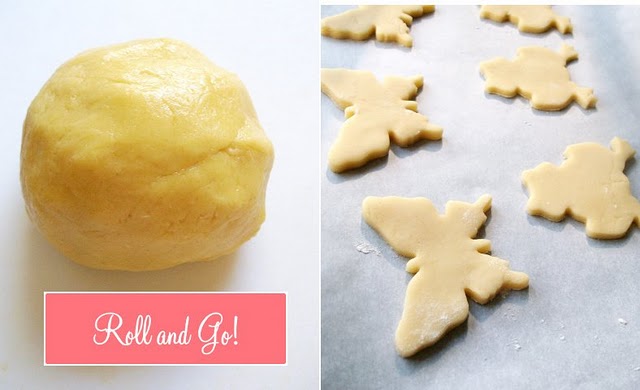
Anyhow, if you're using this recipe, be sure to persevere until you eventually get a smooth dough like the photo above and refrigerate the dough covered in cling film for at least 2 hours. It is a very short (crumbly) dough and it needs to be chilled before you attack it!
TIP: before rolling your dough, make sure to cover you working surface and rolling pin with flour. It does not say that on the recipe sheet, but I found it helped a lot.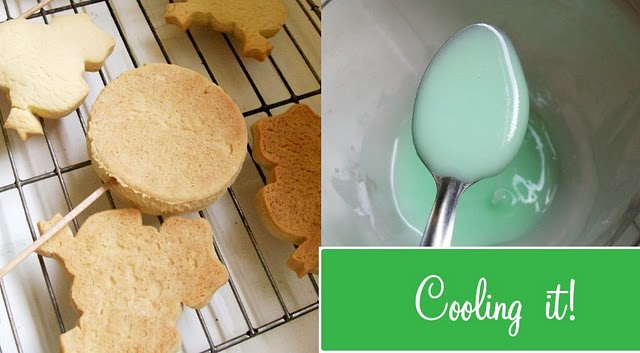 Whilst you let your cookies cool down on the wire rack (Yep, I even attempted lollipop cookies, but that's another post..), prepare your icing.
Now, this was a total guess work but later I discovered the ratio of icing sugar to water is just so the mixture has a syrup consistency and covers the back of a spoon without being too thin (very scientific...NOT). But you'll be able to experiment and get the right consistency after a few attempts.
TIP: If it's too sloppy, add more sugar. If it's too thick add more water (a few drops at a time).
Add a few drops of liquid food colouring and set aside covered with film so it does not get a crust.
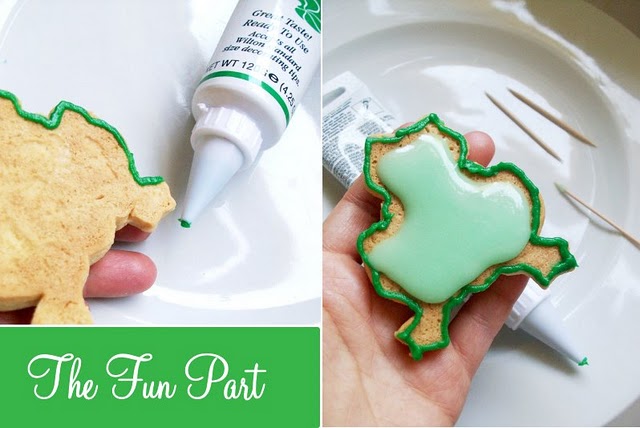 I must say that if it hadn't been for Wilton's Icing tubes, I would not be writing this post.
TIP: If you're a novice to icing you should purchase these tubes to practice with, otherwise you may totally lose the will to live...
The tubes are sooo easy to handle even if you don't have very steady hands. Plus, you can simply screw the lid back on and store the rest for another occasion. Please note: Wilton are NOT paying me to say that!
Where were we...Now, draw a thin line all around you cookie. Doesn't have to be neat, you'll be able to re-do it later. You just need a line to act as a barrier holding the thinner icing inside. Fill the gap with the thinner icing you reserved.
TIP: Don't be tempted to place too much on, otherwise it may run over the lines.
TIP: Use a tooth pick to help you "guide" the icing into the little corners and small spaces.
TIP: Note that I am decorating the underside of the cookie? This is because the right side is slightly raised in the cooking process and you really need a flat surface to work with - So turn those babies upside down to decorate.
Let your cookies dry over night. I sat mine on a baking tray on my worktop.
Next day, add the finishing touches to your design, like going over the edges of the cookie one more time with the Wilton's icing tube and adding detailing.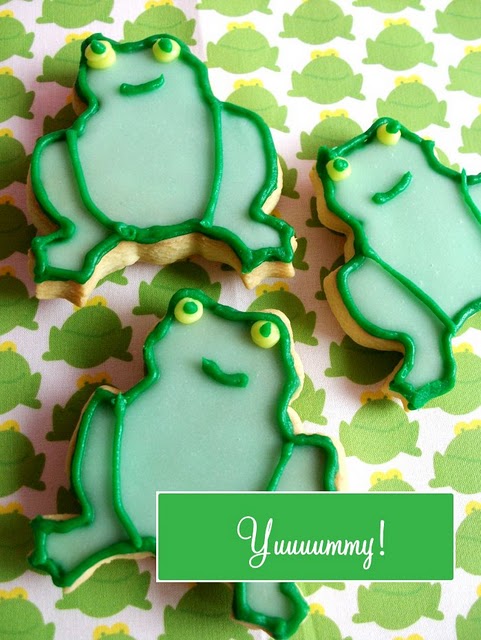
Let the cookies dry another day, but make sure there are no curious hands or teeth about. Place them in cute party bags and make someone's day!
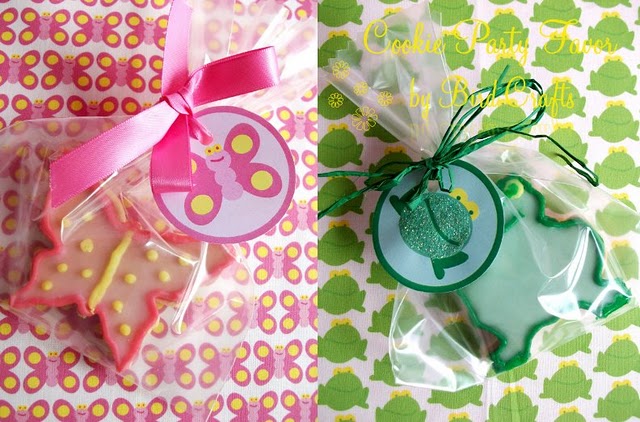 Oh, and I used the cupcake toppers from my Garden Party Collection as favor tags, and my assorted matching Fabrics as the the background (fabrics coming soon to my shop)! Tags vailable at my Etsy shop.
 TIP: Although this whole process takes 3 days you can make the cookies in advance:
1. You can chill the dough and roll it out the next day.
2. You can freeze the baked cookies without the icing
3. You can also freeze the cookies already decorated in a covered plastic container, separated by grease-proof paper. Defrost them covered at room temperature for about 2 hours. They taste basically the same as fresh. Honestly, I tried!
I don't really know how long you can keep them in the freezer for, but I am testing that for you. I guess because the recipe contains butter it wouldn't be advisable to freeze them for longer than 3 months...(CakeSpy Note: but really, will they last that long?)